Microsoft Windows and all that goes with it

BSOD When Starting VirtualBox

Illustration

Ever since I have upgraded Windows 10 to build 14931, whenever I tried to run VirtualBox, a blue screen crash would happen. Worse still I only had “The system has rebooted without cleanly shutting down first. This error could be caused if the system stopped responding, crashed, or lost power unexpectedly.” in the Event Viewer. As the old joke goes: absolutely correct, but still useless.

To make things even worse, under known issues for the release there was “Oracle VM VirtualBox will crash on launch after upgrading to this build.” So I gave up and tried to install VMware Player. I mean, not all third-party virtualization software can be broken.

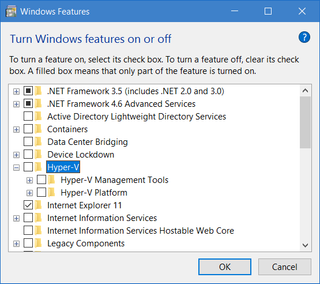
Guess what, VMware wouldn’t start either. However, there was no crash but a slightly cryptic message about something called Device Guard and a link to knowledge base article. While my issues didn’t closely match described ones, article did put my sights on Hyper-V.

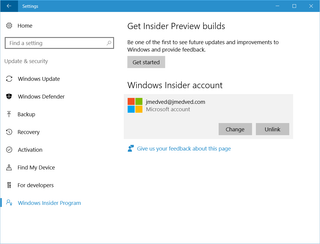
After going into Turn Windows features on or off and disabling Hyper-V followed by reboot, I could start VirtualBox once more.

I haven’t went into further troubleshooting - it just wasn’t worth it. For one, I do not use Hyper-V on my laptop so turning it off didn’t hurt me. And, as I am running insider builds, I am sure that, by the time this build comes to slow ring, there will be some workaround either on Microsoft or Oracle side. In any case, my problem is solved.

[2016-10-11: Yep, new update 14942 broke VirtualBox again - now even this workaround doesn’t work. Although at least VMWare works with this release.]

Goodbye OneDrive

Illustration

Back when OneDrive service was offered for the first time, there were not many takers. You had DropBox with 2 GB and unmatched ease of use and you had Google Drive with whooping 15 GB of disk space. So Microsoft decided to one-up them and gave 15 GB to start with and then another 15 GB as a camera bonus. Both were given for free and without an expiry date. Later they would even give unlimited storage for Office 365 users. Something that was unmatched by any competitor.

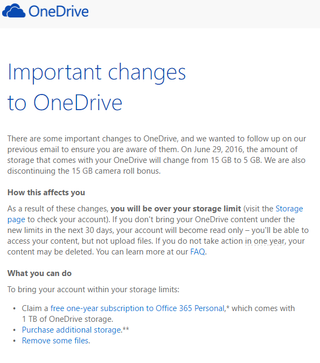
Trouble started in October 2015 when Microsoft decided that new freebie users are to get 5 GB only and all existing users will be downsized. Following backlash, slight modification allowed users to opt-in for another year of existing limits. Guess what, that year is up and both free and camera roll bonuses are expiring.

For me personally this means going from 40 GB (5 GB base + 10 GB loyalty bonus + 10 GB free plan bonus + 15 GB camera roll bonus) to 15 GB (5 GB base + 10 GB loyalty bonus). Quite a big drop for something that originally didn’t have expiry date. Office 365 users are also going to see their unlimited data shrink to 1 TB.

Microsoft does offer 1 year of free Office 365 subscription for your inconvenience and that is actually not a bad offer if you intended to go Office 365 route anyhow. And they will not (at least for now) delete any files you have there even if you are over new limits. Your account is simply going to be placed in read-only mode until enough space is released.

In the light of this, all I can say is meh. Microsoft’s OneDrive has always been second-rate application (let’s not even get into its Metro version). It went through so many redesigns (remember placeholders?) through versions that I was always scared to update it. That is, back when you had a choice of whether to upgrade it or not. Last few Windows installs I haven’t even gone through the trouble of entering my credentials. I found that, for my workflow, only two cloud storage providers I need are DropBox and SpiderOak.

While DropBox has low storage limits for a free account (2 GB + 3 GB for camera), I still find its way of syncing between computers the most natural and painless one. I NEVER had any issues or data loss no mater what stupid thing I would do. You give it a folder and it just works. This is one program everybody in my family uses on both their computer and mobile device. No pain, just file synchronization done right.

Other excellent system is SpiderOak. It has even lower free offering (2 GB), its configuration is more involved, and syncing is annoyingly difficult to setup. However, there is a reason behind it. This is the only cloud storage that actually doesn’t have access to your data. All encryption is done on your computer(s) and all they ever see is encrypted data. If you ever store on cloud anything private, this is the system you should use and no other.

Between those two storage options, I simply have no need for OneDrive. Yes, Microsoft did fill a niche with their high free data allotment but those days are gone. Now they offer sync that is not as pleasant as with DropBox combined with lack of security you would get from SpiderOak. It is literally the worst of both worlds.

I will not say OneDrive was useless nor I will say I won’t ever use it again. Even with those cuts it still offers 15 GB for free and that is nothing to frown upon. And maybe with some new version they finally decide on design and how exactly to handle files not currently synced. And they might even solve one of their many sync problems.

All I will say is so long and thanks for all the fish. :)

Going Big With FAT32

Illustration

FAT32 is an aging file system with many faults. However, it does have one great advantage. It has been with us long enough that every OS supports it. Whether it is smallest IOT device or big mainframe (anybody uses those?), it will just simply work.

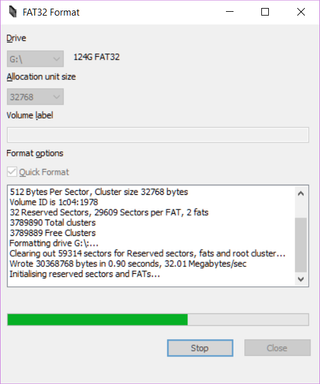
Because of that ubiquity I always keep one FAT32 formatted drive with me. It used to be 8 GB, then 4 GB, and now whooping 128 GB. And it is those 128 GB that posed a curious problem - Windows will allow you to format FAT32 only on disks 32 GB and less.

Mind you, that restriction doesn’t come from FAT32 design itself. If you use whooping 512 KB sectors and maximum count of 4,177,918 clusters, you can reach 2 TB. But, in order to keep backward compatibility with its NT-inherited 16-bit setup, Windows XP decided to drop sector size to 32 KB and inexplicably to limit total partition size to 32 GB (my guess is to promote NTFS). Mind you, it will read even bigger FAT32 volumes if they are already formatted. However, as soon as you try to reformat it first time, it will refuse to do so.

Solution is simple. Either go to ancient Windows 98 that actually supported FAT32 up to 127 GB (ok, that is a bit unrealistic), use pretty much any Linux distribution, or get a Windows application that will do formatting for you.

My go-to application is FAT32 Format. It is simple, free, works on any Windows version you throw at it, doesn’t require installation, and it has acceptable UI. For something one might need just once in a while, a perfect choice.

Media Feature Pack for Windows 10 N

Illustration

Coming from the Europe, Windows N is not foreign to me. For unfamiliar, N is a designation for Windows without Media Player. For most of installations I don’t have any issue with this as I will install a media player of my own choice.

However, there are some scenarios where you might want to have Windows Media Player around. For example, if a program is using Windows Media control for playback, there is no alternative. For exactly those cases Microsoft does provide a Media Feature Pack adding all the bits N version took out.

So, when I had to do this on Windows 10, I knew the drill. Simple search for “Windows 10 Media Feature Pack” returned a link to download pages and short reboot later… I still had an issue.

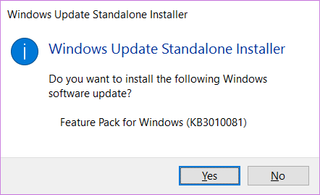
As download page mentioned KB3010081, I checked there and saw that “In Windows 10 1511, this update is superseded by update 3099229 for the November 2015 release of Media Feature Pack.” Easy, I went to KB3099229, tried download, and kissed 404 right on the lips.

Fortunately, knowing the KB article number, I was able to use Windows 10 Update Archive (not official Microsoft site) and figure Windows10.0-KB3099229-x64.msu was the droid file I was looking for. And another reboot later, Windows Media Player was installed with all annoyances it brings.

Let’s recapitulate. Microsoft’s own official download page for Media Feature Pack has a link to an executable that doesn’t work with the latest Windows release. In the knowledge base they do include information about a newer installation but that executable is unreachable. The only way to get a file is to go to independent site and download it from there…

Dual Boot With Bitlocker for a Nitpicker

Illustration

As I use my laptop for both work and personal stuff, from the get-go I decided to go with the dual boot setup. For security I also decided to have full-disk encryption with the additional benefit of further separating those two installations.

When I first installed my laptop I did it as any sane person would - just install two Windows copies and everything works. However, during these holidays I decided to clean out my machine and redo the installs in a slightly different way.

Basic premise was the same: two BitLocker Windows installations. First one would occupy 400 GB, while the other would get leftovers out of 476 GB drive. What was tricky was my desire to have 400 GB accessible to user after Windows take their share. And I definitely wanted my personal partition to be first so that I can easily kill work partition(s) if I ever want to convert it to personal-only rig.

So I downloaded the latest Windows installation onto my USB and got it started. At the first screen I pressed <Shift>+<F10> and wrote DISKPART on the command prompt. Here I wanted to clean my existing disk content, setup GPT partitioning scheme, and have first 400 GB available for my private install with rest of the disk reserved for the work partition:

SELECT DISK 0
CLEAN
CONVERT GPT
CREATE PARTITION PRIMARY SIZE=410176
CREATE PARTITION PRIMARY
SELECT PARTITION 1
DELETE PARTITION
EXIT

As you can see from commands above, I’ve done this by creating two partitions and then deleting the first one so that Windows can have fun in that area only. Yes, I could’ve create recovery and system partitions myself but I actually prefer not to deal with such a low level details. If you wonder how I came upon 410,176 MB as a figure that will give me 400 GB partition, it is simply 409,600 MB (400 GB, the final desired size) + 450 MB (recovery parition) + 100 MB (system partition) + 16 MB (reserved partition) + 10 MB (to get into next cylinder). After that I’ve continued with Windows installation on unassigned space and my disk C after installation was 400.01 GB - the closest I could get to 400 GB.

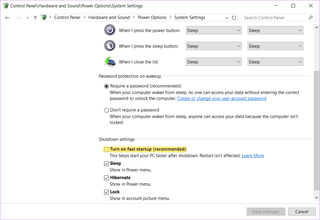
As I wanted to have dual boot, I also went into Power Options, Choose what the power buttons do and turned OFF fast startup setting. In the early Windows 10 days omitting this would cause quite a few dual boot issues as each Windows copy left hardware in its own state. With the newer builds Windows seems to handle that better but I see no reason to tempt the fate. Only step left was to start Bitlocker encryption and get onto the next installation once it is done.

After next installation booted (actually of the same USB media), I used <Shift>+<F10> again to delete partition I’ve “reserved” previously. Since Windows added quite a few of its own partitions, it has moved to 5th spot:

SELECT DISK 0
SELECT PARTITION 5
DELETE PARTITION
EXIT

Installation continues as usual with the same adjustments applied (fast startup off + bitlocker on). Note that this leaves second installation as a default startup option. This can be changed in Advanced System Settings under startup and recovery.

Mini Metro and the Runtime Error!

Illustration

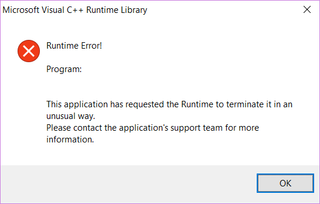
When I first got my hands on Mini Metro, it was over at the GOG.com. And I got dreadful Microsoft Visual C++ Runtime Library: Runtime Error!

Going through forums brought nothing useful so I contacted GOGs customer service. They’ve gave me a list of troubleshooting steps and I religiously went through all of them (even a strange suggestion to create a virtual screen?!). As nothing was really solved, it was the time to get out the big guns. In this case it was asking developers at Dinosaur Polo Club for help.

From them I got two steps. One was to install Visual C++ Runtime (different than what GOG guys suggested) and/or to try non-Galaxy build (Galaxy is GOG’s attempt to be Steam). Already fed up with all the runtimes I’ve installed so far, I tried non-Galaxy build first and it worked flawlessly. Problem solved!

After a few hours spent building subway, I was tempted by the other C++ runtime suggested. Would that make my GOG Metro work? Yes, I got another build from Dino guys, but that was just a zip file. Call me spoiled, but I prefer actual installations. And GOG has that. So I ran Visual Studio 2012 runtime and GOG’s Mini Metro started working.

However, that was not without cost - drivers for my Asus touchpad stopped working. As soon as I reinstalled drivers, GOG’s Mini Metro stopped working. Well, since I really needed touchpad drivers so I can have touchpad disabled (if you own Asus N56VJ you’ll understand), I just unpacked Dino’s build over GOG’s and called it a day.

Two things became obvious from this. One is that Dinosaur Polo Club has an excellent support and they didn’t even blink before giving me essentially another copy of a game. Yes, since it is a DRM-free build it doesn’t really matter if I have one or two or million of them - but that is exactly why DRM-free games are awesome - support doesn’t need to go through hoops to give you another copy.

Another is that allowing the use of GOG’s Galaxy client requires a bit of magic in the game and that magic is invasive enough to make game not work. I don’t know any details on what exactly went wrong there but Galaxy seems to need a bit of growing up.

Windows 10 and Touchpad Disabling on Asus N56VJ

Even though it is a bit old now, I still love my Asus N56VJ laptop. It has nice hardware quite capable of running Window 10 and it does that almost flawlessly. Only thing I found misbehaving is button for disabling touchpad (<Fn>+<F9>). On laptops I previously used (mostly HPs) I wouldn’t consider that a huge issue. However, through great efforts, Asus has managed to manufacture such a lousy touchpad that I consider disabling it a mandatory function.

To get button working on a fresh installation of Windows, first step is to install the latest ATK Package followed by restart (important). On its own this does nothing but enables proper installation of Asus Smart Gesture touchpad application (followed by another restart). Only once both of these are installed, you will get <Fn>+<F9> working again.

Unfortunate news for Windows Insiders is that functionality will disappear as soon as new build is installed. And no, you cannot just repair applications. You will need to fully remove both ATK Package and Asus Smart Gesture followed by computer restart. Only then you can follow the original procedure once again and have the button working.

I guess I cannot expect wonders by using the latest Windows OS with now aging laptop, but I find this behavior most peculiar and worthy a frown.

Windows 10

Illustration

Windows 10 is finally here.

And it is not a bang but a whimper for all those crazy enough to be in Windows Insider program. And frankly that is how it should be. Those yearning for excitement had their share in the last few months. Careful ones have always option of sticking with Windows 7/8/8.1 or upgrading to now officially RTM’d release.

For me personally this day brings absolutely nothing as every computer I have in my home has been running Windows 10 for a while now. July 29th is just another day.

Is Windows 10 perfect? Not really - even RTM version has a couple of issues bugging me still: Windows menu misbehaving if you don’t have internet connection and defaults that include the whole damn web in search. But it is a good OS in general and I see no major benefit in holding Windows 7 on same pedestal Windows XP once held. Yes, both were great OS of their days but lingering in past serves no purpose.

Free upgrade is a nice carrot Microsoft has placed in front of everybody and I suggest you take a bite. It is not clear how exactly mechanics are going to look and I can only hope clean install upgrade will be a possibility. If insider updates are anything to judge by, you will need at least 10 GB for it and that might be hard to find on old devices.

For insiders there are some rumors program will go on. And I will take that offer regardless of actually having enough Windows licenses for all my devices. Microsoft had system working perfectly and issues were both minor and rare. I really see no reason not be be on the Fast ring.

In any case, congrats to Windows 910. May you live to see a lot of updates.

PS: If you are wondering whether your system is eligible for free update, here is the handy guide.

PPS: There is Microsoft Media Creation Tool for those in need of a clean ISO.

PPPS: If you want to install from USB, check this handy guide.

Windows 10 USB Install

Illustration

Installing Windows 10 via Windows Update works surprisingly well. However, such upgrade leaves you stuck with partition layout you might not like. Sometime best course is installing from scratch.

First step to prepare installation is getting .iso file and Microsoft always provides a way to do it. With Windows 10 it is Microsoft Media Creation Tool.

Second step is to prepare bootable USB drive. This step can be done by tools but, if you want UEFI boot, you want to do it manually. Most of tools currently available format disk as NTFS and that file system is not supported by UEFI boot process. Yes, most BIOSes still have support for legacy mode but you do lose some boot speed improvements and there are security implications.

In regards to UEFI do notice that it isn’t really important if your processor supports 64-bit OS or not - if your UEFI system is 32-bit you better install 32-bit Windows too. This weird situation of having 32-bit UEFI only with 64-bit capable processor often happens with Atom tablets. Just treat them as 32-bit system and you’ll be fine. On more capable laptops and desktops UEFI usually has support for both or rarely for 64-bit only. Rule of the thumb is to get 32-bit .iso if you are dealing with tablet and 64-bit otherwise.

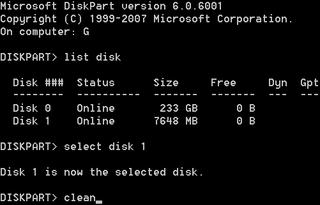
Procedure is actually simple. Just write DISKPART on start screen and you will be greeted with security prompt after which you will have old-fashioned textual interface. In my case USB was disk 3 (you can deduce it based on size) but your case will probably differ. Double check which disk you are selecting because DISKPART does destroy data:

DISKPART> LIST DISK
  Disk ###  Status         Size     Free     Dyn  Gpt
  --------  -------------  -------  -------  ---  ---
  Disk 0    Online          476 GB      0 B        *
  Disk 1    Online          931 GB      0 B
  Disk 2    Online         7168 MB      0 B
  Disk ^^3^^    Online         7648 MB      0 B

DISKPART> SELECT DISK ^^3^^
Disk 3 is now the selected disk.

DISKPART> CLEAN
DiskPart succeeded in cleaning the disk.

DISKPART> CREATE PARTITION PRIMARY
DiskPart succeeded in creating the specified partition.

DISKPART> FORMAT FS=FAT32 QUICK
  100 percent completed

DiskPart successfully formatted the volume.

DISKPART> ACTIVE
DiskPart marked the current partition as active.

DISKPART> EXIT

Assuming that your, newly created and empty, USB drive is under letter U: and your Windows installation disk is at W:, you can use XCOPY to transfer files. Press + to get a prompt where you can enter following command:

XCOPY W:*.* /e /f U:\

Last step is to boot machine while pressing <F2> (or some other key; <Del> used to be popular) to enter BIOS. Since boot is extremely fast, I always need a few attempts to get inside. :)

Depending on the BIOS, option might have a slightly different name but most of them have “Boot override” section somewhere. Your new UEFI USB drive should appear there. Just select it and boot should ensue.

Enjoy your clean installation.

PS: Same procedure actually works for any UEFI system - from Windows Vista onward.

Error While Powering on VMware Player on Windows 10

Illustration

As I went through one of the many Windows 10 beta updates, my VMware Player started throwing “Error while powering on: Internal error.” After reboot everything started working again so I just assumed it was simply some fluke in the upgrade process. And then it happened again a bit later. This time a single restart didn’t help but it did start working after a few of them. Every restart was like a coin toss. It smelled like a race condition.

One of things I checked was status of VMware’s services. There I noticed that, although startup type was set to Automatic, VMware Authorization Service was not running at times. And I could match the times when it was not running with the error. Even better, error would disappear as soon as I would manually start that service. My best guess, based on observed behavior, was that VMware Authorization Service needed some other service to start beforehand. However, dependencies for that service were missing. All VMware’s service needed was a bit more time.

Fortunately, Windows has one great feature enabling just that ever since Windows Vista. All needed is to change startup type to Automatic (Delayed Start) and your service will wait a bit extra time before starting. Original idea of this feature was to alleviate system load at startup by postponing some tasks for just a bit later when CPU had a chance to breathe. But, as a side effect, we can be sure that pretty much all important system services are already up by the time delayed start kicks in.

Might not be an ideal solution but I had no issues with it.

PS: Proper solution would be to find the missing dependency and add it to service. But setting up dependencies is not an easy task and pretty much becomes just trial-and-error adventure unless you know the product on the source code level. Not worth it.