Linux, Unix, and whatever they call that world these days

Warning Me Softly

I already wrote about post-quantum cryptography before. If you check the dates, you’ll see that this is not a new topic. However, it’s still quite common to see standard key exchange for SSH sessions. Well, this might be about to change.

With version 10.1, OpenSSH will present you with the following warning:

** WARNING: connection is not using a post-quantum key exchange algorithm.
** This session may be vulnerable to "store now, decrypt later" attacks.
** The server may need to be upgraded. See https://openssh.com/pq.html

In reality, this change nothing as everything will continue to work as before. But, knowing the human nature, I forsee a lot of people moving to a newer key exchange just to avoid the warning. In no time, projects will face their security review teams. And if security team doesn’t like warnings, projects will oblige.

My own network is in surprisingly good state. Most of my SSH connections already uses sntrup761x25519-sha512 key exchange algorithm. However, there are two notable exceptions: Windows and Mikrotik.

Mikrotik, I pretty much expected. It took them ages to support ED26619 so I don’t doubt I will see the warning for a long while before they update software. I love Mikrotik devices, but boy, do they move slow.

But Windows 11 came as a surprise. They still advertise curve25519-sha256 at best. I guess all that time spent making start menu worse prevented them from upgrading their crypto. I predict that, as always, when warning starts, Microsoft forums will be full of people saying that warning is wrong and that Windows can do no wrong. Only to eventually be dragged into the future.

Disabling AMD Turbo Boost

Recently I upgraded my trusty Framework 13 laptop to AMD motherboard. It’s not my primary laptop mind you, but it does come handy whenever my F16 is too cubersome to lug around. For me, that often ends with it in my lap.

And this laptop can get hot. AMD CPU always wants to give it all, even when it’s not necessary. Often I will have a long-running task in background, that CPU will try to speed up as much as possible by boosting its clock and fans to max. And those are tasks I care not if they finish in 30 or 35 minutes and thus extra heat is unappreciated.

Easy solution for this is just turning off turbo boost. And that is easy enough by writing 0 to a file:

echo 0 | sudo tee /sys/devices/system/cpu/cpufreq/boost

However, I usually remember to do so only once my legs start smoking. So, I decided that it was about time for my system to use that setting as a default. And, since my Kubuntu uses systemd, all starts with creating a service

cat << EOF | sudo tee /etc/systemd/system/cpu-noturbo.service
[Unit]
Description=Disable Turbo Boost

[Service]
ExecStart=/bin/bash -c "echo 0 | tee /sys/devices/system/cpu/cpufreq/boost"
ExecStop=/bin/bash -c "echo 1 | tee /sys/devices/system/cpu/cpufreq/boost"
RemainAfterExit=yes

[Install]
WantedBy=sysinit.target
EOF

Whenever service is started, it will disable turbo boost. Once service is stopped, turbo boost will be reenabled.

Of course, to make sure it starts on every boot, we need to enable it. And because we don’t want to reboot system to apply settings, we might as well start it immediately.

sudo systemctl daemon-reload
sudo systemctl enable cpu-noturbo
sudo systemctl start cpu-noturbo

PS: The same behavior for Intel CPU can be achieved by using slighly different commands. Note that 1 and 0 are swapped:

echo 1 | tee /sys/devices/system/cpu/intel_pstate/no_turbo
echo 0 | tee /sys/devices/system/cpu/intel_pstate/no_turbo

Speed Boost for Repeated SSH

If you lead Linux life, you probably have a bunch of scripts automating it. Assuming you have access to more than one computer, it’s really easy to use SSH and execute stuff remotely. In my network, for example, I’ve automated daily reports. They connect to all various servers I have around, collect bunch of data, and twice a day I get an e-mail detailing any unexpected findings.

Now, this script has grown over the years. At the very beginning it was just checking ZFS status and health, then it evolved to check smart data, and now it collects all things disk related up to a serial number level. And that’s not the only one. I check connectivity, temperatures, backup states, server health, docker states, and bunch of other stuff. So, my daily mail that used too come at 7:00 and 19:00 every day over time started taking over 30 minutes. While this is not a critical issue, it started bugging me - why the heck it takes that long.

Short analysis later and my culprit was traced to the number of SSH commands those script execute. Just checking my disks remotely executed commands over SSH more than 50 times. Per server. And that wasn’t the only one.

Now, solution was a simple one - just optimize darn scripts. And there was a lot of places to optimize as I rarely cached command output. However, those optimizations would inevitevely make my Bash scripts uglier. And we cannot have that.

Thus, I turned toward another approach - speeding up the SSH. Back in days when I first played with the Ansible, I noticed that it keeps its connections open. At the time I mostly noticed it due to issues it caused. But now I was thinking - if the Ansible can reuse connections, can I?

And indeed I can. Secret lies in adding the following configuration to the ~/.ssh/config file:

ControlMaster  auto
ControlPersist 1m
ControlPath    ~/.ssh/.persist.%r@%h:%p

What this controls is leaving the old SSH connection open, and then reusing the existing connection instead of going throush the SSH authentication each time. Since SSH authentication is not the fastest thing out there, this actually saves a lot of CPU time thus speeding it a lot. And, since connection is encrypted, you don’t lose anything.

Setting ControlMaster to auto allows your SSH connection to reuse the existing connection if it exists and fallback to the “standard” behavior if one cannot be found. Location of cached sockets is controlled using ControlPath setting and one should use directly that is specific to the user. I like using .ssh rather than creating a separate directory but any valid path will do as long as you parameterize it using %r, %h, and %p at a minimum. And lastly, the duration we can specify using ControlPersist value. Here I like using 1 minute as it gives me meaningful caching for script use while not keeping connection so long that I need to kill them manually.

With this, the execution time for my scripts went from more than 30 minutes to less than 5. Not bad for a trivial change.

Framework HDMI Missing Sound Output

After watching stuttering 1080p@60 video once too many, I decided to retire my old NUC5i3RYH and switch it with Gen 11 Framework board I had lying around. It was supposed to be a quick swap. Just take SSD from old computer, move it to the new one, place new one into a Cooler Master case, and connect back all the cables. What could go wrong?

Well, everything. First, there was an issue with mounting. NUC uses “sorta” VESA 100mm, Framework uses VESA 100mm, while TV uses VESA 200mm. Thus I assumed I could use NUC’s mounting. Albeit, 200-to-100mm adapter used for NUC was just a fraction too thick for placing Framework screws. So I spent an hour with a dremel making slots slightly thinner. Funny how shaving metal looks awfully like shaving yak.

Well, at least after mounting my case onto TV, there would be no issues. Full of hope, I turned on the computer and … nothing. Gen 11 motherboards have an issue where they would literally destroy their CMOS battery. And then it would refuse to start until battery charges enough. Some time back I fixed that using a soldering mod to use laptop battery instead. However, guess what my newly mounted laptop didn’t have? Yep, Cooler Master case contains no battery. So, coaxing board to power on took another 30 minutes and future order for ML1220 battery.

With system powered on, there was an additional issue lurking. My NUC used mini-HDMI output while Framework provides HDMI via its expansion card. So, that required a trip to the garage and going over all the cables. I am ashamed to say there was not a single 4K@60Hz cable to be found. So, I took the best looking one and tried it out. It actually worked with just a bit of “shimmering”. Downgrading my settings to 4K@30 solved that issue.

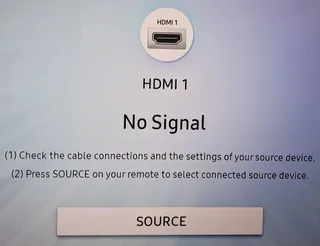
And now finally I was able to relax and watch some Starcraft. Notice the use of word “watch” since I definitely noticed there was no sound. After all that, my “new” computer wouldn’t give me a peep. I mean, output was there. And all was connected. But TV didn’t understand that.

And on this I spent ages. First I tried different HDMI expansion cards - since I did a soldering mod on mine, I thought that might be an issue. Then I tried connecting things using analog audio - it took a while to find analog 3.5mm cable and it took much longer banging my head into the wall when I noticed that TV as no analog input. Then I tried bluetooth on my soundbar - that one kinda worked until you switch input on TV when HDMI ARC would take over and bluetooth would turn off. I was half-tempted to leave it like this.

But, in the moment of desperation I though of connecting via bluetooth to my TV and then using existing ARC connection to my soundbar. Unfortunately, it was then when I found out my TV only has bluetooth output and no bluetooth input. Fortunately, search for non-existent bluetooth input settings led me to audio “Expert Settings”. There I saw “HDMI Input Audio Format” setting. With NUC my TV has happy to work in “Bitstream” mode. However, switching this to “PCM” actually made my Framework work properly.

Now, why my TV had Bitstream set? I have no idea. Why NUC was happy to output compressed audio on HDMI while Framework wasn’t? I have no idea. Will I remember this next time I change computer? Definitely not.

After a long day, I did get to watch some Starcraft. So, I guess this can be considered a success.

Epson V600 under Bazzite

Illustration

After I upgraded my family PC from Windows 11 to Bazzite, I found nothing lacking. At least for a few week. It took me a while but I finally noticed that my Epson V600 scanner, connected to that PC was no longer working.

Well, onto Epson site I went and, lo and behold, they had Linux drivers. While Bazzite is an atomic distribution and not supported by drivers directly, you can still install RPMs using rpm-ostree. So, with drivers unpacked, I tried just that:

sudo rpm-ostree install data/iscan-data-1.39.1-2.noarch.rpm
sudo rpm-ostree install core/iscan-2.30.4-2.x86_64.rpm
sudo rpm-ostree install plugins/iscan-plugin-gt-x820-2.2.1-1.x86_64.rpm

While the first two packages installed just fine, the third package was attempting to change stuff installed by the first two. And, due to atomic nature of Bazzite, it ran into a mkdir: cannot create directory ‘/var/lib/iscan’: Read-only file system error. And no, it doesn’t matter if you install all three RPMs together or all at once - the last one always fails.

Well, if we cannot get packages installed on Bazzite, how about we give it a separate system? Enter, Distrobox. Without going into too many details, it’s essentially container for your Linux distribution. To create it, just enter and you will be asked which distribution you want to create. I went with Fedora.

toolbox enter

After it pulls all packages, you have essentially running Fedora system inside your Bazzite. And, since Fedora is supported by Epson drivers, you can simply use the provided ./install.sh script to install it. If you run it manually, software can now start.

iscan

Since everybody in the family needed this application, I really wanted application in the start menu. However, Distrobox for some reason doesn’t provide this functionality. So, you need to do a bit of manual magic.

cp /usr/share/applications/iscan.desktop ~/.local/share/applications/
sed -i 's|^Exec=.*|Exec=distrobox enter -- iscan|' ~/.local/share/applications/iscan.desktop

Illustration

With that, you can finally find Image Scan! for Linux in your start menu.

After all this effort to have it running, I expected something like Epson’s Windows application. Only to be faced with barely functional application. Definitelly not satisfactory.

But, before I went onto creating Widnows dual boot, I decided to check if Flatpak has something to offer. And, wouldn’t you know it, somebody already packed Epson Scan 2. While still not really equivalent to the Windows counterpart, this one was actually good enough for my use case. And it could be installed without trickery.

Lesson learned for a millionth time.

Getting SkiaSharp Running Under Alpine Linux

While I am not using Alpine Linux for my desktop environment, I love it in containers. And C# pairs with it like a dream. Just compile it using linux-musl-x64 runtime and you’re golden.

But, ocassionally, I do have a situation where my application is running fine on Kubuntu while it just crashes on Alpiine Linux. This time, crashes were coming from SkiaSharp.

Unhandled exception. System.TypeInitializationException: The type initializer for 'SkiaSharp.SKImageInfo' threw an exception.
 ---> System.DllNotFoundException: Unable to load shared library 'libSkiaSharp' or one of its dependencies. In order to help diagnose loading problems, consider using a tool like strace. If you're using glibc, consider setting the LD_DEBUG environment variable:
Error loading shared library libfontconfig.so.1: No such file or directory (needed by /app/bin/libSkiaSharp.so)
Error loading shared library libSkiaSharp.so: No such file or directory
Error loading shared library /app/bin/liblibSkiaSharp.so: No such file or directory
Error loading shared library liblibSkiaSharp.so: No such file or directory
Error loading shared library /app/bin/libSkiaSharp: No such file or directory
Error loading shared library libSkiaSharp: No such file or directory
Error loading shared library /app/bin/liblibSkiaSharp: No such file or directory
Error loading shared library liblibSkiaSharp: No such file or directory

The first error is obvious: I was missing a fontconfig package. To install it, just do the standard APK stuff:

apk add fontconfig ttf-dejavu

And yes, I am not only installing fontconfig butw also ttf-dejavu. Alpine is so lightweigth that it comes without any fonts. I like DejaVu, so I decided to go with it. You can make your own font choices but don’t forget to install some if your application requires them.

But it took me a while to figure out rest of the issues since now I faced a bit more puzzling exception:

 ---> System.DllNotFoundException: Unable to load shared library 'libSkiaSharp' or one of its dependencies. In order to help diagnose loading problems, consider using a tool like strace. If you're using glibc, consider setting the LD_DEBUG environment variable:

No matter what I did, I kept getting one set of error or another. And issue seemed to stem from SkiaSharp having glibc dependencies. Since Alpine Linux uses completely different musl library, one of rare thing you cannot install is glibc.

At moment of desperation, I was even looking to compile it from source myself since that seemed to be something people had luck with. And then, on NuGet I noticed there is another package available: SkiaSharp.NativeAssets.Linux.NoDependencies. This package is a direct replacement for SkiaSharp.NativeAssets.Linux, the only difference being it includes its dependencies on libpthread, libdl, libm, libc, and ld-linux-x86-64. Essentially it includes all dependencies except for fontconfig that I already added to my docker image.

So, I added this dependency to my project and SkiaSharp happily worked ever after.

RayHunter and Access Denied

If you have a spare Orbic RC400L laying around, EFF’s RayHunter might give it a new lease to life. It always warms my heart to see old (and cheap) equipment get some even as it gets gray in hair. So, of course, I tried to get RayHunter running.

Fortunately, instructions are reasonably clear. Just download the latest release and run install-linux.sh. However, on my computer that resulted in an error:

thread 'main' panicked at serial/src/main.rs:151:27:
device found but failed to open: Access denied (insufficient permissions)
note: run with `RUST_BACKTRACE=1` environment variable to display a backtrace

Error is clear - insufficient permissions. And you can get around it by running stuff as root. But that should be only the last resort. Proper way to handle this is to add USB device rule that will put it into plugdev group and thus allow current user to access it (at least on Ubuntu).

To do this, first add a file to /etc/udev/rules.d/ directory for 05c6:f601 device (double-check numbers using lsusb, if needed).

sudo tee /etc/udev/rules.d/42-orbic-rc400l.rules << EOF
ACTION=="add", \
SUBSYSTEM=="usb", \
ATTRS{idVendor}=="05c6", \
ATTRS{idProduct}=="f601", \
GROUP="plugdev", \
TAG+="uaccess", \
ATTR{power/control}:="auto"
EOF

Once file is in place, just reload the rules (or restart the computer).

sudo udevadm control --reload-rules && sudo udevadm trigger

With this, script should now update device without any further problems.


PS: It’s really hard for me to tell if IMSI catcher update even works since I never had it trigger.

PPS: Rather than messing with wireless, I like to just access server via USB (adb can be found in platform-tools directory):

./adb forward tcp:8080 tcp:8080
firefox http://localhost:8080/

A Key to Mute the Microphone

One thing I love about my work Lenovo is its Microphone mute button. While every application offers mute functionality, having it as a special button is really handy. You can even do scripting around that. So, I wanted the same for my Framework 16.

Since Framework 16 keyboard is QMK based (albeit older version), changing key assignment was mostly figuring out which key is muting microphone. Not to keep you in the suspense - that key is F20. Each press on F20 mutes and unmutes microphone - just how standard audio mute functionality does to outputs.

So, with the knowledge of the key, the only decision left was where to assign that key too. And for that, I found = key on numpad looking the best. My whole current Numpad setup looks like this (both with and without NumLock):

┌────┬────┬────┬────┐     ┌────┬────┬────┬────┐
│Esc │PScr│MicM│Mute│     │Esc │Calc│ =  │ <- │
├────┼────┼────┼────┤     ├────┼────┼────┼────┤
│ Num│Bck-│Bck+│Vol-│     │ Num│ /  │ *  │ -  │
├────┼────┼────┼────┤     ├────┼────┼────┼────┤
│Home│ ↑  │PgUp│    │     │ 7  │ 8  │ 9  │    │
├────┼────┼────┤    │     ├────┼────┼────┤    │
│ ←  │    │ →  │Vol+│     │ 4  │ 5  │ 6  │ +  │
├────┼────┼────┼────┤     ├────┼────┼────┼────┤
│End │ ↓  │PdDn│    │     │ 1  │ 2  │ 3  │    │
├────┴────┼────┤    │     ├────┴────┼────┤    │
│ Insert  │Del │Entr│     │ 0       │ .  │Entr│
└─────────┴────┴────┘     └─────────┴────┴────┘

Thus, that changed my definition of keyboard to:

[_FN] = LAYOUT(
    KC_ESC,  S(KC_PRINT_SCREEN), KC_F20,  KC_MUTE,
    KC_NUM,  KC_BRID, KC_BRIU, KC_VOLD,
    KC_P7,   KC_P8,   KC_P9,
    KC_P4,   KC_P5,   KC_P6,   KC_VOLU,
    KC_P1,   KC_P2,   KC_P3,
    KC_INS,  KC_DEL,  KC_ENT
),

Short recompile later and my numpad now has that extra key for much easier muting. As always, QMK code is freely available.

Capturing Govee Temperature in Docker

In my previous post I discussed reading Govee sensor temperature in a script. And that is perfectly fine. However, this is not ideal for my server environment. What I want is a Docker container.

Since I like Alpine images, the first step was to compile GoveeBTTempLogger. After installing prerequisites, I was greeted with bunch of errors:

/root/GoveeBTTempLogger/goveebttemplogger.cpp: In function 'bool ValidateDirectory(const std::filesystem::__cxx11::path&)':
/root/GoveeBTTempLogger/goveebttemplogger.cpp:924:23: error: aggregate 'ValidateDirectory(const std::filesystem::__cxx11::path&)::stat64 StatBuffer' has incomplete type and cannot be defined
  924 |         struct stat64 StatBuffer;
      |                       ^~~~~~~~~~
/root/GoveeBTTempLogger/goveebttemplogger.cpp:925:59: error: invalid use of incomplete type 'struct ValidateDirectory(const std::filesystem::__cxx11::path&)::stat64'
  925 |         if (0 == stat64(DirectoryName.c_str(), &StatBuffer))
      |                                                           ^
...

As lovers of Alpine know, due to its use of musl, this is not an uncommon occurrence. Fix was easy enough so I created a pull request myself. With this sorted out, it was time for Dockerfile.

Base prerequisites were obvious:

FROM alpine:latest
USER root

RUN apk add dbus bluez bluez-dev libstdc++
RUN rc-update add dbus bluetooth default
...

However, depending on services is not something Alpine does out-of-box. Openrc runlevel requires more direct access to machine. But, since I was not the first person needing it, solution already exists and it’s called softlevels. To enable them, three lines are enough:

RUN apk add openrc
RUN mkdir -p /run/openrc/exclusive
RUN touch /run/openrc/softlevel

This and a couple of wrapper scripts was all that was needed to get it running. But, I was still one step away from making it work in my environment. I needed compose.yaml and this is what I came up with (notice dbus volume):

services:
  govee2telegraf:
    container_name: govee2telegraf
    image: medo64/govee2telegraf:latest
    restart: unless-stopped
    privileged: true
    environment:
      TELEGRAF_HOST: <host>
      TELEGRAF_PORT: <port>
      TELEGRAF_BUCKET: <bucket>
      TELEGRAF_USERNAME: <username>
      TELEGRAF_PASSWORD: <password>
    volumes:
      - /var/run/dbus/:/var/run/dbus/:z

Image is available on DockerHub and everything else is on GitHub.

Capturing Temperature of Govee Bluetooth Sensors

I have an quite a few Govee temperature and humidity sensors. They’re reasonably priced, quite accurate, and they’re bluetooth LE. Yes, that allows them to sip power but at a cost that I cannot reach them when outside of home. Well, unless I get one of Govee hubs and connect them to cloud. But, is there a way to bypass the cloud and push all to my telegraf instance? Well, now there is!

First of all, why Telegraf? Obvious answer is because I have it already setup in my network and connected with my Grafana GUI. Longer answer is because I like the idea of telegraf. You have a centralized database and pushing to it is as easy as sending HTTP request. Everything is quite free-form and any mess you create is sorted out when data is displayed in Grafana.

Next question is, how? Well, I originally planned to roll my own script by abusing bluetoothctl scripting. However, during research I fount out that gentleman named William C Bonner already did pretty much the exact thing I wanted to. His GoveeBTTempLogger already both captures and decodes Govee temperature and humidity data.

And yes, there is no x64 package precompiled but, surprisingly, README.md instructions actually work. That said, I opted to build binaries a bit differently. This allowed me to install binary into /usr/local/bin/.

sudo apt install build-essential cmake git libbluetooth-dev libdbus-1-dev
git clone https://github.com/wcbonner/GoveeBTTempLogger.git
cd GoveeBTTempLogger
cmake -B ./build
sudo cmake --build ./build --target install

Once compiled, we can start application and, hopefully, see all the temperatures.

goveebttemplogger

And, if you just want to see the current values, that’s enough. If you check into README.md a bit more, you can also setup application to output web pages. Unfortunately, there is no telegraf output option. Or thankfully, since this gives me option to roll my own script around this nice tool.

What I ended up with is the following.

TG_HOST=<ip>
TG_PORT=<port>
TG_BUCKET=<bucket>
TG_USERNAME=<user>
TG_PASSWORD=<password>

while IFS= read -r LINE; do
  DATA=`echo "$LINE" | grep '(Temp)' | grep '(Humidity)' | grep '(Battery)'`
  if [ "$DATA" == "" ]; then continue; fi

  DEVICE=`echo $DATA | awk '{print $2}' | tr -d '[]'`
  TEMPERATURE=`echo $DATA | awk '{print $4}' | tr -dc '0-9.'`
  HUMIDITY=`echo $DATA | awk '{print $6}' | tr -dc '0-9.'`
  BATTERY=`echo $DATA | awk '{print $8}' | tr -dc '0-9.'`

  printf "%s %5s°C %4s%% %3s%%\n" $DEVICE $TEMPERATURE $HUMIDITY $BATTERY
  CONTENT="temp,device=$DEVICE temp=${TEMPERATURE},humidity=${HUMIDITY},battery=${BATTERY} `date +%s`"$'\n'
  CONTENT_LEN=$(echo -en ${CONTENT} | wc -c)
  echo -ne "POST /api/v2/write?u=$TG_USERNAME&p=$TG_PASSWORD&bucket=${TG_BUCKET}&precision=s HTTP/1.0\r\nHost: $TG_HOST\r\nContent-Type: application/x-www-form-urlencoded\r\nContent-Length: ${CONTENT_LEN}\r\n\r\n${CONTENT}" | nc -w 15 $TG_HOST $TG_PORT
done < <(/usr/local/bin/goveebttemplogger --passive)

This script goes over goveebttemplogger output and extracts device MAC address and its data. That data is then packed into Telegrafs line format and simply posted into nc as raw HTTP output. Not more difficult than wget or curl.

Wrapping this into a service so it runs in the background is an exercise left to the reader.