Intercepting Backspace on Windows Mobile
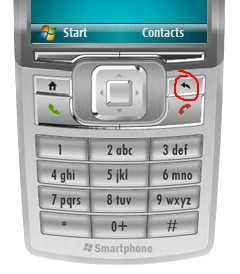
Plenty of applications inside mobile windows make use of backspace key. Just imagine how difficult and unintuitive would be to create even simplest folder browser if you could not use that key. However, on smartphone you have just that situation.
Smartphone (or Windows Mobile Standard) is specific in sense that backspace is used as system-wide key for application switching. You can think of it as Tab in normal applications. It is not something you usually override but sometimes overriding that key can prove to be useful. In our desktop application we would just override ProcessCmdKey function or in worse scenario (older frameworks), just override WndProc. This would allow us to intercept those special keys and use them for our own evil purpose.
However, if we try to do this for Smart Device project we have a big problem. Neither of those two functions is supported. Reason is simple - compact framework is trimmed as far as they could go. In my opinion they took it too far.
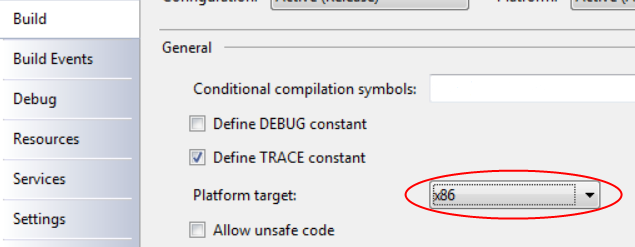
Those who worked in times before .NET framework, may remember SetWindowLong function and that one of parameters enabled developer to set their own window procedure (GWL_WNDPROC). Fortunately, that is supported (as interop call).
In order to simplify development, I tried to keep it as familiar as possible. Whole idea is to create base form with required WndProc function and later just inherit from it. Whole procedure can be seen from sample, so I will only cover base steps.
Each form that needs to intercept backspace will also need to inherit from WndProcForm. Since WndProcForm inherits from Form, you can safely change that in already existing applications and they should retain their functionality (do not forget to recompile application once you do that - otherwise designer may complain until you can do so). Designer will complain that there visual inheritance is no longer supported for that form (P/Interop is reason) but you may safely ignore that if you don’t have visual components on multiple forms.
After that, simple matter of overriding WndProc and waiting first for WM_HOTKEY and then for both MOD_KEYUP (key is depressed) and VK_TBACK (same code as for escape) will do the job.
Notice that while I only give instructions on one usage, you may use this to intercept any window message going to your window. And that is lot of messages. This is also applicable to Windows Mobile Professional (Pocket PC) for those extended cases (although backspace is not used as switch key there).
Resources