World of networks and [Mikrotik](https://mikrotik.com) devices

DNS Conundrum

DNS, known as the phone book of the Internet, is often something you get from your ISP provider with your IP address. And quite often people continue using those automatically given values without ever looking back as such DSN will serve its basic function just fine. But what if you want a bit more privacy, performance, or sometime stability? Enter the world of public DNS resolvers.

One of the first projects to bring DNS to people was OpenNIC. It’s a community driven project with its members providing DNS service on their own hardware similar to how NTP pool works. You select any server close to you and off you go. There are anycast addresses too but their usage is not encouraged albeit I find them much more practical - especially as individual servers can go down at any time. For this service you definitely want to fill secondary DNS server. There are no special privacy features it supports and whether you request is logged or not depends on server’s operator. Support for DNSCrypt is spotty and depends on the exact server you use.

Then came OpenDNS. It’s more centralized service and I found it often has the fastest response of all tested. DNSCrypt is fully supported but privacy is questionable. Enterprise users even have option of getting the logs themselves. If you are only interested in the speed and stability, you won’t go wrong if you select it but don’t expect you’ll know where your data goes.

The first DNS server that started the trend of memorable IP addresses was Google’s. I can almost bet most of its early adoption came from easily memorable 8.8.8.8 IP. Strangely DNSCrypt is not supported yet but privacy is decent. While temporary logs are kept, they are usually deleted within 48 hours. Limited information kept in permanent log is anonymized.

IBM didn’t want to lag behind Google much so they offered Quad9 DNS resolver to the world continuing the trend of easy to remember IP addresses. Privacy is a touch better than Google’s as IP address is not stored even in temporary logs. They do not support DNSCrypt and they do filter content for known phishing sites but supposedly there is no censorship involved. Those willing to deal with slightly more difficult-to-remember IP addresses can get unfiltered access and that’s really nice.

The latest to the party are Cloudflare and APNIC with their DNS. Unfortunately, DNSCrypt is not supported but it does support alternative DNS over HTTPS. While I have small preference toward more usual DNSCrypt, DoH seems to be a reasonable alternative. Most of the logged information is cleared after 24 hours and IP address is not logged in the first place so privacy should not be the issue. Information saved in permanent log does not contain personally identifiable data and it’s even further anonymized. In return for APNIC letting them use awesome 1.1.1.1 IP address, they do share some anonymous log data with them but only for research purposes.

For my personal network I decided to go with Cloudflare and non-filtered Quad9. While their DNS uptime has been impeccable so far, having them both configured does allow a bit of resilience if one network ever goes down. As my network setup unfortunately doesn’t allow me to make encrypted DNS queries I didn’t really take that into account when deciding. However, their claim that IP addresses are not logged did have a measurable impact. I know, there is a great deal of trust involved here but, as both companies do have decent reputation, I do believe their statements.

In the end, everybody values different things and all these choices are valid for one purpose or another. Here are IP addresses for public DNS services in my order of preference:

ProviderPrimary IPSecondary IP
Cloudflare1.1.1.11.0.0.1
2606:4700:4700::11112606:4700:4700::1001
Quad99.9.9.10149.112.112.10
2620:fe::10
Google8.8.8.88.8.4.4
2001:4860:4860::88882001:4860:4860::8844
Quad99.9.9.9149.112.112.112
2620:fe::fe2620:fe::9
OpenNIC185.121.177.177169.239.202.202
2a05:dfc7:5::532a05:dfc7:5::5353
OpenDNS208.67.222.222208.67.220.220
2620:0:ccc::22620:0:ccd::2

Slow Ansible Response Using External IP

As I was playing with Ansible’s ad-hoc commands, I’ve noticed that one host was struggling. Any command I tried took 15 seconds more for it than for any other host.

ansible all -a date

Adding IP to /etc/hosts actually solved that trouble which strongly indicated toward issue actually being connected to DNS setup. But, why the hell was my temporary lab even using DNS? It was just a bunch of virtual machines and I definitely didn’t want to add all hosts by name. I needed another solution…

After a bit of investigation, I discovered the actual culprit - SSH daemon was trying to resolve IP address. For which purpose you ask? Just to write host name to its log.

The final solution was easy - just adding UseDNS no to /etc/ssh/sshd_config:

echo -e "\nUseDNS no" | sudo tee -a /etc/ssh/sshd_config'
sudo systemctl restart sshd

VPN-only Internet Access on Linux Mint 18.3 Via Private Internet Access

Setting up Private Internet Access VPN is usually not a problem these days as Linux version is readily available among the supported clients. However, such installation requires GUI. What if we don’t want or need one?

For setup to work independently of GUI, one approach is to use OpenVPN client usually installed by default. Also needed are PIA’s IP-based OpenVPN configuration files. While this might cause issues down the road if that IP changes, it does help a lot with security as we won’t need to poke an unencrypted hole (and thus leak information) for DNS.

From the downloaded archive extract .crt and .pem files followed by your choice of .ovpn file (usually going with the one physically closest to you). Copy them all to your desktop to be used later. Yes, you can use any other directory - this is just the one I’ll use in example commands below.

Rest of the VPN configuration needs to be done from the Bash (replacing username and password with actual values):

sudo mv ~/Desktop/*.crt /etc/openvpn/
sudo mv ~/Desktop/*.pem /etc/openvpn/
sudo mv ~/Desktop/*.ovpn /etc/openvpn/client.conf

sudo sed -i "s*ca *ca /etc/openvpn/*" /etc/openvpn/client.conf
sudo sed -i "s*crl-verify *crl-verify /etc/openvpn/*" /etc/openvpn/client.conf

sudo echo "auth-user-pass /etc/openvpn/client.login" >> /etc/openvpn/client.conf
sudo echo "mssfix 1400" >> /etc/openvpn/client.conf
sudo echo "dhcp-option DNS 209.222.18.218" >> /etc/openvpn/client.conf
sudo echo "dhcp-option DNS 209.222.18.222" >> /etc/openvpn/client.conf
sudo echo "script-security 2" >> /etc/openvpn/client.conf
sudo echo "up /etc/openvpn/update-resolv-conf" >> /etc/openvpn/client.conf
sudo echo "down /etc/openvpn/update-resolv-conf" >> /etc/openvpn/client.conf

unset HISTFILE
echo '^^username^^' | sudo tee -a /etc/openvpn/client.login
echo '^^password^^' | sudo tee -a /etc/openvpn/client.login
sudo chmod 500 /etc/openvpn/client.login

To test VPN connection execute:

sudo openvpn --config /etc/openvpn/client.conf

Assuming test was successful (i.e. resulted in Initialization Sequence Completed message), we can further make sure data is actually traversing VPN. I’ve found whatismyipaddress.com quite helpful here. Just check if IP detected is different then IP you usually get without VPN.

Stop the test connection using Ctrl+C and proceed to configure OpenVPN’s auto-startup:

echo "AUTOSTART=all" | sudo tee -a /etc/default/openvpn
sudo reboot

Once computer has booted and no further VPN issues have been observed, you can also look into disabling the default interface when VPN is not active. Essentially this means traffic is either going through VPN or not going at all.

Firewall rules are to allow data flow only via VPN’s tun0 interface with only encrypted VPN traffic being allowed on port 1198.

sudo ufw reset
sudo ufw default deny incoming
sudo ufw default deny outgoing
sudo ufw allow out on tun0
sudo ufw allow out on `route | grep '^default' | grep -v "tun0$" | grep -o '[^ ]*$'` proto udp to `cat /etc/openvpn/client.conf | grep "^remote " | grep -o ' [^ ]* '` port 1198
sudo ufw enable

This should give you quite secure setup without the need for GUI.

MAC Address Anatomy

While most people understand the structure behind IPv4 and even IPv6 address, MAC address is usually just assumed as something unique enough not to cause routing issues. But did you ever think whether there is any non-random meaning behind those 48 bits usually expressed as 12 hexadecimal digits?

First bit that gets transmitted is determining if given MAC is for individual device (0) or for a group (1). Most of the time we just care about individual type with group support mostly being used for multicast albeit historically a few more usages were known.

Next transmitted bit controls whether MAC is intended to be globally unique (0) or its intended to be unique only on local level (1). If properly manufactured, all physical network devices will have that bit set to 0 and you can count on it being unique. That being said, I have once personally experienced duplicate MAC on cheap network (ISA) card. However, that is unlikely scenario and hopefully one will never need to troubleshoot it these days.

While one would think locally administered addresses would be an awesome match for virtualization platforms, most don’t take advantage of it and have their addresses instead (incorrectly) allocated from globally unique pool. One major exception is KVM which by default does take care to set bit correctly. Realistically there is no difference in behavior for either choice but I find it nice that someone is actually paying attention.

Further 22 bits are identifier for the organization. Together with aforementioned 2 bits this makes total of 24 bits, also known as three bytes (or octets if you are a stickler). These identifiers are assigned by IEEE and it is easy to check which entity assigned your MAC address. If you despise manual search, you can also check one of the many OUI lookup web sites.

And finally the last 24 bits (the other 3 bytes) are assigned either sequentially or randomly - doesn’t really matter - by manufacturer within their OUI number. The only real requirement is to keep it unique so some manufacturers might have multiple assignments (e.g. almost 500 for Intel Corporations) while others might have just one.

While this covers all 48 bits, there is one piece of puzzle still missing - order of bits. Notice how I said that Individual/Group bit is the one first transmitted. Well, its not the first written. Bits on network get transmitted in least-significant first order.

If we take some imaginary MAC address 9C-DA-3E-E2-34-EB we can express this in binary as 10011100 11011010 00111110 11100010 00110100 11101011. When looking at binary form the Local/Group bit is actually at position 8 while at position 7 you can see the Unique/Local bit.

Those playing with blade servers can now also understand why their network adapters seem to have MAC addresses spaced by 4 - with the lowest two bits set to 0 that decision is forced by math and not some evil plan to waste already small MAC address space.

Setting IPv6 on Mikrotik

If your ISP offers IPv6 and you have Mikrotik router, it would be shame not to make use of it. My setup assumes you get /64 prefix from your ISP (Comcast in my case) via DHCPv6. Also assumed is empty IPv6 configuration.

First I like to disable default neighbor discovery interface. Blasting IPv6 router advertisements on all intefaces is not necessarily a good idea:

/ipv6 nd
set [ find default=yes ] disabled=yes

Next step is to setup DHCP client. Withing a few seconds, you should see the prefix being allocated:

/ipv6 dhcp-client
add add-default-route=yes interface=ether1 pool-name=^^general-pool6^^ request=prefix
:delay 5s
print
 Flags: D - dynamic, X - disabled, I - invalid
  #    INTERFACE             STATUS        REQUEST             PREFIX
  0    ether1                bound         prefix              ^^2601:600:9780:ee2c::/64^^, 3d14h41m41s

At this time I love to allocate address ending with ::1 to the router itself:

/ipv6 address
add address=::1 from-pool=^^general-pool6^^ interface=^^bridge1^^ advertise=yes

Now it should be possible to ping its address from external computer (in this example address would be 2601:600:9780:ee2c::1). If this doesn’t work, do check if you have link-local addresses. If none are present, reboot the router and they will be regenerated.

With router reachable, it is time to delegate IPv6 prefix to internal machines too. For this purpose, setup RA (router announcement) over the bridge. While default interval settings are just fine, I like to make them a bit shorter (20-60 seconds):

/ipv6 nd
add interface=^^bridge1^^ ra-interval=20s-60s

And that’s all. Now your computers behind the router will have direct IPv6 route to the Internet. Do not forget to setup both router firewall and firewall of individual devices. There is no NAT to save your butt here.

PS: Here is the basic IPv6 firewall allowing all connections out while allowing only established back in:

/ipv6 firewall filter
add chain=input action=drop connection-state=invalid comment="Drop (invalid)"
add chain=input action=accept connection-state=established,related comment="Accept (established, related)"
add chain=input action=accept in-interface=ether1 protocol=udp src-port=547 limit=10,20:packet comment="Accept DHCP (10/sec)"
add chain=input action=drop in-interface=ether1 protocol=udp src-port=547 comment="Drop DHCP (>10/sec)"
add chain=input action=accept in-interface=ether1 protocol=icmpv6 limit=10,20:packet comment="Accept external ICMP (10/sec)"
add chain=input action=drop in-interface=ether1 protocol=icmpv6 comment="Drop external ICMP (>10/sec)"
add chain=input action=accept in-interface=!ether1 protocol=icmpv6 comment="Accept internal ICMP"
add chain=input action=drop in-interface=ether1 comment="Drop external"
add chain=input action=reject comment="Reject everything else"
add chain=output action=accept comment="Accept all"
add chain=forward action=drop connection-state=invalid comment="Drop (invalid)"
add chain=forward action=accept connection-state=established,related comment="Accept (established, related)"
add chain=forward action=accept in-interface=ether1 protocol=icmpv6 limit=20,50:packet comment="Accept external ICMP (20/sec)"
add chain=forward action=drop in-interface=ether1 protocol=icmpv6 comment="Drop external ICMP (>20/sec)"
add chain=forward action=accept in-interface=!ether1 comment="Accept internal"
add chain=forward action=accept out-interface=ether1 comment="Accept outgoing"
add chain=forward action=drop in-interface=ether1 comment="Drop external"
add chain=forward action=reject comment="Reject everything else"

TP-Link's Idea of Security

Illustration

My wired network finally got too big for a single router so I decided to get myself a switch.

I realistically needed the dumbest switch there is - just 4 gigabit ports and I would be happy. Thus my eyes were immediately drawn to TP-Link SG105 at $20 on Amazon. However, for only $10 more I noted one could get SG105E. The exactly same switch but with a basic manageability features.

Both switches look exactly the same in their steel shell. They are well built and my impression is they can take a beating. You can get inside the chassis by simply undoing two screws and you will see a really simple board. Based on the components, I don’t think you can get much over 1 Gbps on its bus and thus forget about actually reaching maximum speed when all ports are in use - acceptable compromise for home I guess. I would say 9V power supply is the only thing that actually looks cheap. Fortunately, switch works without any noticeable issues on much more common 12V too (albeit you probably forfeit warranty if you do that).

So, what do you get for extra money? Well, you get DSCP, a QoS priority system nobody seems to use in general and definitely not intended for home network. There is also rate limiting with a storm control. Probably not often needed at home but can be quite useful for troubleshooting naughty device.

Further more you get support for up to 32 VLANs - quite nice if your home network needs a bit of separation. Lastly you will also find more “enterprisey” features like port mirroring and link aggregation. Never figured why you need something like this on 5-port switch but I guess it doesn’t hurt to have them.

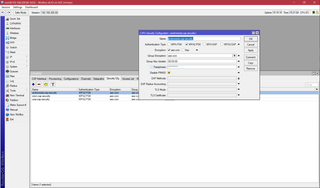
The most useful feature, and the reason I decided to give extra tenner was the GUI. From GUI you can easily see if your cable is connected, whether packets are flowing, and are there any transmission errors. Usually home switches and routers have ugly interface so I was ready for that. What I wasn’t ready for is abysmal security.

Let’s start with a good thing - you can change user name. Security-wise, that is probably the best thing you can do in your network to escape 95% automated attacks. Yes, this won’t help much if someone is “out to get you” but most script kiddies will be thwarted. And that’s as far as security goes for this device.

To start with, your password is restricted to English alphabet, digits, and underscore (_) sign. Restricting the length and character set is not significant just because it lowers number of combinations your password can take. I am sure you are using password manager and even these weak rules should give you years of good sleep if password is hashed.

But, if they used hashed passwords in the first place, they wouldn’t need character set restrictions. These restrictions are almost always a signal your password is saved in a clear-text. Combined with the login screen allowing for infinite number of guesses at unthrottled speed, and you have the whole security tumbling down.

But don’t worry anybody will brute force this device. Nope - there is no need as you can simply snoop all communication as there is no support for HTTPS. Everything you do on its web interface is for everybody to see. They didn’t even bother to do a simple digest authentication. Nope, all is sent in clear text.

For $20 it is hard not to recommend base model of this switch. It is sturdy, cheap, and reasonably performant. Unfortunately, for only $10 more you can get a device performing the same base function but with a woefully insecure user interface.

I would stick with unmanaged model.

Configuring Classless Static Route Option

If you want to push routes to your client, the easiest way to do so would be adding a classless static route (DHCP option 121) as defined in RFC 3442. Every router has their way of setting these but usually they have one thing in common - you must do so manually. And yes, if you make a single mistake, your Internet connectivity will be lost.

Issue of easy entry has bothered me for long enough to actually do something about it. Below find classless static route option calculator. Just enter routes you want and you will get their hexadecimal representations.

NetworkGateway
Default
DHCP option 121:
OpenSense/Ubiquiti notation:
Mikrotik code:

[2019-12-13: Updated script to have default route first (workaround for Ubuntu 19.10 Server).] [2020-12-26: Added OpenSense/Ubiquiti notation.] [2022-07-22: Fixed to allow for /32 network.]

Let's Encrypt on Linode CentOS 7

Having your web server running on Linode is just a first step. No installation is complete without HTTPS. So I turned to Let’s encrypt and official Certbot instructions.

Albeit, it was not meant to be. Official procedure always resulted in No package certbot-apache available error. So I went with slightly alternate approach:

yum install -y epel-release
yum install -y certbot-apache

Assuming your httpd.conf contains something like this

<VirtualHost *:80>
    ServerName ^^www.example.com^^
    ServerAlias ^^example.com^^
    DocumentRoot "/var/www/html/"
</VirtualHost>

All you need is to run certbot for the first time. Of course, do try staging environment first:

certbot --apache -d ^^example.com^^ -d ^^www.example.com^^ --staging

This will create file at /etc/httpd/conf/httpd-le-ssl.conf that will have your SSL configuration. If you prefer to have all your configuration visible together, you can go ahead and copy it back into httpd.conf with the following result:

<VirtualHost *:443>
    ServerName ^^www.example.com^^
    ServerAlias ^^example.com^^
    DocumentRoot "/var/www/html/"
    Include /etc/letsencrypt/options-ssl-apache.conf
    SSLCertificateFile /etc/letsencrypt/live/^^example.com^^/cert.pem
    SSLCertificateKeyFile /etc/letsencrypt/live/^^example.com^^/privkey.pem
    SSLCertificateChainFile /etc/letsencrypt/live/^^example.com^^/chain.pem
</VirtualHost>

Once you are happy with configuration (remember we are using the staging configuration at this time), you can get a proper production certificate. I personally don’t like my httpd.conf touched so I like to go with alternative “webroot” verification. As our staging certificate is fairly new, we need to force renewal.

certbot certonly --cert-name ^^example.com^^ --webroot --webroot-path /var/www/html/ --post-hook "apachectl graceful" --force-renew

To keep certificate up-to-date, we need to add following line that will attempt recertification twice a day (as recommended):

42 7,19 * * * certbot renew --cert-name ^^example.com^^ --webroot --webroot-path /var/www/html/ --post-hook "apachectl graceful"

Now you can enjoy your encrypted website in its full glory.

Internal Domain Name

Illustration

For the longest time anything was a good internal domain name. Yes, obviously you avoided .com, .net, .org, and other usual suspects but anything else was quite OK. While some people did go distance on this, most of networks sort-of settled on .local or .lan. And all was nice and dandy.

However, lately two things have happened lately to mess with fairy tale. First was of course that ICANN smarties decided to create a zillion new top-level domains. And then there was Apple and their kidnapping of .local suffix for the purpose of mDNS.

Just like that people found Apple devices no longer playing nicely on .local domain and all other domains got big on-sale sign with a potential for collision down the road. There was an RFC with a few reserved domain names but neither one of those actually fits the local LAN setup. And yes, there were some attempts at properly reserving the few most common domains (e.g., .lan, .home, .corp, …) but that RFC never went anywhere.

And ICANN did try to sell all three most common local names already but found itself in a bit of a bind due to a high usage of these domains in households and companies alike. Just imagine a mess some company’s network could be in if .corp gets delegated and someone buys login.corp domain. While ICANN has slowed process a bit for the most conflicting domains due to the security report, spammers are pushing to get those domains on market.

As a general rule, the only sure way not to have your domain clash with newly introduced spam domains is actually to buy your own domain. Even if you don’t want to ever have a website, you need to get a domain. I find this solution annoyance and a mini money grab at best. However, this seems to be the only sure way spammers won’t get to resolve your DNS requests. That is until you forget to renew the domain.

I personally have settled on .home for now for my own network. Based on the DNS query stats for the undelegated domains, it is among top 3 most abused domains and thus it is unlikely it will be sold for use as top domain without many feathers being ruffled. That should allow me enough time for the migration to some other domain.

Adding Domain Search Option to Mikrotik DHCP

Illustration

I already wrote about using Mikrotik’s DNS to resolve a short name lookup in Windows. And there I noted that domain-name DHCP option seemingly has no effect on Linux. Well, let me introduce you to domain search option.

Most of the Linux/Unix based operating systems, whether it is Linux, FreeBSD, or MacOS support arguably a more proper way to define which domain we are referring to when using a single word host name.

To define suffix for domain search, just add option 119:

/ip dhcp-server option
add name="domain-search-option" code=119 value="'^^example^^'"

And of course add this option to DHCP network:

/ip dhcp-server network
set 1 dhcp-option=domain-search-option

PS: And no, you cannot use this instead of domain-name. Windows clients only support domain-name while Linux/Mac only supports domain-search option.