For my Nas4Free-based NAS I wanted to use full-disk encrypted ZFS in a mirror configuration across one SATA and one USB drive. While it might not be optimal for performance, ZFS does support this scenario.
On booting Nas4Free I discovered my disk devices were all around the place. To identify which one is which, I used diskinfo:
diskinfo -v ada0
ada0
512
2000398934016
3907029168
4096
0
3876021
16
63
S34RJ9AG212718
Once I went through all drives (USB drives are named da*), I found my data disks were at ada0 and da2. To avoid any confusion in the future and/or potential re-enumeration if I add another drive, I decided to give them a name. SATA disk would be known as disk0 and USB one as disk1:
glabel label -v disk0 ada0
 Metadata value stored on /dev/ada0.
 Done.

glabel label -v disk1 da2
 Metadata value stored on /dev/da2.
 Done.
Do notice that you lose the last drive sector for the device name. In my opinion, a small price to pay.
On top of the labels we need to create encrypted device. Beware to use labels and not the whole disk:
geli init -e AES-XTS -l 128 -s 4096 /dev/label/disk0
geli init -e AES-XTS -l 128 -s 4096 /dev/label/disk1
As initialization doesn’t really make devices readily available, both have to be manually attached:
geli attach /dev/label/disk0
geli attach /dev/label/disk1
With all things dealt with, it was time to create the ZFS pool. Again, be careful to attach inner device (ending in .eli) instead of the outer one:
zpool create -f -O compression=on -O atime=off -O utf8only=on -O normalization=formD -O casesensitivity=sensitive -m none Data mirror label/disk{0,1}.eli
While both SATA and USB disk are advertised as the same size, they do differ a bit. Due to this we need to use -f to force ZFS pool creation (otherwise we will get “mirror contains devices of different sizes” error). Do not worry for data as maximum available space will be restricted to a smaller device.
I decided that pool is going to have the compression turned on by default, there will be no access time recording, it will use UTF8, it will be case sensitive (yes, I know…) and it won’t be “mounted”.
Lastly I created a few logical datasets for my data. Yes, you could use a single dataset, but quotas make handling of multiple ones worth it:
zfs create -o mountpoint=/mnt/Data/Family -o quota=768G Data/Family
zfs create -o mountpoint=/mnt/Data/Install -o quota=256G Data/Install
zfs create -o mountpoint=/mnt/Data/Media -o quota=512G Data/Media
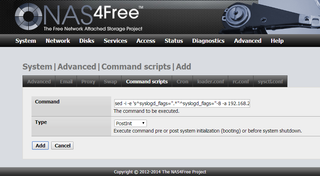
As I am way too lazy to login after every reboot, I also saved my password into the password.zfs file on the TmpUsb self-erasable USB drive. A single addition to System->Advanced->Command scripts as a postinit step was need to do all necessary initialization:
/etc/rc.d/zfs onestop ; mkdir /tmp/TmpUsb ; mount_msdosfs /dev/da1s1 /tmp/TmpUsb ; geli attach -j /tmp/TmpUsb/password.zfs /dev/label/disk0 ; geli attach -j /tmp/TmpUsb/password.zfs /dev/label/disk1 ; umount -f /tmp/TmpUsb/ ; rmdir /tmp/TmpUsb ; /etc/rc.d/zfs onestart
All this long command does is mounting of the FAT12 drive containing the password (since it was recognized as da1 its first partition was at da1s1) and uses file found there for attaching encrypted devices. Small restart of ZFS subsystem is all that is necessary for pool to reappear.
As I wanted my TmpUsb drive to be readable under Windows, it is not labeled and thus manual script correction might be needed if further USB devices are added.
However, for now, I had my NAS box data storage fully up and running.
Other ZFS posts in this series:


