Microsoft Windows and all that goes with it

Fixing Bootable VHD

Illustration

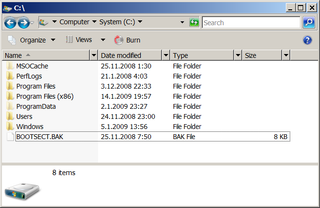
I have installed Windows 7 to VHD (Virtual Disk) file a while back now. I did like it, so I killed Vista and decided to install Windows 7 on my primary partition also. During installation of it, I formatted boot partition. Unfortunately, that also killed any possibility to boot into Windows 7 system within virtual disk file.

In order to boot from this disk image, some play with bcdedit is needed (in elevated prompt). First we need to discover identifier of our original installation (marked red in following text). Once we have it, we can make a copy and perform all further editing on newly created entry (marked blue). Then we set device and osdevice settings. With that step, we are ready for booting. Here are exact commands that worked for me:

C:\bcdedit /v
...
Windows Boot Loader
-------------------
identifier       {2fae45a6-f1ca-11dd-bde6-c5438ada3082}
device           partition=C:
path             \Windows\system32\winload.exe
description      Windows 7
locale           en-US
inherit          {6efb52bf-1766-41db-a6b3-0ee5eff72bd7}
recoverysequence {2fae45a7-f1ca-11dd-bde6-c5438ada3082}
recoveryenabled  Yes
osdevice         partition=C:
systemroot       \Windows
resumeobject     {2fae45a5-f1ca-11dd-bde6-c5438ada3082}
nx               OptIn


C:\bcdedit /copy "{original_id}" /d "Windows 7 VHD"
The entry was successfully copied to {2fae45a9-f1ca-11dd-bde6-c5438ada3082}.

C:\bcdedit /set "{new_id}" device "vhd=[D:]\Virtual Machines\Native\Windows7.vhd"
The operation completed successfully.

C:\bcdedit /set "{new_id}" osdevice "vhd=[D:]\Virtual Machines\Native\Windows7.vhd"
The operation completed successfully.

C:\bcdedit /v
...
Windows Boot Loader
-------------------
identifier       {2fae45a9-f1ca-11dd-bde6-c5438ada3082}
device           vhd=[D:]\Virtual Machines\Native\Windows7.vhd,locate=custom:12000002
path             \Windows\system32\winload.exe
description      Windows 7 VHD
locale           en-US
inherit          {6efb52bf-1766-41db-a6b3-0ee5eff72bd7}
recoverysequence {2fae45a7-f1ca-11dd-bde6-c5438ada3082}
recoveryenabled  Yes
osdevice         vhd=[D:]\Virtual Machines\Native\Windows7.vhd,locate=custom:22000002
systemroot       \Windows
resumeobject     {2fae45a5-f1ca-11dd-bde6-c5438ada3082}
nx               OptIn

If you moved image from another system and you with to boot from it, you may also need to turn on HAL detection:

C:\bcdedit /set "{new_id}" detecthal on
The operation completed successfully.

At this point, there is nothing more to do. You may restart and boot into your favorite VHD.

[2009-05-17: Adjusted bcdedit commands so they work both in cmd.exe and in PowerShell]

Bluetooth on Windows Server 2008

Illustration

One of things that differs Windows Server 2008 from Windows Vista is lack of bluetooth. For some reason it was decided somewhere is Microsoft that bluetooth is not a feature for server operating system. While I may partly agree that on real server there is no need for bluetooth, one needs to remember that before anything gets installed on production servers, it needs to be tested. Usually that testing is done on any machine that is available. That often is just some old workstation or notebook. Those computers often do have bluetooth and, since testing can last for few months, sooner or later some bluetooth device comes up.

There is option of installing bluetooth stack from your bluetooth manufacturer. But, not only those stacks are little bit overkill for just connecting your mouse, most of devices these days lack the CD with stack altogether. Manufacturers got so accustomed on people having default stack installed that they do not bother even creating custom one. Even those that have stack available (Broadcom, Toshiba…), bury it deep inside of website.

Cheating

Another way to get a bluetooth stack is to use Vista drivers. Although for almost all other drivers there is complete compatibility of drivers (in sense that you can install Vista drivers on 2008 and have them working), bluetooth stack cannot be installed directly. Solution is to adapt procedure a little.

On Windows Vista (yes, we need Vista) go to “C:\Windows\System32\DriverStore\FileRepository” directory and start search for “*bth*” (notice star before bth). That will get you quite a few hits. Just copy everything that appears in one folder (do not keep folder structure) and has .inf, .sys or .exe extension (no need for .pnf files). That will give you quite a few files and with subdirectories’ files included (e.g. fsquirt.exe), you have all files. You do not need to worry about duplicate files. One copy of each file will do.

Now you need to edit all .inf files. Just open them all and change any appearance of “NTamd64…1” to “NTamd64…3” (two appearances per file). This tells windows that those files support both desktop and server operating system.

You can go into Windows Server 2008 now and when asked for bluetooth drivers, just give it a path to that directory where all work was done. Drivers will install as normally and you will have your bluetooth working.

Windows 7 Videos

Illustration

Here are some Windows 7 videos that I found useful and educating. They are all from Microsoft’s own Channel 9.

Mark Russinovich: Inside Windows 7

This one is a real gem. It is hard to pinpoint subject since they go all around Windows 7 topics, but if you are a developer or just guy who likes to know technical details - this is video to look. If you are searching for some more details on startup/shutdown workings, there is another video (from Chittur Subbaraman) for you also.

Windows 7 New Taskbar - An Overview

To get a grasp on how exactly new taskbar works, you may wish to see this. If you like this check other videos of same series. They additionally deal with its design, internals and jump lists.

A lap around Windows 7 new Scenic Ribbon

Introduction to ribbon interface. Nothing new for those who already worked with Office 2007. For more technical details, you may want to watch this also.

Larry Osterman: Windows 7 Audio - What’s New

Some changes in area where nobody seemed to have a problem. :)

Windows 7: Find and Organize Part 1 - The User Experience

This one is about new way of organizing things inside Windows 7 (libraries and such stuff). If you are developer, part 2 may interest you.

Life With 7

Illustration

I played for some while with VHD installed Windows 7 and I enjoyed. After few boots I even selected it to be default. There were some small issues, but biggest one was unfortunate choice of .vhd medium. Booting was slow (few minutes).

Last night I installed Windows 7 on my first partition, overwriting Windows Vista, and thus making it my only boot choice. I do hope that I won’t be sorry for this decision.

Big change when compared with .vhd booting? Yes - I am back in sub-minute boot range.

Windows Installer 5.0

Illustration

Windows 7 and Windows 2008 R2 will come with Windows Installer 5.0. Main reason for my happiness is not having to install any prerequisites for SQL Server 2008 on those platforms (currently: Windows Installer 4.5 and PowerShell 2.0).

Except for that there is no significant change. I would just point to Hyperlink Control which is long over due and MSIFASTINSTALL attribute if you wish to shorten time for installations.

It will be available for platforms ranging from Windows 2000 and above.

No Beta 2

As noted on Engineering Windows 7 blog, there will be no beta 2 for Windows 7. Next version will be Release Candidate and final version after that. Although timeline was not given, it seems to me that we will have it this year.

Versions

Illustration

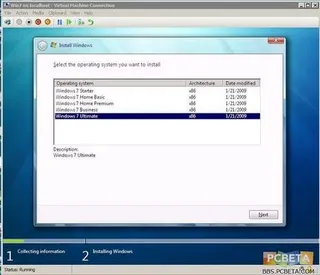
Tom’s Hardware got its hands on Windows 7 build 7025. As you can see, Windows 7 seems to be on Vista path regarding six different versions (don’t forget enterprise).

I find this situation quite annoying. Not only that it creates confusion which version has what but it also creates problems when I want to upgrade (Croatian customers are not worthy to upgrade over Internet).

What is wrong with three versions only: Home, Business and Ultimate.

Home would be same like Home Premium (most of computers come with this anyhow). Business would be the same as now. Ultimate would have it all.

All visual features of Windows 7 (new taskbar, gadgets and other stuff) should be available in all versions and customers would not wonder why Windows 7 doesn’t look anything similar to what they saw on other computer (e.g. Vista Basic problem).

I would find this system much easier to live with.


[Unfortunately, Microsoft went with it’s six pack scheme. It is Starter, Home Basic, Home Premium, Professional, Enterprise, Ultimate]

Windows 2008 Workstation

Windows 2008 Server was publicized as greatest OS ever. It did share its base with Windows Vista but it was “sooooo much better”. Some guys even advocated use of it as client OS for power users.

Since one Belgian MVP deemed me worthy of MSDN Premium subscription (I hope that it will last until Windows 7 is out) I decided to take full advantage of it and download Windows 2008 Server (Standard Edition). Since I wanted to try everything it has to offer I gave it home on my new laptop - 64-bit capable. Plan was to install it over Vista since I haven’t anticipated any problems and that Hyper-V thing looked worth sacrificing all disk space for.

Illustration

Installation procedure looked strangely familiar but after installation finished and everything booted up, I saw worst looking Windows interface ever. It looks like old lady with face stretched from all plastic surgeries she had in order to look younger. But no matter how persistent, at one point she needs to admit that there are more better looking young girls than her and just give up on whole “young look” thing. For me first impression with 2008’s default theme was just that. Once good looking interface ruined by all breadcrumbs, column modifiers (if they are called like that), some blue/green buttons sticking out… You can see that it was not designed for that. I do know that you can get that same look in Windows Vista if you go on classic road but normal person will never see it since default is Basic theme (or Aero if your card is detected by installation). Does it take that much memory to show Vista Basic look by default and put this old interface to retirement?

Additional steps

Since I wanted system to look and behave like Vista (good parts of Vista), I needed to install some additional stuff. First there was Desktop Experience installation. After that you don’t get anything since you need to start Themes service manually (!). I needed sound so I started Audio service also (was it so hard to make it a checkbox choice at features window?) Since I do search a lot, Windows Search was installed next. I found installation procedure for SuperFetch also but it required some changes that I was not comfortable with. Of course I installed Hyper-V. That is one feature that could make whole procedure worth the pain of doing everything manually.

Good

It is stable and looks just like Vista. Quite a lot of people didn’t even notice that there was server on my laptop. Also every program and driver that worked on Vista, worked here also. I didn’t notice that it was anything faster than Vista, but I cannot say that it was any slower. Since no benchmarks were taken, take this as my “feels good” grade.

I liked Hyper-V very much. It is hard to say anything more in details about such non-interesting topic like virtualization so “liked it very much” will suffice for now.

Bad

Someone decided that Server doesn’t need any bluetooth drivers. Never mind fact that those drivers came with Vista and as such already had Microsoft’s stamp of approval. Never mind all administrators which were used to install new OS on any computer they can get hold of (testing it before deployment). You couldn’t even use drivers from Vista since some file parameters didn’t match. However, with small file change I did manage to install them but whole episode leaves bitter taste.

I do not have slow laptop. 2+ GHz dual core processor, 4 GB of RAM and 250 GB hard drive are good figures (in my opinion at last). That is why I hated to be laughing object of friends when I played music and tried to do anything else. Whenever there was any activity on system, Windows Media player would pause for part of a second and then continue with playing thus producing nice stuttering effect. No other player had any problems so I assume that this was some optimization on Microsoft’s side - thanks for nothing. [2009-01-26: Yes indeed, that was an optimization]

I also had some problems with non-Microsoft software. Some programs detect that you are running server version and thus deduce that some more money for their software would be great. Why same software is more valuable if I use it on different system - I do not know.

Ugly

Hyper-V is great but consequence of it is not. Once Hyper-V role is activated you lose your sleep. For some reason Microsoft decided to kill sleep option if Hyper-V is installed. Although I cannot figure why implementing support for sleep is so hard - Hyper-V does have pause button. Just pause all machines when going to sleep. Idiotic thing is that computer will not have sleep enabled even if you are not running any virtual machines. What is rationale for this?

What do I run now?

Windows Vista. It is just so much more user friendly.

Although occasionally I wake up crying for Hyper-V.

VHD Install

With Windows 7 (and Windows 8 also) there is one great possibility that was not there before - booting from VHD files (a.k.a. virtual disks). Great thing about that is possibility to install new operating system (works for Windows 7 and Windows 2008 R2) without killing of your original installation (Vista in my case). Unlike installing it in Virtual PC/Server or Hyper-V, here that OS is working on bare metal. All drivers are accessible. It is just like dual boot but without hassle of repartitioning your drive. For more details on how it exactly works, you can take a look at Mark Russinovich’s TechEd lecture about that feature.

As with much of beta features, there is little bit more command line work required for this to work. I found a lot of guides on Internet, but none of them worked for me and most of them included playing with bcdedit which is no longer needed (as of beta 1). It does seem that quite a lot of them was written before Windows 7 public beta and nobody updated them. I will share with you what worked for me as quickest way to do installation without unnecessary steps.

Booting installation

Illustration

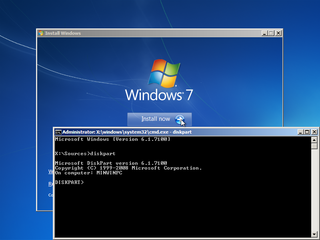
First step is to boot into Windows 7 (or Windows 2008 R2) installation. On installation screen press Shift+F10 and you will be presented with Command prompt. That is our destination for now.

Creating virtual disk file

In this example I will create 20 GB VHD file but you can select whichever size you want.

We need to use DISKPART in order to get anywhere.

DISKPART
CREATE VDISK FILE="D:\Virtual Machines\Native\Windows7.vhd" MAXIMUM=20480 TYPE=FIXED
SELECT VDISK FILE="D:\Virtual Machines\Native\Windows7.vhd"
ATTACH VDISK
EXIT

Because of some weird reason (or bug), creating virtual disk file (CREATE VDISK) with path longer than 14 characters kept failing with “The pathname for a virtual disk must be fully qualified.” error. Workaround was to create VHD file at root (and choose short file name) and move it to desired place afterwards. Other commands (SELECT VDISK and ATTACH VDISK) do not mind long file names, so rest of procedure is just fine. [2009-01-22: As I was informed, problem is in using “Windows” as part of name. If you select name without that word, everything goes fine]

Although CREATE VDISK creates dynamic disk (extends as needed) by default, I use fixed since performances are slightly better and Windows 7 tends to extend dynamic disk anyhow to its maximum size during installation. Please notice that CREATE VDISK step will take quite a while if you create fixed disk so be patient (or go with dynamic one).

You could use already existing virtual disk file but there are some reports that it has problems with Virtual PC/Server generated files. Cannot confirm that since I haven’t tried that my self. I did tried one already existing fixed Hyper-V virtual disk file and it worked without problems.

Installing

Illustration

After attaching virtual disk file we can continue with installation. I saw some guides going through BCDEDIT in order to set some parameters but there is no real need (at least with Windows 7 beta 1) for it.

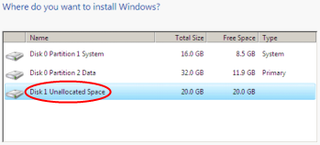
As install type select Custom and you will get drive selection among which virtual disk file is also visible.

There will be small warning at the bottom that says “Windows cannot be installed to Disk X Partition Y”. This may seem troubling but as you take a look to details, there is slightly different wording of message. It says that it “may not support booting to this disk” through BIOS. Since we are not going through BIOS booting process (remember, this is just file on disk), we can just safely ignore this message and click on “Next”.

Installation will then go as usual and after some time and few restarts, your system will be ready for usage.


[2009-05-05: Clearing up some issues]

Booting Windows 7 Installation From USB Drive

Illustration

Windows 7 gives us possibility to install itself from USB drive (yes, you can do it with Windows Vista also). This is, at least in my eyes, great option since USB is much faster and comfortable option to work with. It is much easier to take USB than to burn DVD each time I need to install Windows on some computer.

Procedure to make USB proper boot drive is done with DISKPART utility.

DISKPART
LIST DISK

SELECT DISK 

CLEAN
CREATE PARTITION PRIMARY
SELECT PARTITION 1
FORMAT FS=FAT32 QUICK
ACTIVE
EXIT

Please take great care which disk you select (my USB is marked red). If you select wrong one, you WILL lose your data.

If format gives you error that file system is unsuitable for formatting just unplug USB and repeat whole procedure. For some reason that solves all formatting problems. You can also format it from Explorer window and continue with next diskpart command if that is more convenient.

After everything is done, mount/insert Windows 7 (or Vista) installation DVD. Notice which drive letter is it (mine is F:) and which drive letter is your USB (mine is W:). Then copy all files from one to another using xcopy:

XCOPY ^^F:^^*.* /e /f ^^W:^^\

After everything is copied, your drive is ready.

If booting does not work, be sure to enable Legacy USB support in BIOS. It worked for me.