Programming in C#, Java, and god knows what not

Farewell Mercurial

My first love when it comes to distributed source control systems was Mercurial. It was powerful, simple, and it had excellent Windows client. Compared to Source Safe and CVS I was using before, it was a heaven.

While I first dabbled with local repositories, it wasn’t too long until I found BitBucket. As it was free for up to five users it seemed like a perfect home for many of my projects - both public and private. Yes, Git was getting popular at the same time but I preferred Mercurial. However, as more and more people started using Git, I switched.

Even when I switched to Git, I still continued keeping some projects on BitBucket - especially those where I collaborated with other users. It was simply much easier to get them used to TortoiseHg than to Git. For inexperienced user there was a real benefit in all restrictions Mercurial had by default.

Unfortunately, less than a year from now BitBucket will kill off Mercurial support.

I fully understand them. There was simply not enough Mercurial users out there to make it work. Even when I look at my own repositories, Mercurial is only a small fraction of my commits. However, I am still sad to see an old friend gone.

My guess I’ll convert most of my remaining repositories to Git. Considering how integrated Git got over the years with other tools, I am sure quite a few of shared repositories will go Git route too. For rest, I guess I’ll need to find another home.

Implementing Global Hotkey Support in QT under X11

High-level description of global hotkey support is easy enough:

bool registerHotkey(QKeySequence keySequence) {
  auto key = Qt::Key(keySequence[0] & static_cast<int>(~Qt::KeyboardModifierMask));
  auto modifiers = Qt::KeyboardModifiers(keySequence[0] & static_cast<int>(Qt::KeyboardModifierMask));

  return nativeRegisterHotkey(key, modifiers);
}

Essentially one has to split key sequence into a key and modifiers and get platform-specific code to do the actual work. For X11 this is a bit more involved and full of traps.

Inevitably, X11-specific code will have a section with conversion of key and modifiers into a X11-compatible values. For key value this has to be additionally converted from key symbols into 8-bit key codes:

bool Hotkey::nativeRegisterHotkey(Qt::Key key, Qt::KeyboardModifiers modifiers) {
  uint16_t modValue = 0;
  if (modifiers & Qt::AltModifier)     { modValue |= XCB_MOD_MASK_1; }
  if (modifiers & Qt::ControlModifier) { modValue |= XCB_MOD_MASK_CONTROL; }
  if (modifiers & Qt::ShiftModifier)   { modValue |= XCB_MOD_MASK_SHIFT; }

  KeySym keySymbol;
  if (((key >= Qt::Key_A) && (key <= Qt::Key_Z)) || ((key >= Qt::Key_0) && (key <= Qt::Key_9))) {
    keySymbol = key;
  } else if ((key >= Qt::Key_F1) && (key <= Qt::Key_F35)) {
    keySymbol = XK_F1 + (key - Qt::Key_F1);
  } else {
    return false; //unsupported key
  }
  xcb_keycode_t keyValue = XKeysymToKeycode(QX11Info::display(), keySymbol);

  xcb_connection_t* connection = QX11Info::connection();
  auto cookie = xcb_grab_key_checked(connection, 1,
                static_cast<xcb_window_t>(QX11Info::appRootWindow()),
                modValue, keyValue, XCB_GRAB_MODE_ASYNC, XCB_GRAB_MODE_ASYNC);
  auto cookieError = xcb_request_check(connection, cookie);
  if (cookieError == nullptr) {
    return true;
  } else {
    free(cookieError);
    return false;
  }
}

With key code and modifier bitmask ready, a call to xcb_grab_key_checked will actually do the deed, followed by some boiler plate code for error detection.

At last, we can use event filter to actually capture the key press and emit activated signal:

bool Hotkey::nativeEventFilter(const QByteArray&, void* message, long*) {
  xcb_generic_event_t* e = static_cast<xcb_generic_event_t*>(message);
  if ((e->response_type & ~0x80) == XCB_KEY_PRESS) {
    emit activated();
    return true;
  }
  return false;
}

Mind you, this is a rather incomplete and simplified example. Full code (supporting both Windows and Linux) is available for download.

To use it, just assign instance to a long living variable, register a key sequence, and hook into activated signal:

_hotkey = new Hotkey();
_hotkey->registerHotkey(QKeySequence { "Ctrl+Shift+F1" });
connect(_hotkey, SIGNAL(activated()), this, SLOT(^^onActivated()^^));

PS: Windows variant of this code is available here.

Implementing Global Hotkey Support in QT on Windows

If your application needs a global hotkey support, QT will leave you hanging. Fortunately, on high-level this is a rather simple function:

bool registerHotkey(QKeySequence keySequence) {
  auto key = Qt::Key(keySequence[0] & static_cast<int>(~Qt::KeyboardModifierMask));
  auto modifiers = Qt::KeyboardModifiers(keySequence[0] & static_cast<int>(Qt::KeyboardModifierMask));

  return nativeRegisterHotkey(key, modifiers);
}

Essentially the only work is splitting key and modifiers into their own variables and then having platform-specific code handling the nasty bits.

For Windows, this is just a simple conversion of modifiers and keys followed by a call to RegisterHotKey API:

bool nativeRegisterHotkey(Qt::Key key, Qt::KeyboardModifiers modifiers) {
  uint modValue = 0;
  if (modifiers &  Qt::AltModifier) { modValue += MOD_ALT; }
  if (modifiers &  Qt::ControlModifier) { modValue += MOD_CONTROL; }
  if (modifiers &  Qt::ShiftModifier) { modValue += MOD_SHIFT; }

  uint keyValue;
  if (((key >= Qt::Key_A) && (key <= Qt::Key_Z)) || ((key >= Qt::Key_0) && (key <= Qt::Key_9))) {
    keyValue = key;
  } else if ((key >= Qt::Key_F1) && (key <= Qt::Key_F24)) {
    keyValue = VK_F1 + (key - Qt::Key_F1);
  } else {
    return false; //unsupported key
  }

  return RegisterHotKey(nullptr, _hotkeyId, modValue, keyValue);
}

But this alone is nothing without actual QAbstractNativeEventFilter-based event filter. Here we need to intercept message and emit the signal:

bool nativeEventFilter(const QByteArray&, void* message, long*) {
  MSG* msg = static_cast<MSG*>(message);
  if (msg->message == WM_HOTKEY) {
    if (msg->wParam == static_cast<WPARAM>(_hotkeyId)) {
      emit activated();
      return true;
    }
  }
  return false;
}

Mind you, this is a rather incomplete and simplified example. Full code (supporting both Windows and Linux) is available for download.

To use it, just assign instance to a long living variable, register a key sequence, and hook into activated signal:

_hotkey = new Hotkey();
_hotkey->registerHotkey(QKeySequence { "Ctrl+Shift+F1" });
connect(_hotkey, SIGNAL(activated()), this, SLOT(^^onActivated()^^));

PS: X11 variant of this code is available here.

Single Instance Application in QT

Single instance applications are fun in any programming language. Let’s take QT as example. One could just create a server and depending on whether it can listen, determine if another instance is running. Something like this:

server = new QLocalServer();
bool serverListening = server.listen("SomeName");

if (!serverListening) {
  //hey, I'm walkin over here
}

And that’s it. Only if it would be this easy.

This code might fail on Unix with AddressInUseError if there was a previous application crash. This means we need to complicate code a bit:

server = new QLocalServer();
bool serverListening = server.listen("SomeName");
if (!serverListening && (server->serverError() == QAbstractSocket::AddressInUseError)) {
  QLocalServer::removeServer(serverName); //cleanup
  serverListening = _server->listen(serverName); //try again
}

if (!serverListening) {
  //hey, I'm walkin over here
}

But fun wouldn’t be complete if that was all. You see, Windows have issues of their own. As implemented in QT, you can actually have multiple listeners at the same time. Failure to listen will never happen there.

Unfortunately this is a bit more complicated and you can really go wild solving this issue - even so far as to involve QSystemSemaphore with it’s portability and thread blocking issues.

Or you can go with solution that works 99% of the time - directly calling into CreateMutexW API.

Modifying code in the following manner will do the trick:

server = new QLocalServer();
bool serverListening = server.listen("SomeName");
if (!serverListening && (server->serverError() == QAbstractSocket::AddressInUseError)) {
  QLocalServer::removeServer(serverName); //cleanup
  serverListening = _server->listen(serverName); //try again
}

#if defined(Q_OS_WIN)
  if (serverListening) {
    CreateMutexW(nullptr, true, reinterpret_cast<LPCWSTR>(serverName.utf16()));
    if (GetLastError() == ERROR_ALREADY_EXISTS) { //someone has this Mutex
      server->close(); //disable server
      serverListening = false;
    }
  }
#endif

if (!serverListening) {
  //hey, I'm walkin over here
}

Now on Windows we try to create our very own mutex. If that succeeds, all is normal. If that returns an error, we simply close our server because we know some other instance owns the mutex.

Not ideal but it covers single-instance scenario reasonably well.

If you want to use this in application, you can download the example and use it as follows:

if (!SingleInstance::attach()) {
  return static_cast<int>(0x80004004); //exit immediately if another instance is running
}

QSystemTrayIcon Not Showing Under Ubuntu

I wanted a simple system tray application that would work on both Windows and Linux. As C# doesn’t really have a proper GUI for Linux (albeit you can come a long way using Windows Forms), I decided to go with QT.

Showing system tray was really easy:

_tray = new QSystemTrayIcon(this);
connect(_tray, SIGNAL(activated(QSystemTrayIcon::ActivationReason)),
         this, SLOT(onTrayActivate(QSystemTrayIcon::ActivationReason)));

_tray->setIcon(trayIcon);
_tray->setToolTip(QCoreApplication::applicationName());
_tray->show();

Under Windows it worked beautifully. Under Ubuntu - not so. QT example for tray icon was pretty much equivalent and it worked flawlessly. But my simple example just wouldn’t. It took me a while but I traced the issue.

Upon click I wanted to display a context menu. It seemed innocent enough to dynamically create it:

void MainWindow::onTrayActivate(QSystemTrayIcon::ActivationReason reason) {
  switch (reason) {
    case QSystemTrayIcon::Context: {
      QMenu menu(this);
      menu.addAction("&Show", this, SLOT(onTrayShow()));
      menu.addSeparator();
      menu.addAction("E&xit", this, SLOT(onTrayExit()));

      menu.exec(QCursor::pos());
    } break;

    case QSystemTrayIcon::DoubleClick: {
      onTrayShow();
    } break;

    default: break;
  }
}

And this works under Windows. But Ubuntu and it’s Unity GUI don’t really know what to do with tray icon without preassigned context menu. And thus tray icon is never actually displayed.

Once I figured that out, solution was simple. Just assign menu statically:

_tray = new QSystemTrayIcon(this);
connect(_tray, SIGNAL(activated(QSystemTrayIcon::ActivationReason)),
         this, SLOT(onTrayActivate(QSystemTrayIcon::ActivationReason)));

QMenu* trayMenu = new QMenu(this);;
trayMenu->addAction("&Show", this, SLOT(onTrayShow()));
trayMenu->addSeparator();
trayMenu->addAction("E&xit", this, SLOT(onTrayExit()));
_tray->setContextMenu(trayMenu);

_tray->setIcon(trayIcon);
_tray->setToolTip(QCoreApplication::applicationName());
_tray->show();

Detecting Status Bar Double-Click in VSCode Extension

If you’re developing Visual Studio Code extension that deals with statusbar, you might have noticed that it’s activated with a single click. Yes, there is no way to specify double-click behavior. But what if you really, really, want that double-click? Well, you can use trickery.

For example, you can use a timer to help you out:

var doubleClickTimerId

vscode.commands.registerTextEditorCommand("statusbar.command", () => {
  if (!doubleClickTimerId) { //if timer still exists, it's a double-click
    doubleClickTimerId = setTimeout(singleClick, 250); //do single-click once timer has elapsed
  } else {
    clearTimeout(doubleClickTimerId) //cancel timer
    doubleClickTimerId = undefined

    //code for double-click
  }
})

function singleClick() {
  clearTimeout(doubleClickTimerId) //cancel timer
  doubleClickTimerId = undefined

    //code for single click
}

On first click this code will setup a callback to be executed in 250 ms. If nothing else happens, after timer has elapsed, function singleClick will be called and your single-click code will be executed.

However, if another click happens before timer elapses, statusbar command will cancel the timer and execute the double-click code.

Final effect is that any clicks slower than 250 ms get detected as independent while all faster clicks get a double-click treatment - exactly what we wanted.

PS: If you’re wondering why I needed this, it was for my Code Point extension. Single click changes between display style for Unicode character while double click sends you to a web page with much more information.

Using Visual Studio Code for .NET Framework Projects in C#

As Visual Studio Code is the only completely free member of Visual Studio family now that Visual Studio Express is gone (and no, Community edition doesn’t count as a proper replacement), I wanted to have some of my projects debuggable from within it. While .NET Core works out of box, it takes a bit of effort to setup a full .NET Framework project.

First step is, of course, hunt on Stack Overflow. If you are lucky you might find a guide how to do it that actually works perfectly once you do a few modifications to your project. However, depending on your project, you might not need to go that far.

To start, destination computer will require something that can build your projects. Since installing Visual Studio makes the whole exercise a bit pointless, go and download Build Tools for Visual Studio 2019.

To your Visual Studio Code workspace add familiar .vscode directory and add tasks.json that will build your project. Based on a few of my .NET Framework projects, I found the following common denominator to do wonders (of course, change name of solution and exact path to your source and binaries):

{
  "version": "2.0.0",
  "tasks": [
    {
      "label": "build",
      "dependsOn": [ "clean" ],
      "type": "process",
      "windows": {
        "command": "C:\\Program Files (x86)\\Microsoft Visual Studio\\2019\\Community\\MSBuild\\Current\\Bin\\amd64\\msbuild.exe",
        "args": [
          "-p:Configuration=Debug;DebugType=portable;PlatformTarget=x64",
          "^^Solution.sln^^"
        ]
      },
      "options": { "cwd": "${workspaceFolder}/^^Source^^/" },
      "group": "build"
    },
    {
      "label": "clean",
      "type": "shell",
      "windows": {
        "command": "DEL",
        "args": [ "^^.\\Binaries\\*^^" ]
      }
    }
  ]
}

Here you can already see the trick - we’re adding parameters as argument to MSBuild instead of modifying the project file. I found that most projects (definitely all I tried) are only missing portable debug type and x64 as a platform target (I am still sucker for Any CPU). If it doesn’t work for you, go and check the original article to see if something else is missing.

And the last step is placing launch.json into .vscode directory (again, adjust names):

{
  "version": "0.2.0",
  "configurations": [
    {
      "name": ".NET Framework Launch",
      "type": "clr",
      "request": "launch",
      "preLaunchTask": "build",
      "program": "^^Program.exe^^",
      "args": [],
      "cwd": "${workspaceFolder}/^^Binaries^^/",
      "stopAtEntry": false
    }
  ]
}

This should be sufficient to get you debugging in a pinch.

Using InnoSetup to Convert LF to CRLF For Read-Only Files

My application setup was tasked with installing README.txt file. As Windows versions before 10 have trouble dealing with LF characters, I needed a way to convert line endings to CRLF.

I thought that was easy, I just needed to call AfterInstall:

Source: "..\README.md"; DestDir: "{app}"; DestName: "ReadMe.txt"; Attribs: readonly; AfterInstall: AdjustTextFile;

and then call a simple function:

[code]
procedure AdjustTextFile();
var
  path : String;
  data : String;
begin
  path := ExpandConstant(CurrentFileName)
  LoadStringFromFile(path, data);
  StringChangeEx(data, #10, #13#10, True);
  SaveStringToFile(path, data, False);
end;

However, this didn’t work. While code seemingly worked without an issue, it wouldn’t save to read-only file. Yep, our read-only flag was an issue.

While this meant I had to change my InnoSetup project to install file without read-only attribute set, nothing prevented me setting attribute (after I wrote corrected line endings) using a bit of interop magic:

[code]
function SetFileAttributes(lpFileName: string; dwFileAttributes: LongInt): Boolean;
  external 'SetFileAttributesA@kernel32.dll stdcall';

procedure AdjustTextFile();
var
  path : String;
  data : String;
begin
  path := ExpandConstant(CurrentFileName)
  LoadStringFromFile(path, data);
  StringChangeEx(data, #10, #13#10, True);
  SaveStringToFile(path, data, False);
  SetFileAttributes(path, 1);
end;

Installing QT Creator on Ubuntu

Illustration

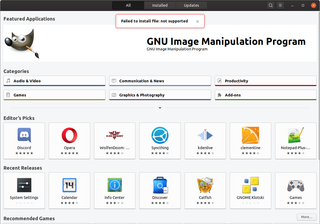
Those wanting to play with QT will probably end up installing QT Creator package. While, strictly speaking, you can make QT applications also without it, a lot of things get much simpler if you use it - most noticeable example being GUI design.

After download, installation is really simple:

chmod +x ~/Downloads/qt-unified-linux-x64-3.0.6-online.run
sudo ~/Downloads/qt-unified-linux-x64-3.0.6-online.run

However, I wouldn’t write this post if it was so easy.

Indeed, in Ubuntu, this will seemingly install everything until you try to make a project in QT Creator. There you’ll be stopped with “No valid kits found.” message. Cause of this is missing QT version selection as None will be only option on a clean system. To get offered more, a few additional packages are required:

sudo apt-get install --yes qt5-default qtdeclarative5-dev libgl1-mesa-dev

Once these packages are installed, you’ll be able to modify your Desktop kit definition and select correct version. Finally, you can finish creating the project and get onto coding.

Visual Studio 2019

Illustration

Visual Studio 2019 is among us and, thanks to multiple release previews, it seems as it was always here. From C# developer point of view, it’s not a revolution but a nice, steady improvement.

The first change you will notice is the new Start window. While it can get crowded if you deal with a lot of projects and it could definitely use a search function, it’s much better than what Visual Studio 2017 had to offer.

The next visual change is that menu got merged with title bar. While this has no functional impact on menu management, it does provide your editor with much needed vertical space. You can see that this was coded by young developers as you cannot blindly double-click at 0,0 to close solution anymore.

The most important new feature for me as a C# developer is break point on data. While I didn’t need it often, I definitely felt C++ envy when I did. Now C# developers can simply set a single breakpoint on data itself instead peppering bunch of them all over the code hoping to catch the rogue update.

Visual Studio Live Share is feature I could see used massively in teaching environment. A long time ago I taught coding and the most difficult part was going over examples on projected screen. It was annoying having to setup Visual Studio specially for projector (e.g. text size) instead of my standard environment. Now presenter gets to work in his own environment and each other connected party (read-only or editable) gets to use their settings too. Pure comfort. :)

There is quite a few other improvements, be it in performance or new flows and you can check release notes for more information.

Or, since Download is available, install and enjoy!