Home automation related content

HA Redirect

Illustration

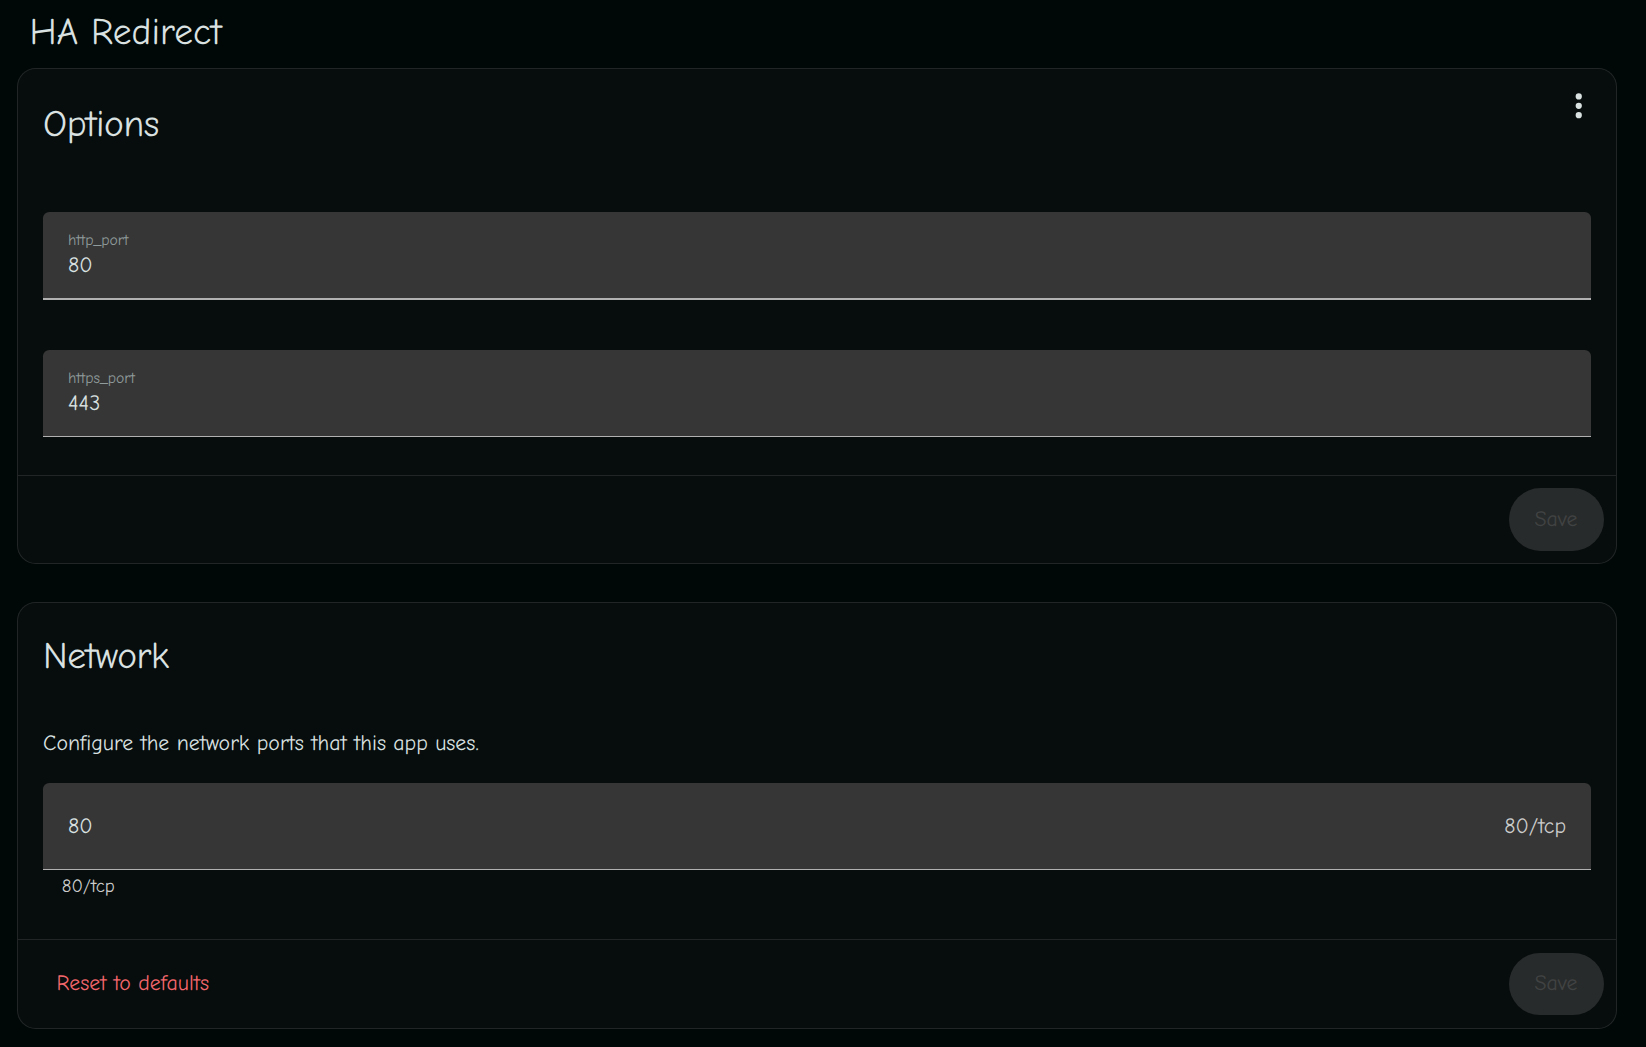
One of the first thing you ought to do with Home Assistant is to setup SSL/HTTPS. It is mandatory if you plan to expose it to the world and good idea even on your local network. But one thing was bugging me when I got my HTTPS setup. Home Assistant wouldn’t redirect good old port 80 requests to the new HTTPS port. Nope, it would just listen on port 443.

And yes, strictly speaking, that is acceptable behavior. But, after being redirected to error page one more time, I decided to do something about it.

After messing a lot with Nginx add-in, I figured that either I am doing something wrong or Nginx add-on simply cannot be configured to do what I want. And, realistically, I needed something much simpler than that. As it often happens, I decided to see how hard is it to make Home Assistant add-on. Good new - it is not that hard.

Fruit of that research is HA Redirect add-on. It is a simple Alpine-based nginx installation that will listen on port 80 (configurable). And the only thing that it does is a humble redirect.

At the same time, I think it is a great example of minimal Home Assistant add-on. It is as close as one can get to the bare minimum while still providing a service.

Now, this app might not be needed for everybody. Maybe you were more successful in setting up Nginx add-on or this “issue” doesn’t bother you because you use HSTS so https redirect will be remembered. Or you were better than me at finding already existing solution. But, if you do have the same issue I had, this add-on might be for you.

Project is available on GitHub.

Looping onto Oneself

Most of my home automations are on YoLink. LoRA was the only thing that actually worked end-to-end so I went with it first. However, I do have a small Zigbee network for sensors. And connectivity in small networks without many (if any repeaters) is the reason I recommend SmLight’s MR4U.

Having MR4U brings a “standard” benefit of moving radios from computer. However, if you have only Zigbee network, it brings another unexpected benefit - extra router. My setup uses CC2674P10 as a Zigbee coordinator and EFR32MG26 as a Zigbee router.

I decided to use CC2674P10 as a Zigbee coordinator because I wanted to “reserve” EFR32MG26 for future Thread-over-Matter devices. However, since I don’t have any Matter devices and my network is small, in meantime I flashed Zigbee router firmware on it. That way I got two antennas to play with. I can setup my coordinator antenna to one orientation while my router on the opposite side can be oriented independently. If you have devices on the edge, antenna orientation helps a lot. Having two antennas is priceless.

Now, as your Zigbee network expands with more router capable devices (e.g. wall switches, outlet plugs, etc.) this becomes superfluous. A router at another location will always beat one router next to another. However, i a small networks as mine, your edge devices will be thankful.

Automatic Light Out

In my home I use YoLink switches for (smart) lights. While you can do a lot of control from their app, sooner or later you’ll end up with Home Assistant for automations.

In my case, I wanted a simple 2 minute timer every time my light switch gets pressed. Since each switch has additional 2 buttons, I wanted to use them to extend light-on state to 30 and 60 minutes. And most importantly, light automation should survive Home Assistant restart. Yes, one can probably just check lights manually after a restart, but I promise one won’t. So, it’s best to make restart survivable.

For lights on, rules are easy. YoLink switch is smart enough to turn on the list itself. So our only action is to start the timer.

triggers:
  - trigger: light.turned_on
    id: light_on
    target:
      entity_id: light.stairwell_light

actions:
  - choose:
      - conditions:
          - condition: trigger
            id: light_on
          - condition: state
            entity_id: timer.stairwell_light_off
            state: idle
        sequence:
          - action: timer.start
            target:
              entity_id: timer.stairwell_light_off
            data:
              duration: '00:02:00'

And what do we do when timer is reached? Well, we turn the light off.

triggers:
  - trigger: event
    id: timer_finished
    event_type: timer.finished
    event_data:
      entity_id: timer.stairwell_light_off

actions:
  - choose:
      - conditions:
          - condition: trigger
            id: timer_finished
        sequence:
          - action: light.turn_off
            target:
              entity_id: light.stairwell_light

These two cover 95% of what I needed. But we haven’t dealt with buttons yet. And with YoLink, that is a special task since they are not directly exposed. But they are exposed as events you can catch in Tools,Events menu, if you listen to yolink_event. With IDs in place, we can now adjust light-off timer to 30 or 60 minutes. In my case, due to 3-way switch setup, I had to capture 4 events.

triggers:
  - trigger: event
    id: button_1a
    event_type: yolink_event
    event_data:
      device_id: 8ff8e36d5d21125a07c9cb322f7d6be8
      type: button_1_short_press
  - trigger: event
    id: button_2a
    event_type: yolink_event
    event_data:
      device_id: 8ff8e36d5d21125a07c9cb322f7d6be8
      type: button_2_short_press
  - trigger: event
    id: button_1b
    event_type: yolink_event
    event_data:
      device_id: 87af18c6d107df22aaeb28b09f24b40d
      type: button_1_short_press
  - trigger: event
    id: button_1a
    event_type: yolink_event
    event_data:
      device_id: 87af18c6d107df22aaeb28b09f24b40d
      type: button_2_short_press

actions:
  - choose:
      - conditions:
          - condition: or
            conditions:
              - condition: trigger
                id: button_1a
              - condition: trigger
                id: button_1b
        sequence:
          - action: timer.start
            target:
              entity_id: timer.stairwell_light_off
            data:
              duration: '00:30:00'
          - action: light.turn_on
            target:
              entity_id: light.stairwell_light
      - conditions:
          - condition: or
            conditions:
              - condition: trigger
                id: button_2a
              - condition: trigger
                id: button_2b
        sequence:
          - action: timer.start
            target:
              entity_id: timer.stairwell_light_off
            data:
              duration: '01:00:00'
          - action: light.turn_on
            target:
              entity_id: light.stairwell_light

And now finally we’re onto the last condition - surviving HA restart. In theory, it should be as simple as just turning any light with expired timer off. But, in reality, that won’t work with YoLink switches because it takes a bit of time to establish communication with them. You also cannot check if light is on because light status is also a part that needs YoLink communication. So, the best you can do is to blindly turn on timer if one is not already on. If light is on, it will turn it off in 2 minutes. If light is off, we’ll turn it off again - not really an issue.

triggers:
  - trigger: homeassistant
    id: ha_start
    event: start

actions:
  - choose:
      - conditions:
          - condition: trigger
            id: ha_start
          - condition: timer.is_idle
            target:
              entity_id: timer.stairwell_light_off
        sequence:
          - action: timer.start
            target:
              entity_id: timer.stairwell_light_off
            data:
              duration:
                hours: 0
                minutes: 2
                seconds: 0

And only with all these is place we have our automation ready for the real life.

My full automation is below, adjust as needed.

alias: Stairwell Light
triggers:
  - trigger: homeassistant
    id: ha_start
    event: start
  - trigger: light.turned_on
    id: light_on
    target:
      entity_id: light.stairwell_light
  - trigger: light.turned_off
    id: light_off
    target:
      entity_id: light.stairwell_light
  - trigger: event
    id: button_1a
    event_type: yolink_event
    event_data:
      device_id: 8ff8e36d5d21125a07c9cb322f7d6be8
      type: button_1_short_press
  - trigger: event
    id: button_2a
    event_type: yolink_event
    event_data:
      device_id: 8ff8e36d5d21125a07c9cb322f7d6be8
      type: button_2_short_press
  - trigger: event
    id: button_1b
    event_type: yolink_event
    event_data:
      device_id: 87af18c6d107df22aaeb28b09f24b40d
      type: button_1_short_press
  - trigger: event
    id: button_1a
    event_type: yolink_event
    event_data:
      device_id: 87af18c6d107df22aaeb28b09f24b40d
      type: button_2_short_press
  - trigger: event
    id: timer_finished
    event_type: timer.finished
    event_data:
      entity_id: timer.stairwell_light_off
conditions: []
actions:
  - choose:
      - conditions:
          - condition: trigger
            id: ha_start
          - condition: timer.is_idle
            target:
              entity_id: timer.stairwell_light_off
        sequence:
          - action: timer.start
            target:
              entity_id: timer.stairwell_light_off
            data:
              duration:
                hours: 0
                minutes: 2
                seconds: 0
      - conditions:
          - condition: trigger
            id: light_on
          - condition: state
            entity_id: timer.stairwell_light_off
            state: idle
        sequence:
          - action: timer.start
            target:
              entity_id: timer.stairwell_light_off
            data:
              duration: '00:02:00'
      - conditions:
          - condition: trigger
            id: light_off
        sequence:
          - action: timer.cancel
            target:
              entity_id: timer.stairwell_light_off
      - conditions:
          - condition: or
            conditions:
              - condition: trigger
                id: button_1a
              - condition: trigger
                id: button_1b
        sequence:
          - action: timer.start
            target:
              entity_id: timer.stairwell_light_off
            data:
              duration: '00:30:00'
          - action: light.turn_on
            target:
              entity_id: light.stairwell_light
      - conditions:
          - condition: or
            conditions:
              - condition: trigger
                id: button_2a
              - condition: trigger
                id: button_2b
        sequence:
          - action: timer.start
            target:
              entity_id: timer.stairwell_light_off
            data:
              duration: '01:00:00'
          - action: light.turn_on
            target:
              entity_id: light.stairwell_light
      - conditions:
          - condition: trigger
            id: timer_finished
        sequence:
          - action: light.turn_off
            target:
              entity_id: light.stairwell_light
mode: queued

Syncing YoLink Dimmers

Illustration

In my home automation I stumbled at an insteresting problem. All my switches are of YoLink’s smarty pants variety. One salient to this topic was their dimmer switch. I really wanted one of them to control the other and, while you can pair on/off state in YoLink, you cannot sync dim state. Home Assistant to the rescue!

My first go was simple enough

triggers:
  - trigger: state
    entity_id:
      - light.living_room_ceiling_light_switch

conditions: []

actions:
  - choose:
      - conditions:
          - condition: state
            entity_id: light.living_room_ceiling_light_switch
            state:
              - 'off'
        sequence:
          - action: light.turn_off
            target:
              entity_id: light.living_room_ceiling_light2_switch
            data: {}
      - conditions:
          - condition: state
            entity_id: light.living_room_ceiling_light_switch
            state:
              - 'on'
        sequence:
          - action: light.turn_on
            target:
              entity_id: light.living_room_ceiling_light2_switch
            data:
              brightness: >
                {{ state_attr('light.living_room_ceiling_light_switch',
                'brightness') | int }}

This will capture any change from my “controller” light and then propagate them to the “controllee”. If state is off, it will turn it off - simple enough. If state is on, it will turn it on and send the current dimmer state.

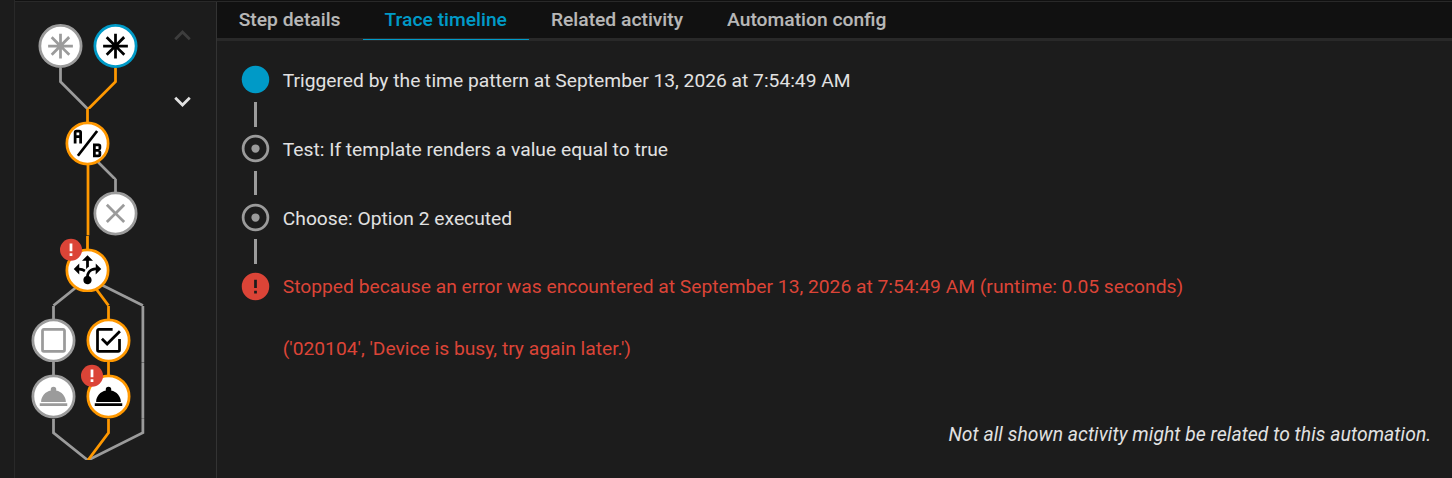
In theory, this should be enough. In practice, it worked ok if I adjusted dimmer values slowly. But, if I went fast, it would go into “Device is busy” state and never update. I did try “queued” and “restart” modes but neither really helped.

So, I turned to timers for help. Instead of reacting only to the changes, automation will also trigger every 5 seconds to check if states match. If states are the same, trigger is abandoned. If states are not the same, we proceed with the same change.

triggers:
  - trigger: state
    entity_id:
      - light.living_room_ceiling_light_switch
  - trigger: time_pattern
    seconds: /5

conditions:
  - condition: template
    value_template: |
      {{ states('light.living_room_ceiling_light2_switch') !=
        states('light.living_room_ceiling_light_switch')
        or
        (
          states('light.living_room_ceiling_light_switch') == 'on'
          and
          state_attr('light.living_room_ceiling_light2_switch', 'brightness') !=
          state_attr('light.living_room_ceiling_light_switch', 'brightness')
        ) }}

actions:
  - choose:
      - conditions:
          - condition: state
            entity_id: light.living_room_ceiling_light_switch
            state:
              - 'off'
        sequence:
          - action: light.turn_off
            target:
              entity_id: light.living_room_ceiling_light2_switch
            data: {}
      - conditions:
          - condition: state
            entity_id: light.living_room_ceiling_light_switch
            state:
              - 'on'
        sequence:
          - action: light.turn_on
            target:
              entity_id: light.living_room_ceiling_light2_switch
            data:
              brightness: >
                {{ state_attr('light.living_room_ceiling_light_switch',
                'brightness') | int }}

mode: restart

Now, this does two things. First, for slow updates, it will run only once and we’re golden. But, if there is an issue with the first run, it will run every 5 seconds until it manages to synchronize their states. Why 5 seconds? Well, sending updates more often actually prolongs “too busy” state to 20-30 seconds.

Also, I switched mode to restart. While default single did work ok, it also went through many intermediate brightness steps too making overall response slower.

Are there any places for improvement? Surely there are. One that immediately comes to mind is using proper 5 second timer instead of triggering every 5 seconds. I opted to skip this in order to have only a single automation. The performance difference was not worth the clutter.

Also, addint a small delay before choose conditions does help since “restart” mode gets to cancel it most of the time. Albeit that comes at a cost of slower single-trigger updates. Since most of my actions are just turning on or off the light, it seemed as unnecessary slowdown for a rare benefit.

Regardless, my second light now takes all its cues from my main light and that’s all I needed for now.