Because some posts just refuse to be placed into a bucket

Rabbit Managed

One of my first vivid memories when it comes to having fun while programming definitely contains me implementing RC4 encryption in QBasic. Algorithm was perfect. It worked on per-byte text, was simple enough to have at least basic understanding what the heck was happening, and it gave me a bit of “el bandito” feeling as algorithm was leaked. Going over RC4 encouraged me to reinvent the wheel and was a direct cause of my love into creating own encryption algorithms. And I’ve created quite a few…

In time I learned a bit more about encryption. Or at least enough to understand why “rolling your own” is generally a bad idea. With time my beloved RC4 got its ass kicked by cryptoanalysis to be finally deprecated in 2015. My focus meantime went toward block algorithms, most notably Twofish and later AES version of Rijndael. My mind decided to go block cipher route but my heart still longed for good old stream cipher times.

As someone following crypto-world as a hobby, I was surprised I missed a whole stream cipher competition - eSTREAM. At this time it’s already an ancient news but results of that competition are still available in the form of 4 secure software stream ciphers: HC-128, Rabbit, Salsa20/12, and SOSEMANUK. All these eSTREAM finalists are still secure, completely free, and really nostalgia inducing for those with a soft spot for stream ciphers.

One that immediately drew my attention was Rabbit. As name suggests, this one was really fast. Additionally, it has quite understandable method of operation, uses no “exotic” operations, it has a reasonably small state (513 bits), and it’s specified in RFC4503. The only thing I couldn’t find was a C# implementation wrapping it into a SymmetricAlgorithm so it can be easily used with CryptoStream. Well, now there’s one…

If you want to use the Rabbit from C#, take a look at my RabbitManaged class. It derives from SymmetricAlgorithm and exposes ICryptoTransform interface so it can be used with CryptoStream. While it uses 128-bit blocks internally, it also allows usage without padding (i.e. more like a traditional stream algorithm). It also allows for all standard paddings.

Considering wide prevalence of AES, its usage will be limited at best but I believe into not having all eggs in one basket and you might find usage for it still. But damn, it was fun to implement this little gem.

PS: For nostalgia, I also have a SymmetricAlgorithm implementation of RC4.

Turning Off Narrator in Windows 10

My problem started with a cat. She loves enforcing my laptop breaks and having some laptop time herself. Whenever that happens, I lock my laptop and let her be for 5 minutes. Without fail she’ll manage to turn off wireless and enable the darn Windows Narrator. And no, turning off the Narrator shortcut doesn’t help.

Issue here is that lock screen works under completely different environment and permanently disabling narrator shortcut for your user will do nothing. No, solving this requires a bit more interaction and the easiest way I found is through registry editing.

To turn off the Narrator, there is a well documented WinEnterLaunchEnabled registry value. For our user we can find this at HKEY_CURRENT_USER\Software\Microsoft\Narrator\NoRoam but for logon user this hides at HKEY_USERS\S-1-5-18\Software\Microsoft\Narrator\NoRoam. Setting this DWORD value to 0 sorts the issue even without going for restart.

However, since my cat also plays with touchpad, I decided to remove the whole Ease of Access portion to ensure erroneous touchpad movements as cat lays down cannot turn anything on. For this we need the [BrandingNeutral](https://docs.microsoft.com/en-us/windows-hardware/customize/desktop/unattend/microsoft-windows-embedded-embeddedlogon-brandingneutral) value. This can be found at HKEY_LOCAL_MACHINE\SOFTWARE\Microsoft\Windows Embedded\EmbeddedLogon. Setting DWORD value to 8 followed by a restart sorts out that issue.

Those full of trust can download registry file with these settings here and import them automatically while others can do the registry changes manually. In either case Windows 10 will become a bit more cat friendly.

Using Proper NTP on Android Phone

Illustration

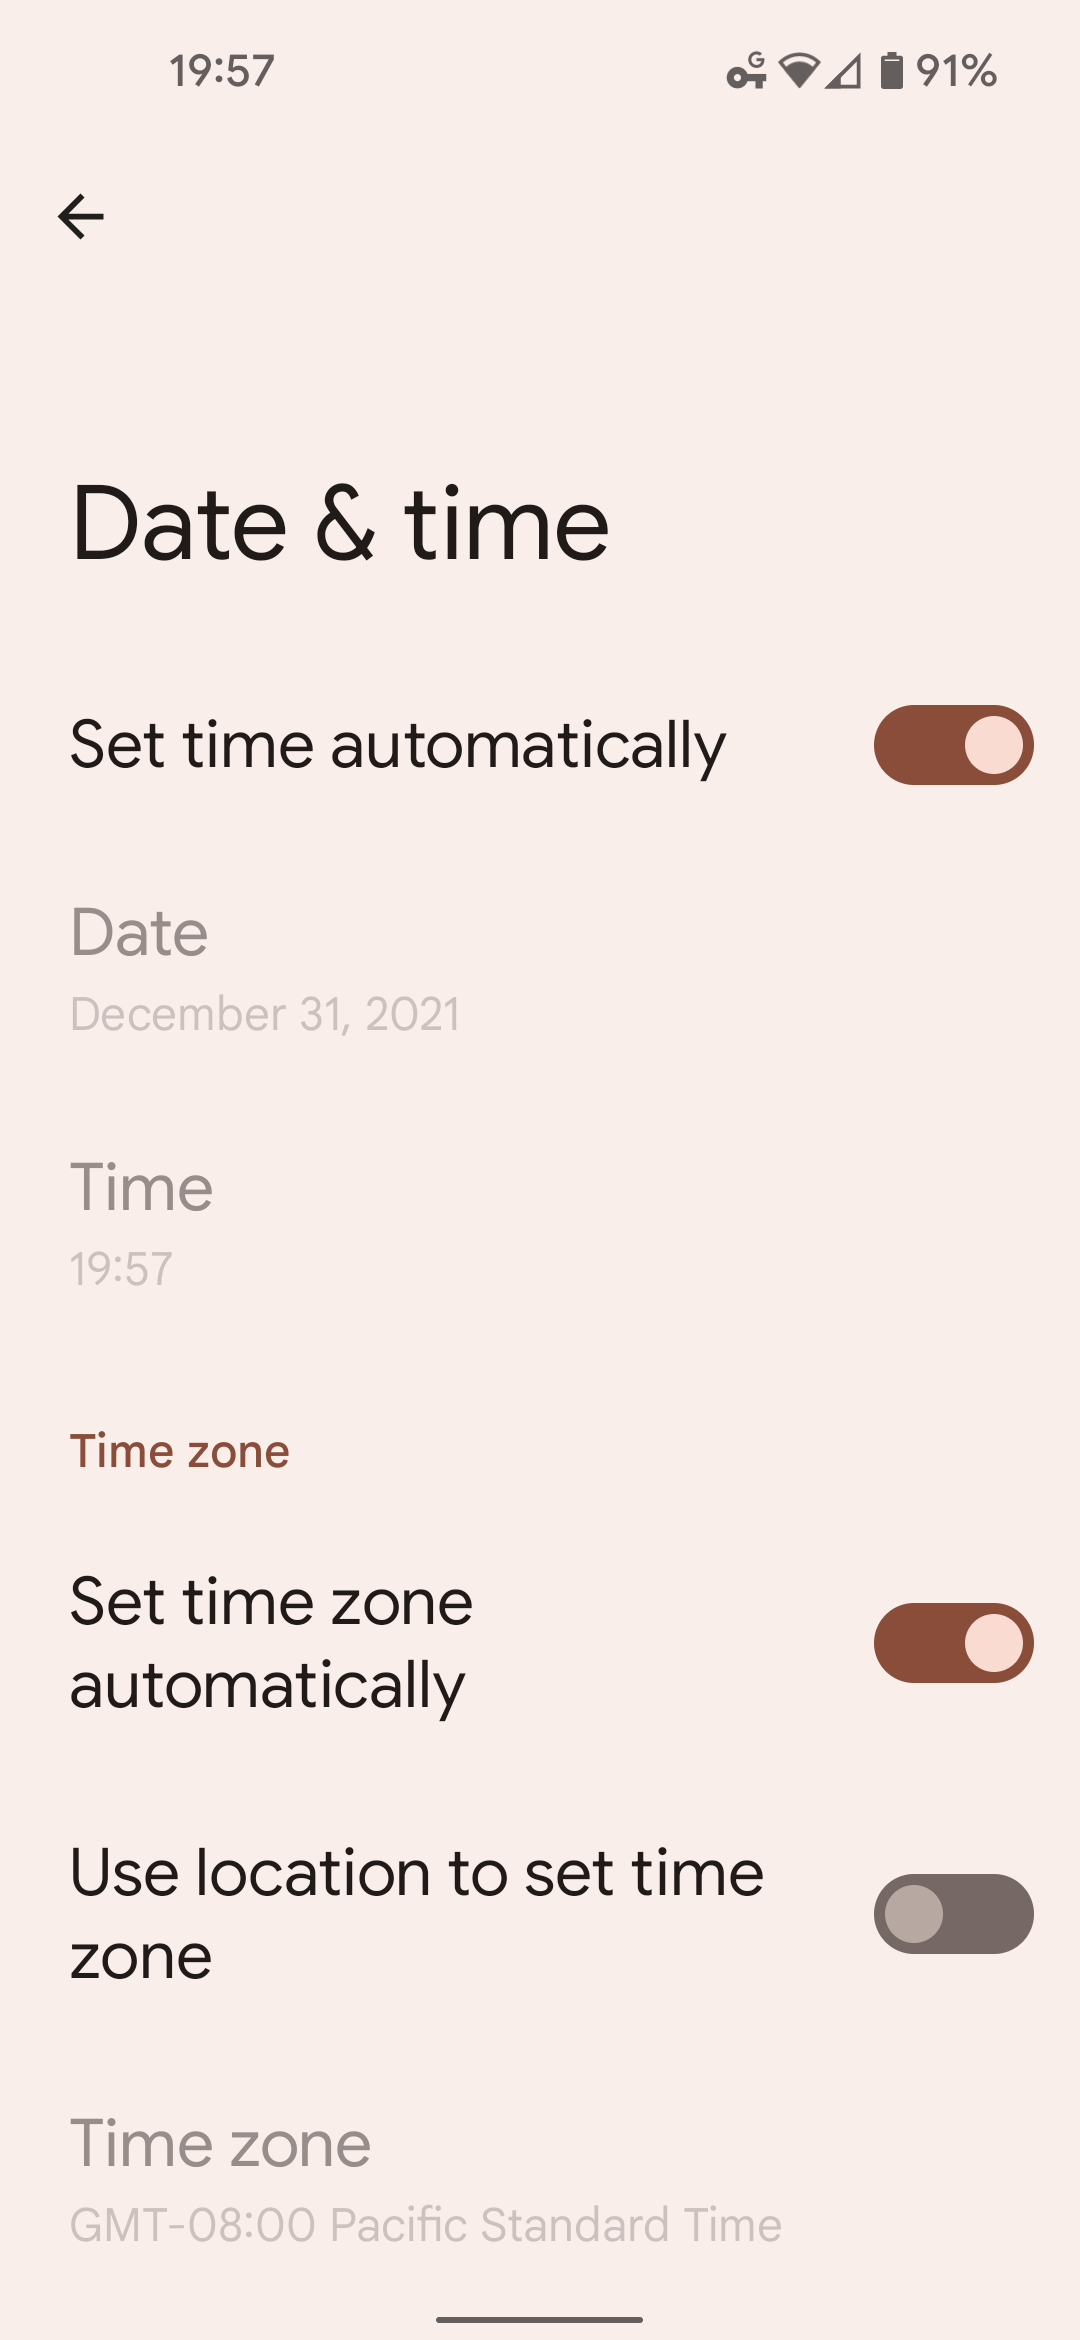
As a time connoisseur, I really get really pissed off when my phone’s time is off by a second or two. Considering phone receives time from the radio network, one would expect this not to happen. However, for some reason, it seems no USA network provider actually cares to have their radio time straight. The solution to this problem would be using an NTP server instead of the time provided by the network. However, with an Android devices that’s not as straightforward as one would expect. But it is possible…

Before starting anything, we first need to turn on Developer Options (usually tapping Build Number 7 times). Once this is enabled, we need to enable USB Debugging (Settings > System > Advanced > Developer Options > USB debugging). With this done, we can finally download Platform Tools and check if our device is visible:

adb devices
 List of devices attached
 0A281JCCBA0317  device

Once connectivity is tested, we can immediately go onto setting the NTP server followed by a reboot:

adb shell settings put global ntp_server ^^time.medo64.com^^
adb reboot

Once device has rebooted we can check the value:

adb shell settings get global ntp_server 
 time.medo64.com

And that’s it. Now your device will use the defined time server instead of the unreliable network time.

Segmentation Fault Using Threads With Static Compile

I was playing a bit with threads in C++ and all was going well. For the final compile I wanted a static binary (don’t judge me, I have my reasons ;)). Compile passed as expected but executing program resulted in Segmentation fault (core dumped) error:

g++ -pthread -static test.cpp
a.out
 !!Segmentation fault (core dumped)!!

Well, these were definitely not the droids I was looking for.

Strangely enough, issue was with my thread.join() statement. Something that shouldn’t cause any issues.

It took me some time (in addition to helpful GCC ticket and StackOverflow answer) to finally come to the following compilation line:

g++ -static -pthread -D_GLIBCXX_GTHREAD_USE_WEAK=0 -std=c++0x \
    -Wl,--whole-archive -lpthread -Wl,--no-whole-archive test.cpp

And now my static binary worked happily ever after.

APIs Are a Fair Use

It took just 10 years but we finally know for sure: copying API is a fair use.

There’s a really detailed analysis of Supreme’s court decision at TechDirt for those wanting details.

Despite result matching what I believe is right and better for industry, it’s really heartbreaking it took 10 years and millions in lawyers to clean this up.

Toto Slice

As my son went about cutting a mega bread slice, I told him that was called a “Toto slice”. And then immediately went onto explaining what is the origin of that phrase and why the heck nobody uses it except me.

Well, story starts ages ago when I got my first dog. It was a black terrier and a spitting image of Toto from Wizard of Oz. And Toto slice wasn’t named after him because he didn’t like bread. He liked chickens. Our chickens.

So, within a month, Toto was pronounced incompatible with our yard and gone. Where? I am not sure as some secrets run deep in my family but official version is that he was sold to somebody else. Whether it was an upstate farm or a backyard, the end result was the same - I was dogless.

Some time after, a replacement arrived. It was a mix of a female Scottish shepherd and a male white terrier. Rumors are that conceiving happened due to the bet between owners of each in regards to the capabilities of terrier. If they are true, terrier was skilled enough and thus a few puppies became available soon after.

In any case, the new dog was completely white and would quickly grow close to the size of a (smaller) Scottish shepherd. And his name was Toto too. It was shame to throw away a good name despite this dog being as far as possible from the Wizard of Oz namesake being both white and large.

Life wasn’t always easy and, while my family never went hungry, there was no extra money for dog food. Toto ate what we ate - more precisely, he ate leftovers. When leftovers were sparse, he would get a huge thick slice of bread dipped in the melted lard. That became known in the family as a Toto slice (or “totovska šnita” in my native language).

And Toto slice wasn’t just for a dog. Whenever my sister or I wanted a large piece of (ideally warm) bread, we would use the same phrase. And that’s the phrase I kept using for years and well into my current 40’s.

This phrase might live on with my children along with a story. Or it might die off with me. Regardless, I find it really interesting how sometime words we personally take for granted might not be known even to those closest to us. And how private the language can be even in these global times.

Watching Sector Count - Take 2

As I shucked my 12 TB drive and got it working, I noticed my reporting script was reporting it as 11997 GB. What the heck. Even with power-of-two shenanigans, I would expect capacity to follow LBA Count for Disk Drives Standard (LBA1-03) I already wrote about.

When I checked disk, I saw the following:

Drive:WDC WD120EMFZ-11A6JA0
Logical sector:512 b
Physical sector:4096 b
Sector count:23,437,770,752
Capacity:12,000,138,625,024

Based on my calculator, I expected to see size of 12,002,339,414,016 bytes. Was WDC placing non-standard capacity drives in their enclosures? Or did I miss something? Well, I missed something. :)

There is a later version of sector count standard coming from SFF Committee as SFF-8447. And this standard makes a difference between low capacity (80 - 8,000 GB) and high capacity (>8,000 GB) disk drives.

For lower capacity drives, formulas are ones we already know (first one is for 512-byte, second one for 4K sector):

97,696,368 + (1,953,504 * (CapacityInGB - 50)) -or- 12,212,046 + (244,188 * (CapacityInGB - 50))

Drives larger than 8 TB have the following formulas (512-byte, 4K sector sizes):

ceiling(CapacityInBytes / 512, 221) -or- ceiling(CapacityInBytes / 4096, 218)

Armed with both formulas, we can update the sector count calculator - find it below.

GB
 

Drive Shucking

Diskar morghulis.

All drives must die. That was the thought coming through my mind as I noticed remaps pending statistics for one of my backup NAS drives increasing. And it wasn’t just statistics, ZFS was showing checksum errors too. No doubt, it was a time for a new drive.

Even thought I was lucky enough to have older generation CMR Red drive, I was also unlucky enough to be out of warranty - by 2 months. Since my needs increased since, I also didn’t want to just get the same drive again. Nope, I wanted to do a first step toward more capacity in my backup mirror.

I checked prices of drives and saw that they’re not where I wanted them to be. So, after giving it some thought I went looking into alternatives. Finally I decided to go the same route I went when I created my very first NAS located in USA. Shucking.

For those wondering, shucking drives is just a funny name for buying an external drive, removing it from enclosure, and using it just as you would any internal drive. One major advantage is cost. These drives are significantly cheaper than special NAS drives. I got 12 TB priced at $195 when same size Red was around $300. Those are a significant savings.

Downside is that you have no idea what you’re gonna get. Yes, if you order drive larger than 8 TB, you can count on CMR but anything else is an unknown. Most of times you’re gonna end up with a “white label” drive. This seems to be enterprise-class drive with power disable feature (which causes issues with some desktop power supplies) spinning at 5,400 instead of 7,200. Essentially, there is a good chance you got a drive that couldn’t pass internal tests at the full speed.

This is also reflected in warranty. My drive only came with 2-year warranty. Even worse, there is a decent chance manufacturer will simply refuse a service unless you send the whole enclosure. If enclosure gets damaged while getting the drive out - you might be out of luck.

Regardless, savings were too tempting to refuse so I got myself one. It’s a backup machine after all.

To minimize any risk of dead-on-arrival, I actually used it in its intended form - as an USB drive. The first step was to encrypt the whole drive thus essentially writing over each byte. This took ages, reminding me why larger drives might not be the best choice. Once whole disk was filled with random data, I placed it into my ZFS mirror and let resilvering do its magic.

Only once the drive was fully accepted into a 3-way mirror, I performed the shucking as shown YouTube video. Once it was out of its enclosure I powered off the server (no hot-swap) and replaced the failing drive with it. ZFS was smart enough to recognize it’s the same drive and only remaining task was to manually remove now removed old drive.

No issues so far. Let’s see how it goes.


PS: I am not above buying used drive on eBay either but these days asking prices for used drives are just ridiculous…

Building a Gaming PC

This year Christmas project for my son and me became building a PC. He got eager to game a bit more and laptop he has wasn’t sufficient anymore. So, after more than 20 years being a laptop-only household (yes, not counting servers), we went onto building a PC.

Our goal was to build something that would give a better gaming performance than his 940M-based laptop (ok, that wasn’t that hard), allow playing most titles on 1080p, but still not drain the bank. As we went onto component selection, we went back and forth multiple times as we analyzed how things fit, whether they were giving enough bang-for-the-buck, and how available they were at a decent price range.

Literally the first decision was selecting a case. After looking at price s and motherboard support, we decided to go with micro-ATX. Every single manufacturer had bunch of motherboards in this format and we found many cases in that size were both reasonably sized and at a reasonable cost. After watching a lot of YouTube videos (e.g., ScatterVolt and Gamers Nexus) we decided on darkFlash DLM21 with a mesh front.

This case was the right size, the right features, and the right looks. Of course you cannot expect wonders from the case that’s under $100 so there are a lot of things that could be done better. However, it does offer enough airflow and it has ample space for both current PC build and its further expansions.

Unfortunately, this case doesn’t come with any fans so those looks ended up costing a bit more than expected. I don’t consider it a breaking deal as most case fans are really shitty when it comes to noise so we would probably replace them anyway. We longed for Noctua but decided on Artic P12/14 at the end. It’s almost as quiet as Noctua but at a fraction of a cost. Even though case has enough space for 5 fans, we only decided on one push-pull pair. We could always add another front fan later. While using pressure-optimized fans might not be needed in this case, they were a bit cheaper and came in black.

Power supply was an easy decision. The cheapest one from trusty source with 80+ rating would do. We opted for EVGA as it was the cheapest 500 W power supply that had a single 12V rail and a over-temperature protection. We did toy with an idea of grabbing something more powerful for the sake of the upgradability but decided against it. Any future upgrade needing more power will probably also include newer devices and maybe motherboard. With Intel’s 12V standard creeping in, spending too much money on “maybe” seemed unnecessary. Unfortunately, the old-style colored cables (albeit in black mesh) are not the best sight. But we’ll survive. :)

All this was selected before we had to decide if we want to be a team Intel or team AMD. And we easily went with AMD. Intel does have their offering in our desired price range but there was a slightly cheaper or more performant AMD no matter where we looked. While processor availability proved to be an issue with AMD we had enough time for that not to matter much.

We spent hours and hours browsing over all budget motherboards only to decide between two ASRock offers. One was B450M Pro4 due to it’s better than average VRMs and a really reasonable cost. Works perfectly with Ryzen 2 and (after BIOS upgrade) with Ryzen 3 CPUs. Based on recent reviews, BIOS update is pretty much done for any board currently on sale. No wonder it’s part of many budget builds.

But we decided to splurge a few dollars more and go for B550M variant of the same. Major reason was a newer chipset that should give us a bit more lifetime out of it while keeping reasonably good (albeit simplistic) VRM. Since most boards in that price range either don’t include wireless or have just a basic one, we appreciated this one including cutouts for antenna alongside M.2 E-type slot. This essentially allows us to use any laptop M.2 WiFi we chose and upgrade over its lifetime. Unfortunately, this board doesn’t support Ryzen 2 so no 2600 here.

We did spend some time looking at other motherboards too - especially Gigabyte and MSI offering - but they were always more expensive and with less features as compared to ASRock. Yes, build quality was better for many of them and ASRock is known for their “optimism” when it comes to board shutdown protection. In the end we decided that going with slightly higher ASRock was better than going with low-end Gigabyte/MSI for the same price.

We also looked at A520 chipset boards as this would have been a good fit on paper for a budget PC. Alas, time was not right for this as availability was spotty, features were limited, and price was comparable with B550 boards. At the same price point, B550 wins every time.

Processor decision was hard as 3100 was realistically good enough for what we needed. It’s a proven processor that can handle pretty much anything this computer would be used for. We decided to go slightly higher with AMDs 3300X counting that two months would be enough time to get one. Unfortunately, that wasn’t true as the only scalpers had it in stock. In the end we went with 3600 because we could get it at MSRP.

It took us a long time to decide what to do about CPU fan. On one hand, AMD CPUs come with more than capable stock fan. On other hand, that thing is not the most quiet out there. At the end we opted to go with Arctic Freezer 7 X. Realistically, it’s a minimal upgrade when it comes to temperatures. When it comes to the noise level, things are slightly different. If you value reducing noise levels on a budget, this one is a great deal. And yes, for a budget build, this is probably the most dubious choice as we could have as easily gone with the stock fan.

Choice of memory was annoying at best. AMD is a bit picky about memory and any incompatibility is usually accompanied by crashes. My Epyc-based file server crashed a few times a day no matter how I adjusted timings until I finally gave up and bought the new memory. Yes, the newer generations had some improvements but selecting memory is a still task that needs to be considered carefully. While on motherboard pages you can see explicitly validated modules, I found these are both way too expensive for what they are and way too limited in selection. Finding the exact match was an exercise in futility. I felt like goldilocks as my bed was either too soft or too hard. And I wasn’t as fortunate as she was to find it just right.

On micro-ATX boards one also has memory selection restricted by height. While our current CPU fan left quite a bit of space for memory, changing it in future might cause problem with the clearance. To future-proof the system, we self-restricted to modules that were on a shorter side. Also, modules had to come in pairs to make use of a dual channel but also having just two modules was slightly favored as compared to populating all four as most of budget boards daisy-chain their modules and thus there is a latency increase when all DIMMs are occupied.

Finding the memory based on QVL was easier for some brands as compared to other. Crucial was impossible to corelate while ThermalTake was as easy as it gets. Unfortunately, as it often happens with ThermalTake, modules were “almost” good. One kit was annoyingly flashy and other was intended for water cooling.

Final selection wasn’t directly from ASRock QVL but we went close. List contains both HyperX Fury (HX432C16FB3/8) and HyperX Predator (HX436C17PB4/8) in their single module configuration. We narrowed our choice between kit versions of the same. From motherboard perspective, there should be literally no difference so one might say we followed the rules in their spirit. The final selection between Fury (3200 MHz) and Predator (3600 MHz) modules was a difficult one. So we selected neither. :)

After watching a few videos about terminology and overclocking, we decided on G.Skill RipJaws V (3600 MHz). Yes, that wasn’t in the list of officially supported memory on ASRock pages - but B550M Pro4 is listed G.Skill’s page. Yes, that memory is taller than either HyperX (42 mm vs 32 mm) - but our CPU cooler would have enough clearance. Since price (lower than HyperX Predator) and coolness factor were acceptable, we decided to screw our own rules and go for it.

And not. We didn’t install that memory either as NewEgg package got lost in the mail - literally. So, after another research round, we switched to Crucial Ballistix (BL2K8G36C16U4B) kit. And no, this memory is not in motherboard’s QVL list. However, Crucial does claim it’s compatible so we decided to give it a try. And CL16-18-18-38 timings are actually not too bad making it a nice fit with Ryzen out of the box.

For now, 16 GB will be enough and there are 2 empty DIMM slots still remaining for further upgrade at the cost of a 1 clock latency.

For storage we toyed with an idea of 4.0 NVMe as both selected motherboard and CPU would support it. But considering price was doubled as compared to more standard 3.0, we decided to cheap out. We selected a reasonably decent NVMe SSD that was cheapest at the time of purchase. More specifically, we selected Samsung 970 Evo 500 GB in 500 GB capacity. Since we bought it after 970 Evo Plus was already out, we managed to grab it at a reasonable price. As a secondary drive we went with spinning rust and old 2 TB SpinPoint I had lying around. And yes, I didn’t include this in the price. :)

Graphic card selection was essentially just between Radeon RX 580 and GeForce GTX 1650 Super. Both are close in performance and in price. However, at the time of buying prices for RX 580 were going into stratosphere while GTX 1650 Super remained in sub-$200 range. Out of all GeForce cards we ended up going with MSI’s Gaming X as it was one of the most quiet graphic cards available under load and it would even turn off fan completely when not gaming.

In M.2 E-key slot we placed Intel’s 9260NGW. We selected this card purely because we already owned it and thus would save $20 that we would need to pay for a new AX200. We also had Killer 1535 card but Intel had Bluetooth 5.1. For wireless to be complete, we had to buy pigtail reaching M.2 slot. Length of 30 cm was sufficient to reach the rear panel and from there we went with cable to the external antenna.

All in all, from the moment of decision to having computer running, it took us 2 months. A solid week was spent selecting desired components alongside with 1st and 2nd runner-up. And then we just waited for components to drop in price or, in case of Ryzen CPUs, to become available. Not everything was bought at an optimal cost. For example, we overpaid for CPU just because our desired model wasn’t available. Graphic card with the same performance profile was available at lower cost if we went with a bit louder fan configuration. Furthermore, we could have saved another $65 or so by skipping CPU cooler, downgrading motherboard (to B450M), and downgrading memory speed (to DDR4-3200). But we didn’t. :)

All said and done, it was a fun project, a decent machine too boot, and it will hopefully serve well into the future.

Here is the full table of components used:
ComponentSelectedPrice
CasedarkFlash DLM21 MESH$60
Front case fanArctic P14 PWM$15
Rear case fanArctic P12 PWM$10
Power supplyEVGA 500 W1$40
CPUAMD Ryzen 5 3600$200
CPU FanArctic Freezer 7 X$25
MotherboardASRock B550M Pro4$85
MemoryCrucial Ballistix DDR4-3600 (2x8GB)$75
GPUMSI’s GeForce GTX 1650 Super Gaming X$190
Storage (1)Samsung 970 Evo 500 GB$60
Storage (2)Seagate Spinpoint M9T 2TB$0
WirelessIntel 9260NGW$0
Wireless (cable)NGFF antenna with pigtail$5
Wireless (antenna)NGFF antenna with pigtail$15
TOTAL$780

Mildly Infuriating Warning

Illustration

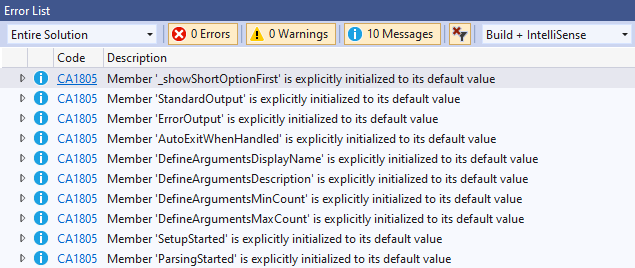
I love Visual Studio’s code analysis. Quite often it will give quite reasonable advice and save you from getting into a bad habits. But not all advice is made equal. For example, look at CA1805: Do not initialize unnecessarily.

First of all, here is code that triggers it:

int i = 0;

According to documentation “explicitly initializing a field to its default value in a constructor is redundant, adding maintenance costs and potentially degrading performance”. I agree on assignment being redundant. However, is it really degrading performance?

If you check IL code generated for non-default assignment (e.g. value 42), you will see ldc.i4.s 42 in .cctor(). If you remove that assignment, the whole .cctor() is gone thus bringing some credibility to the warning.

However, warning was about the default assignment. If you set variable to 0, in IL code you will see EXACTLY the same code as if you left it without the explicit assignment. Despite what warning says, compiler is smart enough to remove the unnecessary assignments on it’s own and doesn’t need your help. For something that’s part of performance rules, there is a significant lack of any performance impact.

I did check more complicated scenarios and there are some examples where code with this rule violation had some difference in IL compared to “fixed” code. However, in my view, that’s work for compiler to optimize around - not to raise warning about it. Or alternatively, since it might be a performance issue in those cases, just raise warning when it’s an issue and not for everything.


PS: And habit of assigning default values will save your butt in C++ if you are multi-lingual.