LXQt High DPI Settings For Surface Go
Ubuntu Unity on the Surface Go is not the lightest environment out there. And on device with low memory (mine has only 4 GB) there is a definite need for something lighter. Based on my research, there are three comfortable alternatives: Xfce, LXDE, and LXQt. After a bit of testing, I decided to go with LXQt.
Installing LXQt into existing ubuntu is as easy as installing its package and selecting it on next login:
sudo apt install lxqtWhat greets you are really small window elements and almost impossible to read interface. LXQt does not detect high-DPI environment and thus 1800x1200 Surface Go has to offer is used as if screen was 24" and not mere 10" in size.
Fortunately, there is a forum with high DPI advice. Unfortunately, a lot of those advices are not really applicable when it comes to Ubuntu 19.10. To spare you a lot of research, here is what worked for me.
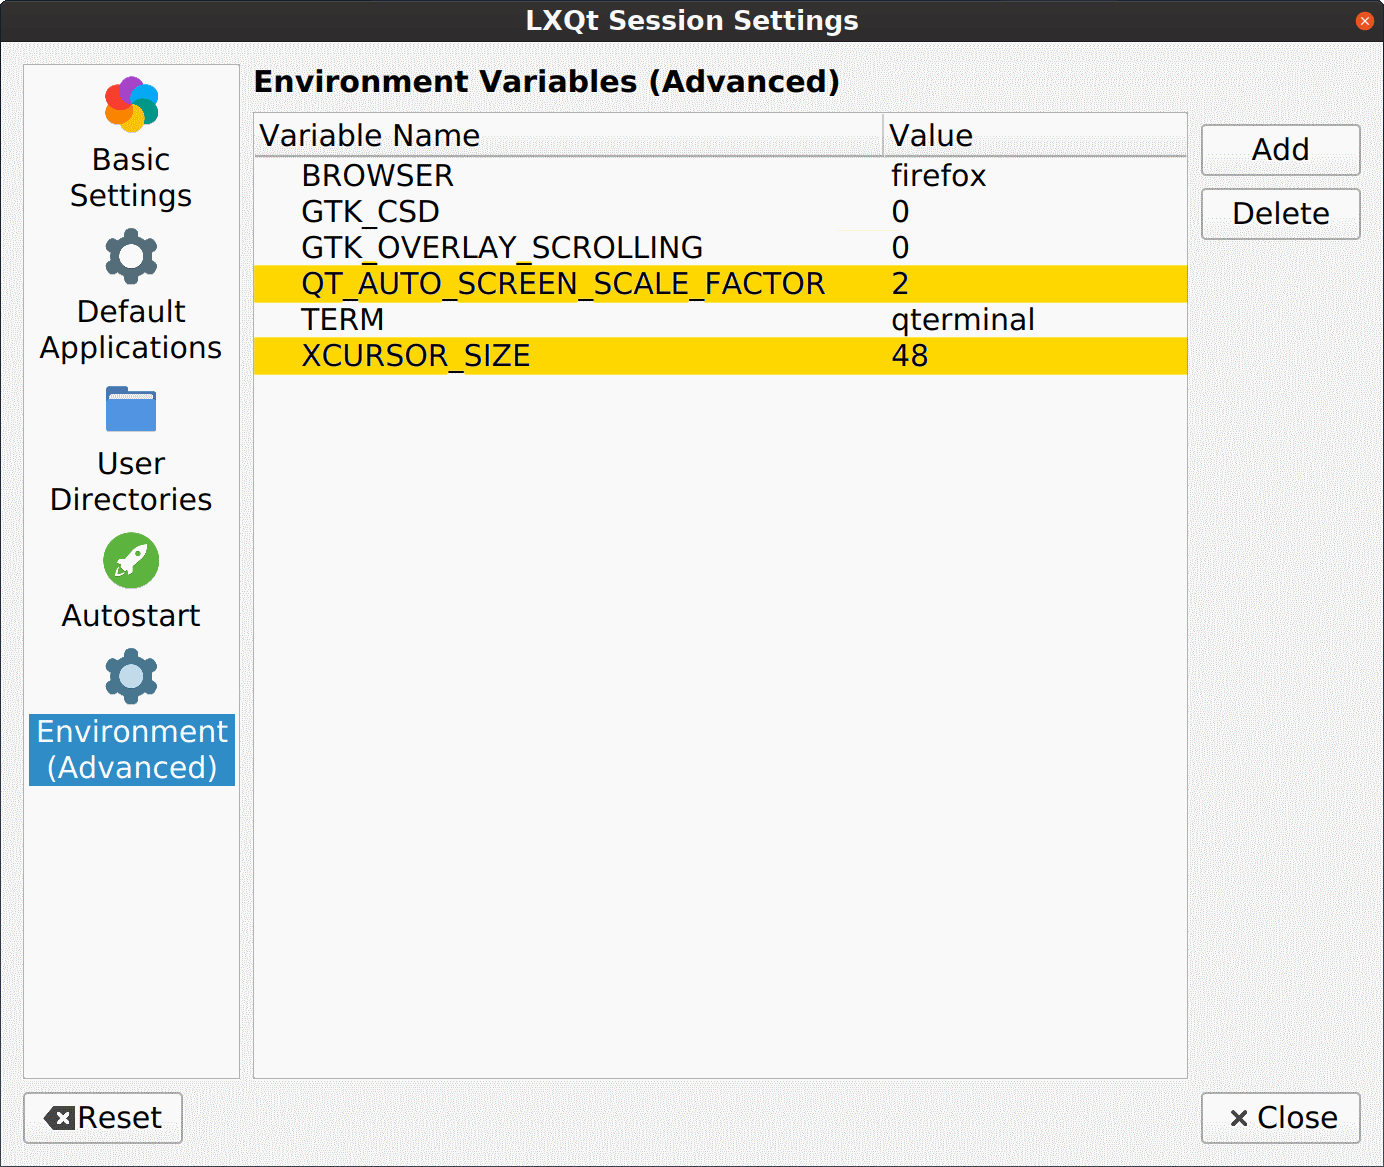
The first argument you will want to adjust is QT_AUTO_SCREEN_SCALE_FACTOR=2. Forum advice is to adjust QT_SCALE_FACTOR=2 but I found this to be counter productive as properly written Qt applications will have their size quadrupled. Yes, you can use QT_SCALE_FACTOR=2 combined with QT_AUTO_SCREEN_SCALE_FACTOR=0 but that still leaves you with increased toolbar icons in high-DPI aware applications. So, for my use case, just setting QT_AUTO_SCREEN_SCALE_FACTOR=2 worked the best.
Small cursor is also a problem but there is an easy way to correct this. Most often I found setting XCURSOR_SIZE=32 mentioned but I personally like to go with XCURSOR_SIZE=48.
That said, where do you set them? Just go to Preferences, LXQt settings, Session Settings, Environment (Advanced) and add those two environment variables.
Those two changes will make your Qt applications look bigger but non-Qt applications like Chrome will still look way too tiny. For those you need to set Xft.dpi in ~/.Xresources.
echo "Xft.dpi: 192" > ~/.XresourcesWith these three changes I find windows once again reasonably sized on my Surface Go.