My XigmaNAS-based file server is usually quite a speedy beast. Between 8 disk ZFS RAID-Z2 and LACP, it can pretty much handle everything I need for my home. Except VirtualBox.
When I tried using its built-in VirtualBox, the guest virtual machine was really slow to install. Disk transfer was in kilobytes. And it wasn’t the disk speed problem as I could copy files in the background at the excess of 100 MB/s. After a bit of investigation, culprit was found in the way how VirtualBox writes to disk. Every write is essentially flushed. Combine that with ZFS on spinning rust and you have ridiculously low performance.
There are essentially two ways to solve this. The first one is to enable such pattern on ZFS. Adding logging SSD disk to my array would do wonders. However, considering this was the only load requiring them, I didn’t want to go through neither the cost or the effort of setting mirrored logging devices.
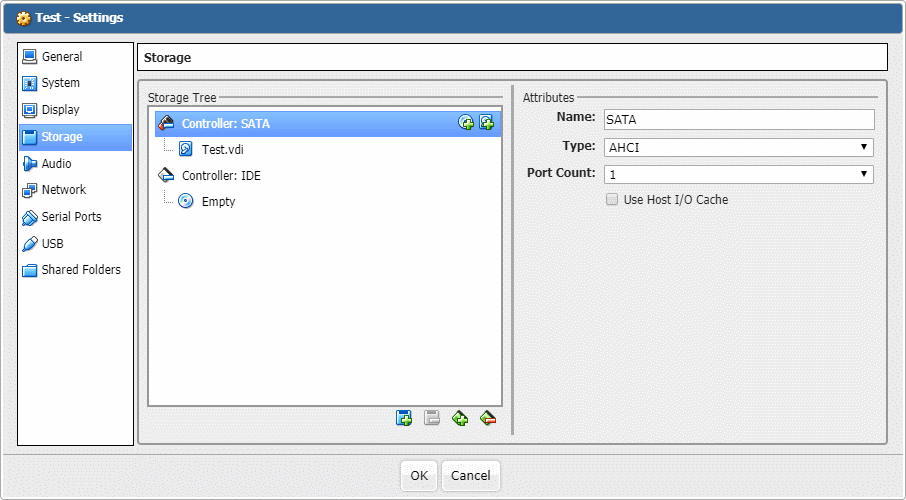
Another fix is much easier and comes without the cost. I just enabled Use Host I/O Cache for my virtual controller and speed went through the roof. Yes, this solution makes host crashes really dangerous as all cached data will be lost. And that’s a few seconds worth of important guest file system data with a potential to cause corruption. You should really think twice before turning it on.
However, for my VM it proved to be good enough. All data used by that VM lived on network shares to start with and recovering from corrupted OS didn’t bother me much as I scripted the whole setup anyhow.
Low cost solution for when you can handle a data loss potential.