Back when OneDrive service was offered for the first time, there were not many takers. You had DropBox with 2 GB and unmatched ease of use and you had Google Drive with whooping 15 GB of disk space. So Microsoft decided to one-up them and gave 15 GB to start with and then another 15 GB as a camera bonus. Both were given for free and without an expiry date. Later they would even give unlimited storage for Office 365 users. Something that was unmatched by any competitor.
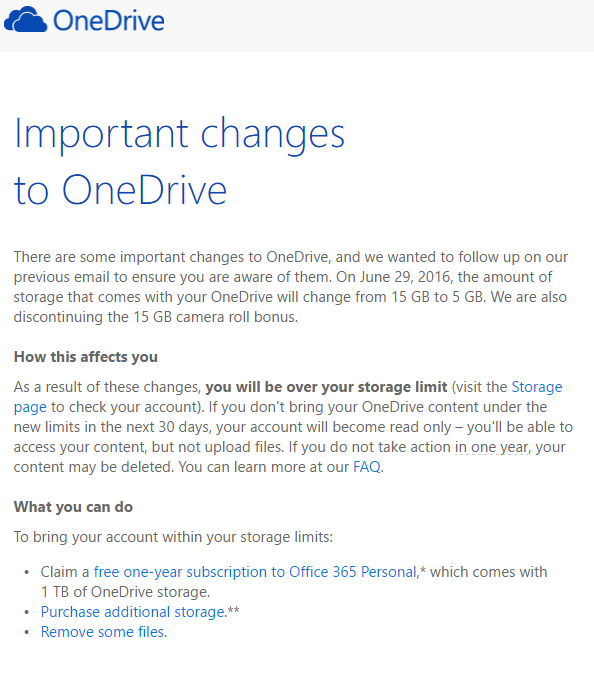
Trouble started in October 2015 when Microsoft decided that new freebie users are to get 5 GB only and all existing users will be downsized. Following backlash, slight modification allowed users to opt-in for another year of existing limits. Guess what, that year is up and both free and camera roll bonuses are expiring.
For me personally this means going from 40 GB (5 GB base + 10 GB loyalty bonus + 10 GB free plan bonus + 15 GB camera roll bonus) to 15 GB (5 GB base + 10 GB loyalty bonus). Quite a big drop for something that originally didn’t have expiry date. Office 365 users are also going to see their unlimited data shrink to 1 TB.
Microsoft does offer 1 year of free Office 365 subscription for your inconvenience and that is actually not a bad offer if you intended to go Office 365 route anyhow. And they will not (at least for now) delete any files you have there even if you are over new limits. Your account is simply going to be placed in read-only mode until enough space is released.
In the light of this, all I can say is meh. Microsoft’s OneDrive has always been second-rate application (let’s not even get into its Metro version). It went through so many redesigns (remember placeholders?) through versions that I was always scared to update it. That is, back when you had a choice of whether to upgrade it or not. Last few Windows installs I haven’t even gone through the trouble of entering my credentials. I found that, for my workflow, only two cloud storage providers I need are DropBox and SpiderOak.
While DropBox has low storage limits for a free account (2 GB + 3 GB for camera), I still find its way of syncing between computers the most natural and painless one. I NEVER had any issues or data loss no mater what stupid thing I would do. You give it a folder and it just works. This is one program everybody in my family uses on both their computer and mobile device. No pain, just file synchronization done right.
Other excellent system is SpiderOak. It has even lower free offering (2 GB), its configuration is more involved, and syncing is annoyingly difficult to setup. However, there is a reason behind it. This is the only cloud storage that actually doesn’t have access to your data. All encryption is done on your computer(s) and all they ever see is encrypted data. If you ever store on cloud anything private, this is the system you should use and no other.
Between those two storage options, I simply have no need for OneDrive. Yes, Microsoft did fill a niche with their high free data allotment but those days are gone. Now they offer sync that is not as pleasant as with DropBox combined with lack of security you would get from SpiderOak. It is literally the worst of both worlds.
I will not say OneDrive was useless nor I will say I won’t ever use it again. Even with those cuts it still offers 15 GB for free and that is nothing to frown upon. And maybe with some new version they finally decide on design and how exactly to handle files not currently synced. And they might even solve one of their many sync problems.
All I will say is so long and thanks for all the fish. :)