Simple OpenVPN Server on Mikrotik

Illustration

Having OpenVPN server on your router is a nifty feature. However, as often with Mirotik, not all is straight forward.

This guide is going to assume you are to enter commands into the New Terminal window from WinBox. That way I will simply repeat commands needed instead of going through the screens. Commands are actually quite descriptive and easy to “translate” into GUI actions if that is your preference.

Prerequisite for any VPN server is to get certificates sorted. For OpenVPN we need main Certificate Authority, server, and client certificate. Yes, strictly speaking, client certificate is optional but let’s not skimp on security.

First we create all the certificate templates (10 years validity) we’ll need:

/certificate
add name=ca-template common-name=^^example.com^^ days-valid=3650 key-size=2048 key-usage=crl-sign,key-cert-sign
add name=server-template common-name=^^*.example.com^^ days-valid=3650 key-size=2048 key-usage=digital-signature,key-encipherment,tls-server
add name=client-template common-name=^^client.example.com^^ days-valid=3650 key-size=2048 key-usage=tls-client

For the purpose of OpenVPN server common name can be really anything. However, some other VPNs are not as forgiving (yes SSTP, I am looking at you) so it might be best to have either your external IP or host name as the common-name text. Any yes, if you have dynamic IP and you are not using your own domain, you can put *.dyndns.org there - no worries.

Created certificates will need signing:

/certificate
sign ca-template name=ca-certificate
sign server-template name=server-certificate ca=ca-certificate
sign client-template name=client-certificate ca=ca-certificate

Depending on your router’s speed, that sign command might time-out - nothing to worry about - just wait for CPU to drop below 100%. Or alternatively check name of certificate - template part will disappear once signing is completed.

With this we need to export a few files:

/certificate
export-certificate ca-certificate export-passphrase=""
export-certificate client-certificate export-passphrase=^^12345678^^

This should give you three files: cert_export_ca-certificate.crt, cert_export_client-certificate.crt, and cert_export_client-certificate.key. After copying this on computer for later I like to rename them to ca.crt, client.crt, and client.key respectively.

Next we need a separate pool of IP addresses for clients. I will assume you have your clients in some other network (e.g. 192.168.1.x) and this new network is just for VPN:

/ip
pool add name="vpn-pool" ranges=192.168.8.10-192.168.8.99

Instead of editing the default encrypted profile, we can create a new one. Assumption is your Mikrotik will also be a DNS server. And while at it, you can create a bit more imaginative user/password:

/ppp
profile add name="vpn-profile" use-encryption=yes local-address=192.168.8.250 dns-server=192.168.8.250 remote-address=vpn-pool
secret add name=^^user^^ profile=vpn-profile password=^^password^^

Finally, we can enable OpenVPN server interface:

/interface ovpn-server server
set default-profile=vpn-profile certificate=server-certificate require-client-certificate=yes auth=sha1 cipher=aes128,aes192,aes256 enabled=yes

Now finally we can copy both ca.crt and client.crt to C:\Program Files\OpenVPN\config\ directory alongside client.ovpn.

You don’t have client.ovpn? Well, one is in sample-config directory and we just need to change/add highlighted items:

client
dev tun
proto ^^tcp^^
remote ^^example.com^^ 1194
resolv-retry infinite
nobind
persist-key
persist-tun
ca ca.crt
cert client.crt
key client.key
remote-cert-tls server
cipher AES-128-CBC
^^auth SHA1^^
^^auth-user-pass^^
^^redirect-gateway def1^^
verb 3

A bit annoying step is being asked for the private key passphrase (in the addition to username/password). Mikrotik doesn’t allow export without it but fortunately we can use OpenSSL to change that:

openssl.exe rsa -in client.key -out client.key
 Enter pass phrase for client.key: 12345678
 writing RSA key

With this, your VPN connection should work like a charm.

PS: Do not forget to adjust firewall if necessary (TCP port 1194).

/ip firewall filter
add chain=input protocol=tcp dst-port=1194 action=accept place-before=0 comment="Allow OpenVPN"

PPS: Do check SSTP guide too.

PPPS: If you’re on RouterOS 7 you might want to check this guide for UDP.

[2017-01-26: Adjusted certificate creation to work on RouterOS 6.38 and later] [2017-01-26: Changed key size to 2048 (instead of 4096) so it doesn’t take ages to generate certificates. :)] [2017-02-25: Changed example to use AES-128 for lower CPU usage on router.]

Fountain Pens on the Plane

As a fountain pen user, I’ve always heard about precautions you must take before you board the flight. Most people I spoke with recommend to clean the pen completely or, if you really want to use it, keep it fully inked as to minimize possibility of air expanding and pushing the ink out.

On the first glance, all this seems logical so I always took precautions. Considering that all my flights lately have been cross-Atlantic, it seemed as a wise choice. However, on my last flight I decided to experiment a little.

On my trip from USA to Croatia (Seattle-Frankfurt-Zagreb) I carried four of my pens: Pilot Custom 74, TWSBI Diamond 580, Platinum Cool, and Pilot Metropolitan. Custom 74 was attached to my notebook while remaining pens had home in the case located in my backpack. All were fully loaded with different inks: Noodler’s Heart of Darkness, Diamine Oxblood, Private Reserve DC Supershow Violet, and Private Reserve Sherwood Green respectively.

I used Custom 74 with Noodler’s during the whole flight and, outside of the nib creep Noodler is famous for, I had no issues what-so-ever. And yes, I used it both during take off and landing - just to be sure. Other pens I took just a few scribbles with for test purposes but I haven’t noticed anything wrong.

On the way back I expected slightly different results as I have used some ink and didn’t refill any pen. Custom 74 was close to being empty, TWSBI was around 50%, while Cool and Metropolitan were reasonably full at around 75%. I expected trouble.

Surprisingly, nothing happened. My pens operated just fine with TWSBI taking more of an main pen role from Custom 74. Absolutely no leakage occurred during any of two flights (Zagreb-Frankfurt-Seattle).

Based on my, admittedly limited, test I don’t see any justification of additional pen preparation before the flight if you are bringing it in cabin with you. Any pressure change in the cabin during flight is small enough that any modern fountain pen can handle it just fine. Yes, in the case of sudden decompression, pen would probably leak but then you’d have more important things to worry about than 2 mL of ink.

If you are transporting pen in unpressurized cargo area I would always go with cleaning out the pen completely. In all other cases relax and write on. :)

Local Host Name Resolving Under Windows With Mikrotik's DNS

Illustration

As I switched all DNS resolving to my Mikrotik router, a curious problem appeared. I couldn’t access my main file server using its short name anymore.

That is fine, I thought. If I go to IP -> DNS and I add Static entry for it. And so I did and everything worked when I tested it. From Linux machine. From Windows 10 machine you ask? Nope - I couldn’t access it still. I try ping and it complains. I try nslookup and it works. Interestingly, an entry with a domain (e.g. server.thing) would work with both. It was just short names that wouldn’t behave.

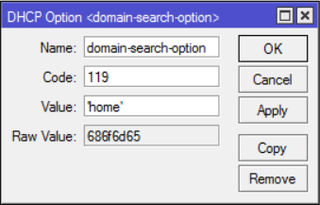
To make long story short, fix is to force Windows to use longer names even for single word lookups. To do this, we can employ magic of DHCP’s domain-name setting conveniently available under DHCP network setup. If this is provided to Windows host upon IP address assignment, it will append all single word host names with that DNS suffix and, provided you defined static DNS host entry with that full name, Windows will work happily ever after.

Downside of this solution is that you need to have both long and short form (e.g. server and server.network) defined for mixed Windows/Linux environments. Yes, you can create a regex to cover both but it will look ugly (e.g. ^server(.network)?$). I personally simply define host two times - looks nicer. ;)

Root issue is just another leftover from NBNS/WINS resolver era - something nobody uses on any normal network but somehow Windows still thinks of it as an appropriate default behavior. Annoyingly some components are built smarter so, depending which tool you use, you can chase damn Schrödinger’s cat all day long…

Why No Insider?

Illustration

I am a bit crazy. Some say in general, while I will just use it to describe my choice of beta testing Microsoft’s software. :)

If Microsoft had release candidate of either Windows or Visual Studio, I would install it. And I wouldn’t pussy out and put it on some non-important server. No, I usually got that running on my daily driver.

And yes, this is definitely not what Microsoft recommends. And yes, this approach has bit me in the ass multiple times. However, I usually liked the new features enough to ignore the small issues. Well, no more. After what seems ages on the Windows Insider track, I have given up.

First issue I had with Windows Insider is the fact it would obliterate custom drivers on every install. As I have Asus N56VJ that needs the same for keyboard shortcuts (e.g. to disable touchpad), this was annoyance. And you couldn’t just reinstall driver - it took a bit more involved process to recover it.

Another issue was pushing of damn Edge. Every freaking time I would get new insider build, Edge would appear in taskbar. And not only there - it would take over the file associations too. A bit hypocritical and a whole lot annoying. That is, when you can switch it - there was a full month where “bug” in the build prevented moving away from Edge for http file handler.

However, both of these issues, along with a few others, were just a minor annoyances. Computer was still usable after them and I could get everything properly working within a day while not losing too much time.

Straw that broke my back were issues with VirtualBox. For the last few months every Insider build broke VirtualBox and VMware in one way or the other. While some were minor and easily solvable, others required either waiting for the new build or update from manufacturer. And, strangely, I found Microsoft’s Hyper-V re-enabled every time.

As someone who runs quite a few Linux related virtual machines (not all are properly supported by Hyper-V), I simply cannot be days without a running system. And the pressure of knowing that, even if I do get it working, it is never more than a build away from braking was simply too much.

Year ago, I would have jotted this just as a cost of getting early features. But insider updates lately became just noise as no proper feature has been introduced in ages. It seems to me that last few of them were just a sneaky way to reset my defaults for the damn Edge and show some Hyper-V up my bum.

Due to all this, I stopped all insider builds to two of my machines.

My main multimedia PC went to Linux Mint and my daily driver went back to the last Windows 10 official release. Frankly, if it wasn’t for Visual Studio, I would have moved it to Mint too.

It is a sad day when Linux distribution is valid and less annoying than Windows…

Remote Passwordless SSH/RSA Login Into Mikrotik

It all started with the need for backup. I had to do two things. First create a backup user with read-only access and then to automate gathering of exported configuration using SSH. And, as a twist, SSH would need to use RSA - something WinBox started supporting only recently (since 6.31).

The easiest way to configure this is to enter commands into New Terminal from WinBox. I will simply repeat commands needed instead of going through the screens. Commands are actually quite descriptive and easy to “translate” into GUI actions if that is your preference.

Before creating user itself we need to create a group without any rights, followed by user creation:

/user
group add name=backup policy=
add name=backup group=backup

With the user in hand, we should get key authentication going. Do notice that key.txt contents should be the public key for use with login. How to generate it is out of scope but just google PuttyGen and you can find a lot of information about this. In any case, we can set publick key for user by using the following commands:

/file
print file=key.txt
set key.txt contents="^^ssh-rsa ...^^"

/user
ssh-keys import public-key-file=key.txt user=backup

After assigning key to a user, we can give it appropriate rights - in my case those were ssh and read. Do notice that policy could have been set while creating group but that would allow user to login without any password until SSH key was set. While window is short and chance is really remote, I prefer to avoid it:

/user
group set [find name=backup] policy=ssh,read

If everything has been done correctly, you can log into router using your RSA keys and you can run export command to gather current configuration.

PS: If you are limiting MACs to be used with SSH beware that Mikrotik supports only hmac-sha1.