Seattle Code Camp 2016

inline right

My third time at Seattle Code Camp is done. All that remains is to hear a few other talks and have some fun.

This year I gave two talks. First one was Crash course in foreign language support for ÜS developer. Not a line of code in sight but a lot of useful information - or so I hope. In this messy multicultural world knowing where things go wrong is an asset.

Second was an example driven Bash primer. It was an introduction into a command line possibilities that come as a part of Git for Windows. Despite the title, this talk dealt not only with bash commands but also with general GNU tools. And yes, all examples work on Linux too.

As always, PowerPoint slides are available for download but they are not a substitute for being present.

Cananka, the Raspberry Pi HAT: Software

[This post is part five in the series.]

One of the requirements I’ve stated was that we should use as much of Linux driver defaults as possible. In this step we should reap benefits of that as all needed to enable CAN should be:

sudo bash -c 'echo "dtoverlay=mcp2515-can0,oscillator=16000000,spimaxfrequency=10000000,interrupt=25" >> /boot/config.txt'
sudo reboot

After reboot, we should see device loaded:

ip -d link show can0
 3: can0: <NOARP,ECHO> mtu 16 qdisc noop state DOWN mode DEFAULT group default qlen 10
     link/can  promiscuity 0
     can state STOPPED restart-ms 0
           mcp251x: tseg1 3..16 tseg2 2..8 sjw 1..4 brp 1..64 brp-inc 1
           clock 8000000

When I was setting this for the first time I was brought on a wild goose chase as nothing really worked. No matter what I did, can0 device would not appear (Cannot find device "can0"). It took me a while to notice something is off:

dmesg | egrep "spi|can"
 spi_bcm2835: disagrees about version of symbol module_layout

As this Raspberry was used for other projects and I’ve updated it multiple times it seems at one point something went wrong with drivers. A fresh reinstall of Raspbian sorted that out.

More careful among you will notice that CAN interface is actually down upon boot. This is easy to correct and the only piece of data we need is the bus speed (this example will use 125 kHz):

sudo ip link set can0 up type can bitrate 125000

ip -d link show can0
 3: can0: <NOARP,UP,LOWER_UP,ECHO> mtu 16 qdisc pfifo_fast state UNKNOWN mode DEFAULT group default qlen 10
     link/can  promiscuity 0
     can state ACTIVE restart-ms 0
           bitrate 125000 sample-point 0.875
           tq 500 prop-seg 6 phase-seg1 7 phase-seg2 2 sjw 1
           mcp251x: tseg1 3..16 tseg2 2..8 sjw 1..4 brp 1..64 brp-inc 1
           clock 8000000

Unfortunately this doesn’t survive the reboot. To make it stick just execute:

sudo bash -c 'echo >> /etc/network/interfaces'
sudo bash -c 'echo "auto can0" >> /etc/network/interfaces'
sudo bash -c 'echo "iface can0 inet manual" >> /etc/network/interfaces'
sudo bash -c 'echo "    pre-up ip link set \$IFACE type can bitrate 125000" >> /etc/network/interfaces'
sudo bash -c 'echo "    up /sbin/ifconfig \$IFACE up" >> /etc/network/interfaces'
sudo bash -c 'echo "    down /sbin/ifconfig \$IFACE down" >> /etc/network/interfaces'

For testing install can-utils:

sudo apt-get install can-utils

With them you can use cansend and candump, e.g.:

cansend can0 02A#FEED
candump can0

At this moment we have are HAT working. However, without EEPROM, we cannot really call it a HAT. So, guess what’s next

Should You Take Password Advice From a Comic?

XKCD 936: Password Strength

Many have seen comic on the right explaining how to select a good password. Some might have even seen security expert Bruce Schneier claiming it is a wrong approach. And then there were several rebuttals. It was as close to celebrity fight as it comes in the computer industry.

As somebody who implemented password generator and a junkie for a good statistics, I’ll dare to throw bit of my opinion here.

For analysis, first thing we need to know is how fast you can crack passwords. And here assumption of 1000 guesses per second mentioned in cartoon is highly optimistic. Mind you, it is not wrong, as it specifies online attack and assumes proper hash used for computation. But, more often than not, your password will leak in one of stolen database dumps. Now attacker can do stuff offline.

With the advent of graphic cards and massively parallel processing, I believe we can go with assumption of 100 x 1012 guesses per second for basic MD5 hashing. Yes, it is highly exaggerated if password uses any stronger hash, but in the case of password strength analysis it is best to be paranoid and assume not only lousy hashing but a strong attacker with access to many computers. And do check this video to see what a “simple” server can do - it peaks at 38 billion (38 x 109) guesses per second. For a single server.

Now we take claim from cartoon of its password having entropy of 244 (17 x 1012) we can see that attacker can go over that whole search space within 5 hours assuming usage of the server from video. Using our imaginary powerful attacker, same space can be searched in less then a second. Does that mean XKCD was really wrong? Well, it’s kinda complicated…

Assumption we made is that attacker knows exact dictionary and exact way how you selected your password. Baring that, you have 25 character password that, using brute force only, would require checking of (on average) 1 x 1035 combinations. That means even our all-powerful attacker would need 30,000,000,000,000 years (again, on average) to find it. More observant might have noticed that there is a slight disparity between 1 second and 30 trillion years.

Issue at hand is how well the attacker knows you and what “rules” it feeds to its cracking engine. If it has all these words in its dictionary and it assumes you used comic as a password selection authority, you’re toast. However, if guy goes for low-hanging fruit, it will ignore everything longer than 12-14 characters and your password is safe.

And anything you add is going to make that long phrase only better. Add a three digit number at the end, you increase time by the factor of 1,000. Add it anywhere in the middle, you increase it by factor of 25,000. Add a special character, complexity goes up still. And that is for somebody who perfectly knows how your password was created. While XKCD method alone is a bit too optimistic, it is on the right track. If you select password you can remember and you spice it enough, brute force cannot touch you.

But I believe what comic omits is one important fact. Developers are lazy and some just simply don’t care. It is not uncommon for password leaks to have no password hashing at all. If you use the same password for multiple sites, sorry but you are fucked no matter which password you have.

First important rule about passwords is to never ever reuse them. Every site must have a unique password. This ensures that any password leak, even if developers were extremely lazy, only impacts a single account. For example, prevents attacker using your leaked LinkedIn password to login to your PayPal.

Second rule is to never, ever, know more than one password. XKCD is correct, humans are simply not made to handle passwords. So don’t. Remember one password and use a password manager to create and manage others.

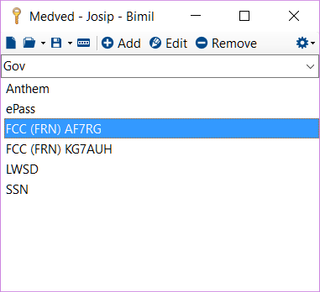
You can use my own Bimil or you can use Password Safe - they both actually use the same file format. Or you can use something else you feel is secure enough. But, for the love of god, don’t use your web browser for remembering any password you don’t wish to leak.

XKCD 538: Security

PS: If you wish to be informed when your password leaks, do consider subscribing to ';–have i been pwned?. It won’t protect you, but it will at least keep you informed.

Cananka, the Raspberry Pi HAT: Layout

Illustration

[This post is part four in the series.]

The most difficult part of board setup is done for us - we have both dimensions and we’ve decided on components. Even better we don’t need to think about board much as our HAT specification has it all sorted out. Or does it?

If you make board based on HAT specification you won’t be able to fit official case around it. We need additional cutouts if we want it to fit - bigger on the left side and just a small one on the right. As board is not really crowded, it was easy to carve out the additional space. However, it might not be as easy for more dense layouts.

Illustration

Top side is dominated by our DC-to-DC converter and nice 3.81 mm 4-pin CAN bus connector. Additionally there are through-hole LEDs so we can see activity and a through-hole oscillator purely because I hate SMD ones. To help with troubleshooting a few pads without solder mask are along the edge.

The whole board is essentially split into two parts. On top we can find components that can safely connect to Raspberry Pi. Most notable being MCP2515 CAN bus controller and 24C32 EEPROM needed for HAT compatibility.

Between CAN bus connector and controller we have isolation border crossed only by isolated DC-to-DC converters and ISO1050 CAN bus transceiver. Two millimeter spacing between these two universes should provide adequate protection.

It is a pretty straightforward layout mostly driven by the need to have isolation border and the size of the components.

Now, let’s get the board working.

Missed WordPress Schedule

WordPress - missed schedule

It seems with every new WordPress version there is the same issue. For one reason or another, post scheduling stops working. Exact cause is varied but most commonly it is the caching plugin playing games.

Usual solutions for this are either manually calling wp-cron.php via wget or getting WP Scheduled Plugin. I believe most sites, including mine, need another plugin as much as pig needs a wig. I am not judging if you are into either of it, but I recommend limiting both activities.

Using curl or wget to manually execute wp-cron.php might also not work on sites that are properly secured and have most of php disabled in .htaccess to start with. Yes, you can always make an exception, but there is a better way.

First step is common, just disable standard WordPress cron behavior in wp-config.php:

define('DISABLE_WP_CRON', true);

Then either use crontab -e from command line or your web provider’s task scheduling web interface (CPanel or similar) to add following command:

/usr/bin/php -q /home/user/www/wp-cron.php

This will call upon PHP to manually execute wp-cron.php bypassing Apache and .htaccess completely. Notice that you must use full paths as cron jobs are ran in limited environment.

For my needs, a daily frequency (@daily or 0 0 * * *) is actually sufficient as I schedule my posts always for midnight. Those needing more precise time might decide to go hourly (@hourly or 0 * * * *) or even more often.