Setting Up Private Internet Access on Mint, 2016 Edition

I have already written about getting Private Internet Access running on Linux Mint back in 2013. It was for then current version 16 and it still works. However, there are some possible improvements to be made.

As OpenVPN client is installed by default these days, we only need to download PIA’s OpenVPN configuration files. More careful ones will notice these files are slightly different than recommended default. These have VPN server IP instead of DNS name. While this might cause long term issues if that IP ever changes, it does help a lot with firewall setup as we won’t need to poke a hole for DNS over our eth0 adapter.

From downloaded archive select .ovpn file with desired destination (usually going with one closest to you gives the best results) and also get both .crt and .pem file. Copy them all to your desktop and we’ll use them later for setup. Yes, you can use any other directory too - this is just one I prefer.

With this done we can go into configuring VPN from Terminal window:

sudo mv ~/Desktop/*.crt /etc/openvpn/
sudo mv ~/Desktop/*.pem /etc/openvpn/
sudo mv ~/Desktop/*.ovpn /etc/openvpn/client.conf

sudo sed -i "s*ca *ca /etc/openvpn/*" /etc/openvpn/client.conf
sudo sed -i "s*crl-verify *crl-verify /etc/openvpn/*" /etc/openvpn/client.conf

sudo echo "auth-user-pass /etc/openvpn/client.login" >> /etc/openvpn/client.conf
sudo echo "mssfix 1400" >> /etc/openvpn/client.conf
sudo echo "dhcp-option DNS 209.222.18.218" >> /etc/openvpn/client.conf
sudo echo "dhcp-option DNS 209.222.18.222" >> /etc/openvpn/client.conf

echo "^^username^^" | sudo tee -a /etc/openvpn/client.login
echo '^^password^^' | sudo tee -a /etc/openvpn/client.login

sudo chmod 500 /etc/openvpn/client.login

Now we can test our VPN connection:

sudo openvpn --config /etc/openvpn/client.conf

Assuming that this last step ended with Initialization Sequence Completed, we just need to verify whether this connection is actually used and I’ve found whatismyipaddress.com quite helpful here. Just check if IP detected there is different then IP you usually get without VPN.

Stop the test connection using Ctrl+C so we can configure automatic startup and test it.

echo "AUTOSTART=all" | sudo tee -a /etc/default/openvpn
sudo reboot

Lastly you can think about firewall and disabling default interface when VPN is not active. This means allowing traffic only on tun0 interface (VPN) and allowing only port 1198 (it used to be 1194).

sudo ufw reset
sudo ufw default deny incoming
sudo ufw default deny outgoing
sudo ufw allow out on tun0
sudo ufw allow out 1198/udp
sudo ufw enable

Assuming all went well, VPN should be happily running.

PS: For nitpickers, you can actually make firewall for VPN a bit more strict. This assumes 1.2.3.4 is address of your VPN destination (check in client.conf under remote) and that your network interface is eth0 (check with ip addr).

sudo ufw reset
sudo ufw default deny incoming
sudo ufw default deny outgoing
sudo ufw allow out on tun0
sudo ufw allow out on eth0 proto udp to 1.2.3.4 port 1198
sudo ufw enable

[2017-08-18: Newer guide is available for Linux Mint 18.]

Bimil 1.60

Illustration

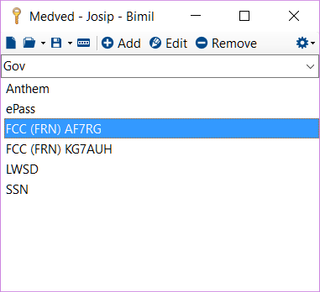
Once more, a new version of Bimil is here.

A major feature of this version is auto-type. Yes, copy/paste is not too hard but there is something magical about watching computer do it for you. Pretty much any fields can be automatically typed along with default Username <TAB> Password <TAB> <ENTER> combination. Those needing something specific can take a look in the read-me file and create combination of their choice. Pretty much all options from PasswordSafe are supported alongside a few Bimil-specific fields (e.g. two-factor authentication code).

While the password generator had a nice word selection already, it never hurts to expand it. For this I have used personal names and geographical features alongside the works of William Shakespeare, Jane Austen, and Bible. Choice was driven mostly by desire to get wide selection of words that are easy to remember. Say what you want about these books but they are well known.

To scratch my own itch I have added a QR Code field. While you can pretty much add any text here and it will get QRification treatment, my particular problem was dealing with QR codes intended for settings of IoT devices.

The smallest of the features is adding a read-only mode. If you have file that you rarely need to change, this will come in handy.

As always, the newest version is available for download Bimil or you can upgrade it from within application.

My 4K Video Settings

Illustration

With a 4K camera in my family there came a need to find a sweet spot settings for those space hungry videos. In my case, the primary use for my 4K videos is a simple on-disk archiving and an occasional YouTube upload.

For video editing I personally use Sony Movie Studio Platinum 13. It is actually a quite well designed program without a steep learning curve, offering reasonably fast editing, and you get 4K support out of box. Yes, there might be better programs out there but they usually come either at a higher price point, without many options, or without 4K support of any kind. Movie Studio actually has two codecs supporting 4K.

I personally prefer using MainConcept AVC codec over Sony XAVC S. It might be argued that Sony XAVC S actually creates slightly better files than standard AVC codec, but customization options for that codec are non-existent. You get to select frame-rate and that is it. Resulting file is huge and maybe just slightly more manageable than what you get directly out of camera.

With MainConcept you not only get to chose your bitrate but it is also viewable on any MP4 supporting device. Yes, quality probably suffers a bit but you can improve it significantly by wisely selecting among many options. It might not be perfect but it is trouble-free - especially when your video has to be handled by a third-party.

In template creation I started with Internet HD 1080p template and set frame size to 4K resolution (3840x2160). Why? Because I am lazy and that template is actually quite close to what I want.

For Profile I go with High. In theory using Baseline will offer you the most compatibility with devices and allow for playback on even older MP4 players. Main profile would allow for a bit smarter encoding, improving quality but requiring a bit more powerful playback device. High profile gives you the best quality with all the bells and whistles H.264 can offer but it will require a powerful device and a well built player. While it might be tempting to go with Main or even Baseline, this is completely unnecessary because we are not in 1080p land anymore. Pretty much any device capable of 4K playback supports High profile.

Frame rate and field order I never change. When creating project you can tell Movie Studio to match your video frame rate and just use whatever native framerate your camera gives. In my case that is 30p progressive NTSC and I use it throughout the edit process. Same goes for pixel aspect ratio I am yet to see be different than 1.

For number of reference frames I stick to the default of 2. In theory having more than that (up to 16) is allowed but I usually don’t go there. Reason is encoding time. While more reference frames can help with better motion detection, they increase time linearly without noticeable improvement in this particular quality. Where I did find them useful though is when encoding cartoons or something else that has a clean animation. For real-life footage, two is more than enough.

As my camera outputs 100 Mbps video, it makes sense to go lower to grab some file size savings. But how low is really still practical? I found my sweet spot at 50 Mbps average. This is still reasonably high that you don’t lose much of image quality even when it is shot in low light, noisy conditions. For occasional more complex scenes I usually allow for maximum of 75 Mbps (or 100 Mbps is video is really dynamic).

To help codec understand relative complexity of scenes and where to put that extra thump, I always go with two-pass encoding. Mind you, two-pass encoding will prolong your encoding time - you’ve guessed it - by (almost) double. However, the final result is worth it as you get the maximum bitrate when you need it and total file size is spot-on. Codec can try to do that dynamically within a single pass but two-pass approach leaves the guessing element out of it.

Number of threads I usually leave at default of 4 because I found it works well with my 4-core, 8-threads processor. It will keep my processor probably at around 90% usage allowing me to still use it for less intensive tasks while rendering is ongoing. And I render using CPU-only although I have a CUDA graphic card. While faster, CUDA algorithms have a noticeable quality drop (best explained in this video). Since I usually render my videos during night, I see no benefit in quality-for-speed exchange.

While I am at it, I also disable progressive download. Since I don’t stream these videos there is no benefit in using it and without it encoder can squeeze some extra bits.

Audio I leave at 192 Kbps at 48 kHz. Realistically, for audio I record 95% of the time, even less than 128 Kbps would be sufficient and probably nobody could hear the difference. However, cost of leaving it at default is minuscule enough that it is not worth thinking whether this video is one of those 5% where I have some music going on.

So, these settings work for me and I’ve tried to explain reasoning behind them. Your mileage may vary.

Cananka, the Raspberry Pi HAT: EEPROM

[This post is part six in the series.]

What makes HAT a HAT is its EEPROM. While official instructions are lacking in details there are some forum posts and tutorials dealing with that issue.

In order to follow steps later in this post, we first have to install some packages:

sudo apt-get install git i2c-tools

For HAT EEPROM access we have to tell system to allow use of, usually inaccessible, I2C bus 0:

sudo bash -c 'echo "dtparam=i2c_vc=on" >> /boot/config.txt'
sudo reboot

Easiest way to see if we have set it up correctly is to probe I2C bus 0 for EEPROM at address 0x50 and see what we have there. We are searching device with ID of 0x50:

i2cdetect 0
i2cdump 0 0x50

To manipulate it any further we need to install EEPROM utilities from the Rasbperry repository:

git clone https://github.com/raspberrypi/hats.git
cd hats/eepromutils/
make clean
make

Before anything else is done, it is a good idea to clean out EEPROM:

dd if=/dev/zero ibs=1k count=4 of=blank.eep
sudo ./eepflash.sh -w -f=blank.eep -t=24c32

Now we are finally ready to actually create .eep file from our text config and upload it to EEPROM:

./eepmake eeprom_settings.txt hat.eep
sudo ./eepflash.sh -w -f=hat.eep -t=24c32
sudo reboot

If everything is ok, you should have directory /proc/device-tree/hat with product, vendor, and other files:

more /proc/device-tree/hat/product

But this is not where we want to stop - we want also device tree so that our CAN bus can get some auto-configuration magic. And frankly that whole concept is such a mess that creating it from scratch takes unholy amount of time. However, since CAN over SPI is one of the already existing overlays, we don’t have to do anything other than include it and flash our EEPROM again:

./eepmake eeprom_settings.txt hat.eep /boot/overlays/mcp2515-can0.dtbo
sudo ./eepflash.sh -w -f=blank.eep -t=24c32
sudo ./eepflash.sh -w -f=hat.eep -t=24c32
sudo reboot

Even if our CAN bus implementation didn’t match existing overlay completely (e.g. using different frequency), we could still use it as a template for our modifications. We would first dump it:

dtc -I dtb -O dts /boot/overlays/mcp2515-can0.dtbo > hat.dts

Once we have it in (semi) human readable format, we can change what is needed (e.g. clock-frequency) and then use the same flash procedure as before:

./eepmake eeprom_settings.txt hat.eep hat.dts
sudo ./eepflash.sh -w -f=blank.eep -t=24c32
sudo ./eepflash.sh -w -f=hat.eep -t=24c32
sudo reboot

Now you can remove all modifications done to /boot/config.txt and our interface will still appear:

ip -d link show can0
 3: can0: <NOARP,UP,LOWER_UP,ECHO> mtu 16 qdisc pfifo_fast state UNKNOWN mode DEFAULT group default qlen 10
     link/can  promiscuity 0
 ...

With that, we have Cananka project completed and the only post remaining is to reminiscence over development problems.

Batch Optimizing Images

I already wrote about optimizing images for your website. What I didn’t tell at that time is that, since I ran tools under Windows, this meant a lot of download/upload shenanigans. Yes, it was scriptable but annoying nonetheless. What I needed was a way to run both OptiPNG and jpegoptim automatically on the web host itself.

These pages are hosted by DreamHost which currently runs on Debian (Wheezy) and its linux environment is rather rich. Despite, neither of my preferred tools was installed and, since this was not my machine, just installing a package was also not really possible.

However, one thing I could do is to actually build them from sources. With jpegoptim this is easy as it uses GitHub for source. With OptiPNG it gets a bit more involved but nothing too far from just a basic download and compile:

mkdir -p ~/bin

cd ~/bin
git clone https://github.com/tjko/jpegoptim
cd jpegoptim/
./configure
make clean
make

cd ~/bin
wget http://prdownloads.sourceforge.net/optipng/optipng-0.7.6.tar.gz -O /tmp/optipng.tgz
mkdir optipng
cd optipng
tar -xzvf /tmp/optipng.tgz --strip-components 1
rm /tmp/optipng.tgz
./configure
make clean
make

With both tools compiles, we can finally go over all the images and get them into shape:

find ~/www -iname '*.jpg' -print0 | xargs -0 ~/bin/jpegoptim/jpegoptim --preserve --strip-all --totals
find ~/www -iname '*.png' -print0 | xargs -0 ~/bin/optipng/src/optipng/optipng -o7 -preserve

For hands off approach, I also scheduled them to run every week.

[2017-12-27: If you get error Cannot find libjpeg or you have too old version, install libjpeg-turbo-devel package.]