Firefox and Java Console
When you’re dealing with a lot of Linux servers, having a Linux client really comes in handy. My setup consisted of Linux Mint 18 and I could perform almost every task. I say almost because one task was always out of reach - viewing HP iLO console.
Two options were offered there - ActiveX and Java. While ActiveX had obvious platform restrictions, multi-platform promise of Java made its absence a bit of a curiosity. Quick search on Internet resolved that curiosity quickly - Firefox version 53 and above dropped NPAPI plugin system support and HP was just too lazy and Windows-centric to ever replace it. However, Firefox 52 still has Java support and that release is even still supported (albeit not after 2018). So why not install it and use it for Java iLO console?
First we need to download Firefox 52 ESR - the latest version still allowing for Java plugin. You can download these from Mozzila but do make sure you select release 52 and appropriate release for your computer (64-bit or 32-bit).
With the release downloaded, we can install it manually into a separate directory (/opt/firefox52) as not to disturbe the latest version. In addition to Firefox, we’ll also need IcedTea plugin installed:
tar -xjf ~/Downloads/firefox-52.8.0esr.tar.bz2

sudo mv firefox /opt/firefox52

sudo apt install -y icedtea-plugin
Of course, just installing is worthless if we cannot start it. For this having a desktop entry is helpful. I like to use a separate profile for it as that makes running side-by-side the newest and this release possible. After this is done you’ll find “Firefox 52 ESR” right next to a normal Firefox entry.
mkdir -p ~/.mozilla/firefox52
sudo bash -c 'cat << 'EOF' > /usr/share/applications/firefox52.desktop
[Desktop Entry]
Name=Firefox 52 ESR
GenericName=Web Browser
Exec=/opt/firefox52/firefox --no-remote --profile ~/.mozilla/firefox52
Icon=firefox
Type=Application
Categories=GNOME;GTK;Network;WebBrowser;
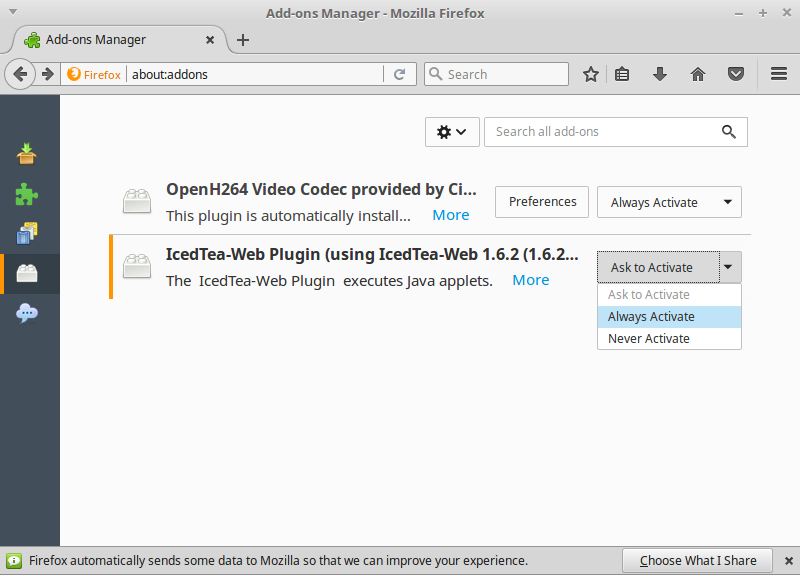
EOF'The final step is going to “about:plugins” within Firefox 52 ESR and selecting “Always Activate” for IcedTea plugin.
Now you can use Firefox 52 ESR whenever you need the Java Console.