Despite UDP being ubiquitous on pretty much any other OpenVPN platform, for a long while Mikrotik only supported TCP variant. With Mikrotik RouterOS 7 finally being released earlier this year, we at last got an UDP support for OpenVPN.
For some people UDP/TCP difference might not matter much. If you have a stable connection chances are you really don’t need to care - OpenVPN via TCP will serve you without any issues.
But, if you are dealing with multiple connections over a high latency and/or lossy network, UDP will be much faster as lost packets for one connection will not impact the other. How big the difference is? Well, I have a connection between USA and Croatia and it leaks like a sieve. My speed went from about 400 Kbps to 1000 Kbps just due to this change (tested using 2 parallel connections). I would say switching to UDP was well worth the effort for my use case.
Getting UDP enabled for OpenVPN server once you get Mikrotik 7.1 or higher running is trivial assuming you have OpenVPN via TCP already configured. You just change Protocol value to udp, update your client side with the same change (albeit for proto field) and you’re done.
But, in the interest of completeness, let’s see how one would create such config from scratch.
First we create all the certificate templates (give it at least 10 years validity):
/certificate
add name=ca-template common-name=^^example.com^^ days-valid=3650 \
  key-size=2048 key-usage=crl-sign,key-cert-sign
add name=server-template common-name=^^*.example.com^^ days-valid=3650 \
  key-size=2048 key-usage=digital-signature,key-encipherment,tls-server
add name=client-template common-name=^^client.example.com^^ days-valid=3650 \
  key-size=2048 key-usage=tls-client
As far as OpenVPN server is concerned, you can use whatever you want for certificate’s common name. Since some other VPNs are not as forgiving (yes SSTP, I am looking at you), I made it a habit to use either external IP or the host name here.
Once we have templates sorted out, we can do the signing:
/certificate
sign ca-template name=ca-certificate
sign server-template name=server-certificate ca=ca-certificate
sign client-template name=client-certificate ca=ca-certificate
And then exporting certificate material:
/certificate
export-certificate ca-certificate export-passphrase=""
export-certificate client-certificate export-passphrase=^^12345678^^
This should give you three files: cert_export_ca-certificate.crt, cert_export_client-certificate.crt, and cert_export_client-certificate.key. After copying these files to the computer for later I like to rename them to ca.crt, client.crt, and client.key respectively. It just makes everything a bit tidier.
Next we need a separate pool of IP addresses for clients. I will assume you have your clients in some other network (e.g. 192.168.1.x) and this new network is just for VPN:
/ip
pool add name="vpn-pool" ranges=192.168.8.10-192.168.8.99
Instead of editing the default encrypted profile, we can create a new one. If you use different DNS server, do change it here, and while at it, you should really use a bit more imaginative user/password pair:
/ppp
profile add name="vpn-profile" use-encryption=yes idle-timeout=10m \
  local-address=192.168.8.250 dns-server=1.1.1.1 remote-address=vpn-pool \
  secret add name=^^user^^ profile=vpn-profile password=^^password^^
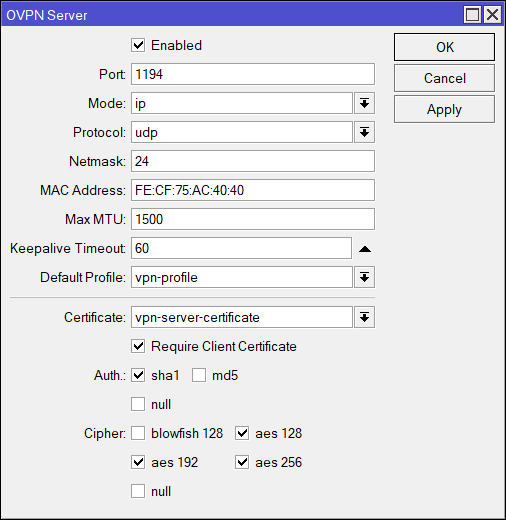
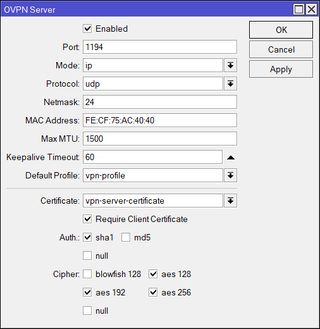
Finally, we can enable OpenVPN server interface:
/interface ovpn-server server
  set default-profile=vpn-profile certificate=server-certificate require-client-certificate=yes \
  auth=sha1 cipher=aes128,aes192,aes256 enabled=yes protocol=udp
Assuming you’re using Windows, you can copy both ca.crt and client.crt to C:\Program Files\OpenVPN\config\ directory alongside client.ovpn. On Linux, one would do the same, just in the /etc/openvpn/client directory.
You don’t have client.ovpn? Well, one is in sample-config directory and we just need to change/add the highlighted items. And since we’re finally using UDP, we can leave proto as it is.
client
dev tun
proto udp
remote ^^example.com^^ 1194
resolv-retry infinite
nobind
persist-key
persist-tun
ca ca.crt
cert client.crt
key client.key
remote-cert-tls server
cipher AES-128-CBC
auth SHA1
auth-user-pass
redirect-gateway def1
verb 3
A bit annoying step is being asked for the private key passphrase (in the addition to the username/password pair). Mikrotik doesn’t allow export without it but fortunately we can use OpenSSL to change that:
openssl.exe rsa -in client.key -out client.key
 Enter pass phrase for client.key: 12345678
 writing RSA key
With this, your VPN connection should work like a charm.
PS: Do not forget to adjust firewall if necessary (TCP port 1194).
/ip firewall filter
add chain=input protocol=udp dst-port=1194 action=accept place-before=0 comment="Allow OpenVPN"