Averaging ADC readings on microcontroller is often needed but also often quite problematic. The easiest way to do it is remembering the last N values, summing them together and simply dividing by count. Simple, reliable, and uses a BUNCH of memory. If you want to store 50 16-bit values, you will need 100 bytes. When dealing with Microchip PIC, that’s a fortune.
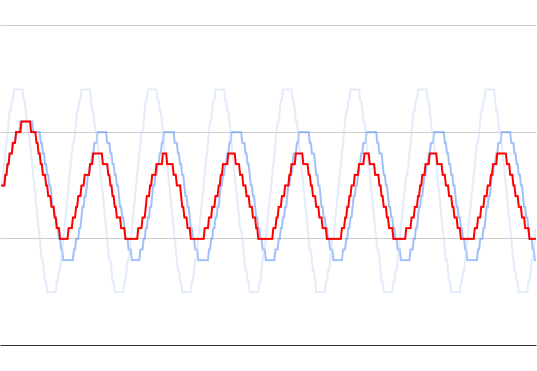
However, if you’re ok with a mean rather with an average, there’s an easier way (and I would argue that mean is a better measure anyways in 90% of cases). You can use Welford’s online algorithm to get mean value using only 3 bytes of static storage and a few bytes more when executing. Of course, use of such algorithm in microcontroller environment will require a bit of a trade off (the least of them is me using average and mean interchangeably further down in post).
For my case, I assumed I need it for unsigned 10-bit ADC values. In the context of Walford algorithm, this means my intermediate values can be up to 15-bits (16-bit signed integer is needed internally) and this leaves 5 bits to use as a fixed decimal point. My case also called just “averaging” a handful of values, so I was ok with a 8-bit counter.
This means my variables are as follows:
uint8_t walfordCount = 0;
int16_t walfordMeanEx = 0;
As compared to the standard Walford’s algorithm, a few things are different. First of all, if we have more than N entries, it will reduce count to half over and over again. This trickery is allowing for “sorta” running average. And yes, you shouldn’t really use Walford’s for running average but it’s close enough. Secondly, when adding the value into the internal variable, we convert it to the signed integer and shift it 5-bits to simulate a decimal point. The only expensive (in CPU terms) operation here is dividing by count as everything else is quite cheap (shift, subtractions, and comparisons).
void walford_add(uint16_t value) {
    walfordCount += 1;
    if (walfordCount > WALFORD_CUTOFF) { walfordCount >>= 1; }
    int16_t delta = (int16_t)(value << FIXED_DECIMAL) - walfordMeanEx;
    walfordMeanEx += delta / walfordCount;
}
To get a value out, we just shift variable 5-bits back to remove the “decimal point”.
uint16_t walford_getMean(void) {
    int16_t value = (walfordMeanEx >> FIXED_DECIMAL);
    return (value > 0) ? (uint16_t)value : 0;
}
And that’s it. It’s a cheap (memory-wise) way to get an average on a 8-bit microcontrollers. As compromises go, I had worse.
In any case, you can download code here.