I2C Framework Expansion Card
Some time ago I created an UART expansion card for Framework laptop. While card served me well, but MCP2221 around which the whole circuit was created has more to give - I2C. But for that, a bit of rethinking was needed.
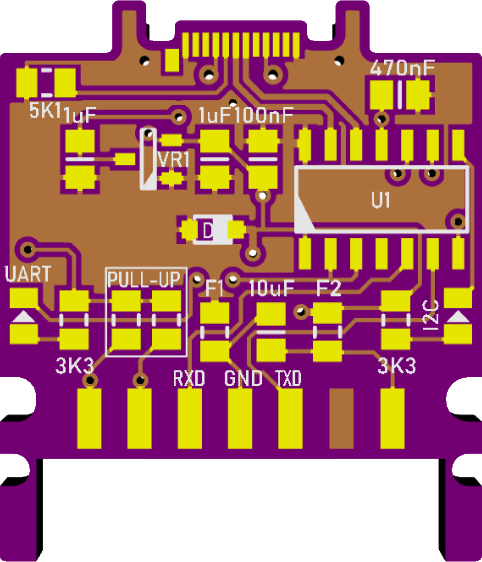
The first order of business was a connector. UART realistically requires only 3 wires and thus connector was reasonably small. But, if one wants to express both UART and I2C, at least 5 wires are needed. Still manaegable but not sufficient for what I had in mind.
As I wanted this card to help me test and troubleshoot standalone I2C devices, I also needed to source power. Well, easy enough to expose my internal regulator output on another pin. And that gives us total of 6 pins.
However, if you count pins on my finialized device you will see a 7-pin connector. In order to minimize risk and keep UART connections straight in the middle I decided to add an empty pin with a nice side effect of isolating power pin from other thus making accidental connection less likely.
Since I already had UART PCB as a template, creating a new one was easy enough so in no time I uploaded it to PCBWay for manufacturing. 15 minutes later I got a message that something is wrong.
Failure was due to “non-plated slots size should be greater than 0.8mm” and it included a nice picture showing the issue. In a moment I figured an issue - my wide connector was using enough space to leave only slivers of PCB material remaining. Since I was always looking at it on the screen, I never got the feeling how thin PCB that was. However, my reviewer (Elena) did.
After looking into a few different solutions, I decided to maintain PCB’s shape and just cut the bottom off. If you look into PCB carefully, you will see just a sliver of the slot remaining. While it might look like an accident, it actually helps with positioning around the stub in case.
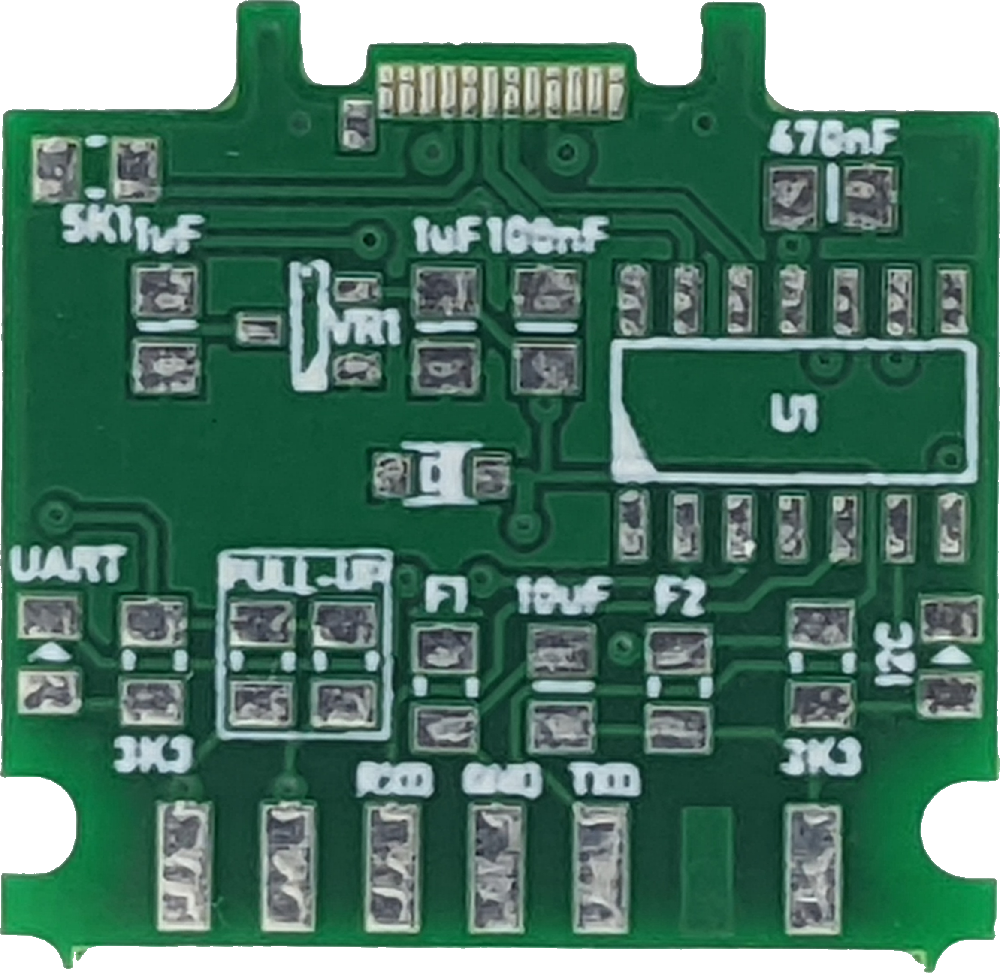
Courtesy of fast shipping, PCBs were in my hand in less than two weeks. First thing I noticed was subpar silk screen printing. Yes, I pushed things a bit using such a small lettering but PCBWay usually does better job. It seems that truetype font I used is simply not compatible with their silkscreening process. I know for a fact that vector fonts normally used by PCB tools work flawlessly as I use PCBWay for a lot of non-sponsored content. But truetype font seems to be their cryptonite.
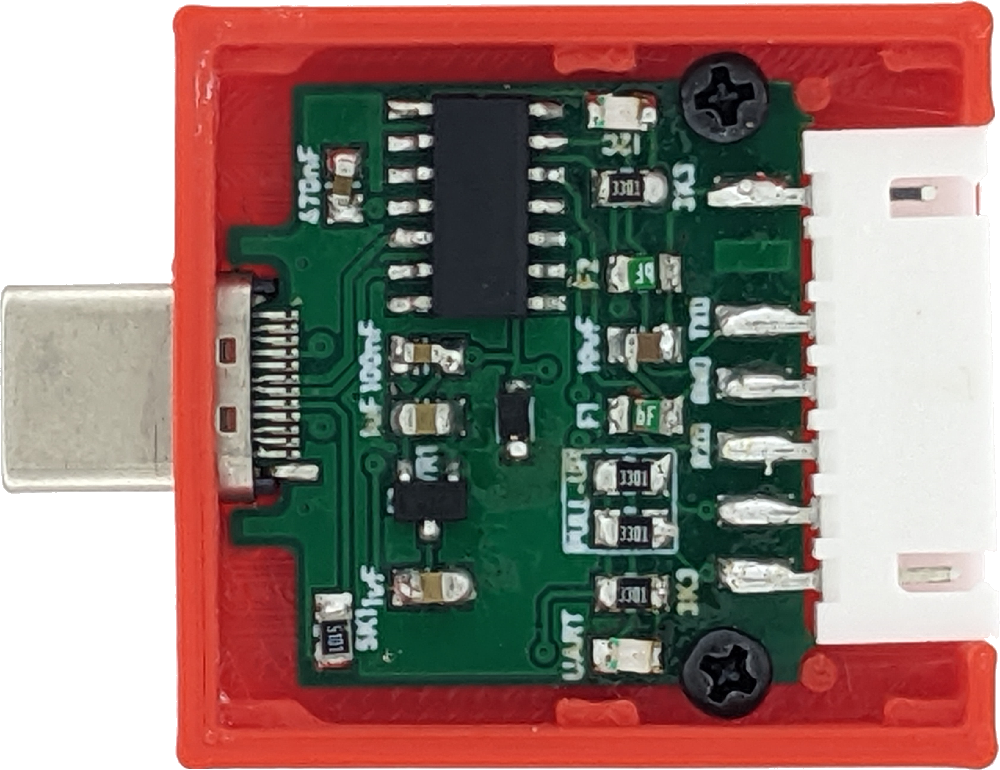
Boards themselves are what you would expect from HASL finish. As you can see on the picture, surface is not as leveled as you would get with ENIG but I found no issues positioning narrow-pitch type-C connector and soldering it in place.
While PCB outline is not really complicated, it’s not trivial either. I had other manufacturers mess board outline routing by using mill end that’s a bit too big. But PCBWay always routed it perfectly (and not just for sponsored boards). I pretty much consider them a first choice when it comes to framework expansion cards.
In any case, a short soldering session later and I had my device ready for testing. UART portion works as you would expect it. System sees it as a serial port and with correct baud rate world is your oyster.
I2C side requires download of a I2C/SMBus Terminal utility. Utility is easy enough that anyone familiar with I2C will quickly get the hang of it. Also you can look in other downloads if you want to create something custom.
Just keep in mind that I2C is not relly designed to be used via USB and inherent latency makes any high-speed communication impossible. Yes, your device might work at 400 kHz, but you still need to wait after every transfer for reply to come back. Inneficient at best.
Regardless, for testing, this is a decent addition for my Framework laptop toolbox.
PS: I got information on the silk screen from PCBWay and issue stems from how truetype font got rendered into gerber on my side. The end result is bunch of small lines that are way too short. In order to make each of those lines visible, they get expanded a bit and thus the result ends up looking too thick and blury. Now, some houses won’t have issue with this as they might drop the lines instead of widening them up but that will probably cause issue with some other truetype font rendering. There is big enough “impedance mismatch” between how fonts and how gerbers work that I would recommend staying clear away from them completely as result will differ both from font to font and fab to fab. Every PCB tool has a vector font that’s properly setup for usage in gerber and you should stick with that one. Lesson learned. :)
PPS: Source files are available on GitHub.