Driving the Plunger (part 1)
This is part 1 out of 3 in the series (see part 2).
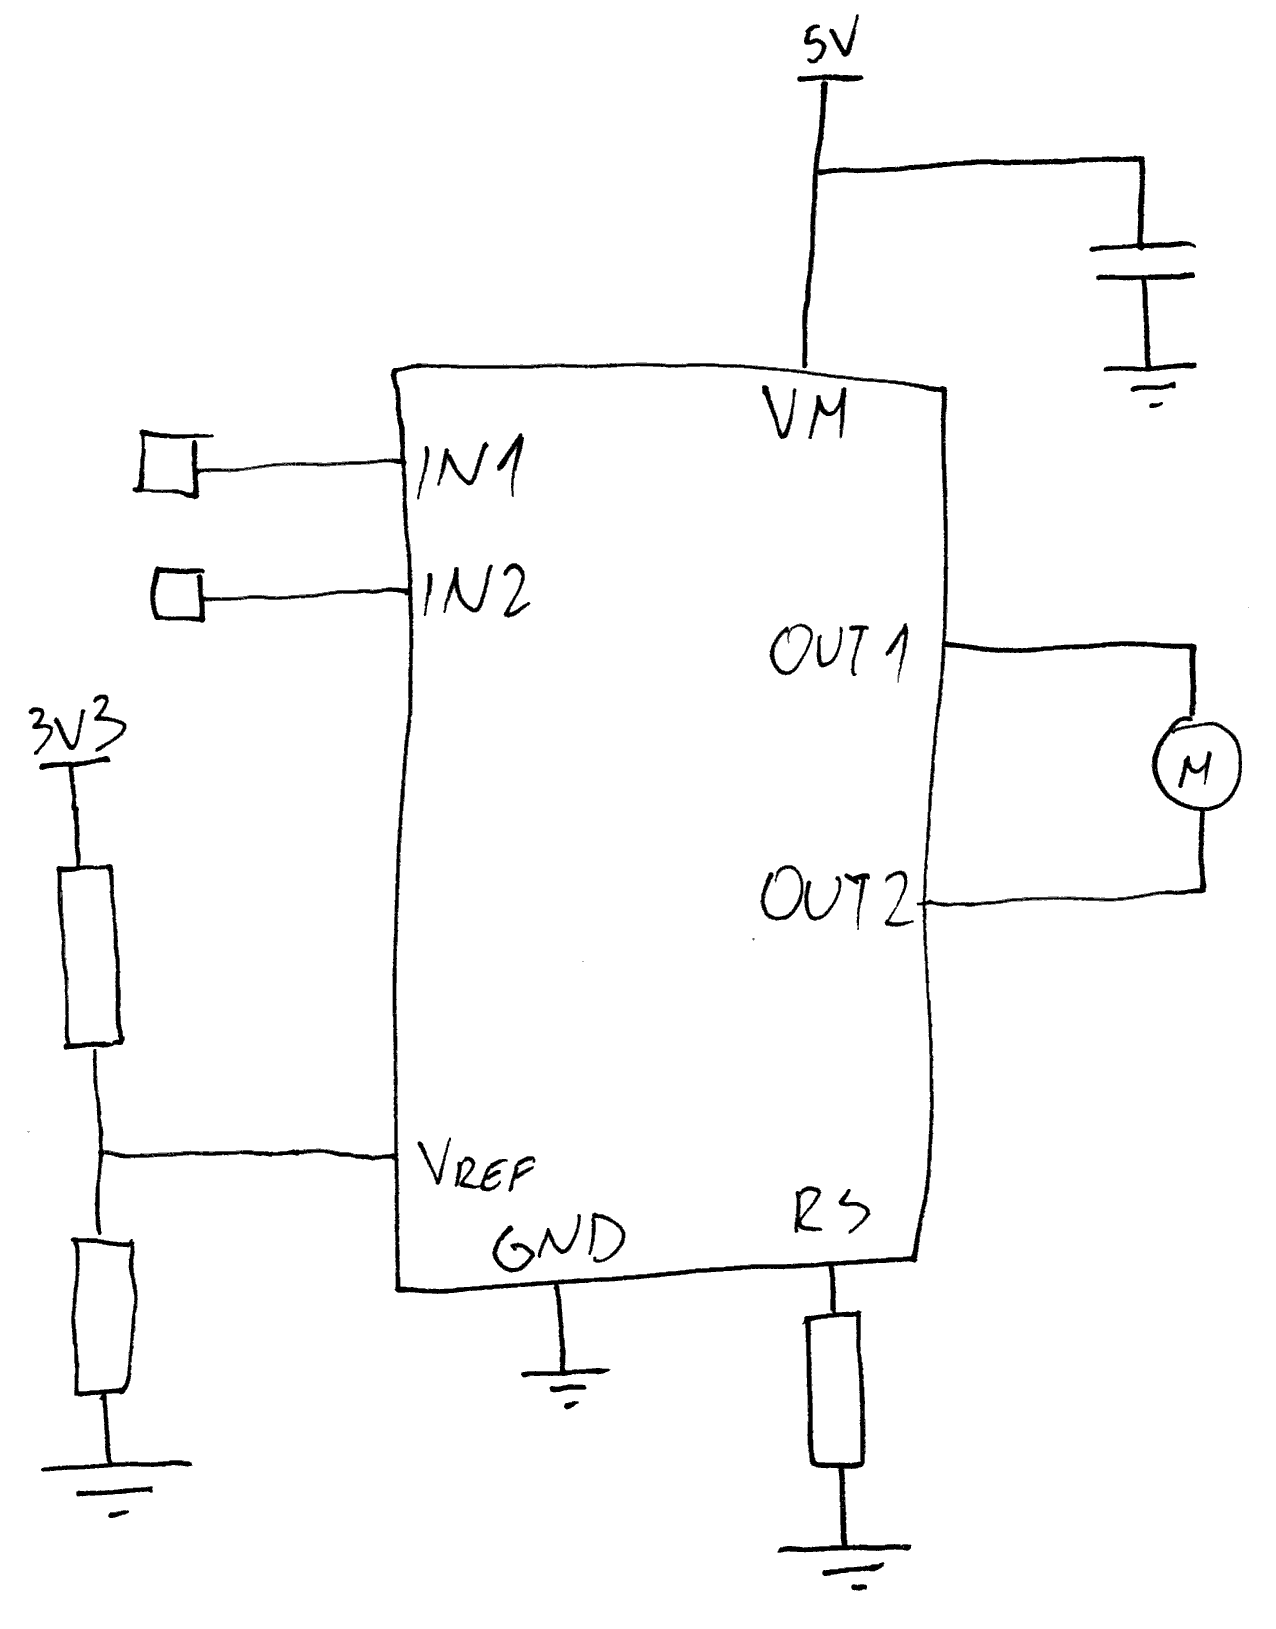
After playing with TB67H450FNG motor driver for a project of mine, I was really taken away by this little jelly bean chip. While rather basic, it’s really protective of its user. Not only does it offer a nice current limiting functionality defined by a single resistor, but it also has basic back-EMF current sink built in. Even if that goes wrong, there is a thermal shutdown circuit to save the day. And all that in the small 9-pin SOP package.
Yes, you read it right - 9 pin. While 8 pins are exactly where you expect them, the 9th pin is exposed beneath the chip itself and it’s pain to solder. Before you ask, yes, solder it you must.
At first glance, soldering it should not be too difficult. Just put some paste on pad, hit it from above (or below) with some heat and things will work out. And that is true if you place just enough solder paste. Place too much and you’ll get shorted pins from the back that are really annoying to get rid of. Place too little and it will not make contact thus leading to overheating and thermal shutdown. While not catastrophic, I can assure you troubleshooting this is not fun.
What I needed for this was a way to always place the same amount of paste on the bottom pad. My hands, while marvelous in their own right, were just not precise enough for this duty. What I needed was a way to push some paste out from a syringe in a repeatable manner.
As I was playing with a motor driver, thoughts immediately went toward using it to drive some gears and push a small rod into the back of the syringe in order to get its rotation into a linear motion.
With that idea on my mind, I went on to selecting components. I already knew which motor driver I wanted to use but it took me a while to decide on the motor.
The first thought was to use a 3D printer stepper driver I had around. It would be ideal for this as you can control it really precisely, it holds position well, and it can handle some torque even without gearing. That idea lasted until I took it into my hand. That darn thing was heavy. When I accounted for all parts I needed for pushing into the syringe, darn things would be way too top heavy for my taste. And that’s even without taking bulkiness into account.
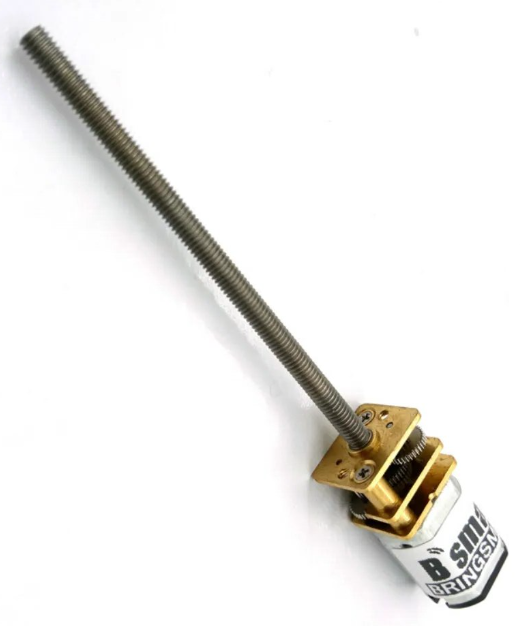
No, I wanted something a bit slender and thankfully, such motors exist. Even more importantly for my case, they already had a shaft on saving me an extra step. After measuring my paste syringes, I decided onto 6V 15 rpm motor with 55 mm M3 thread.
With an M3 rod integrated into the motor, my only task left for the mechanical portion of the project was to design a plunger. And I did so in TinkerCAD. It was just a simple body taking the motor from one side and taking a custom-designed plunger from the other.
With all the mechanical stuff out of the way, it was time to design the electronics. But that’s a story for the next week.