Ever since I got my first Be Book reader I was a fan of epaper displays. So, when I saw a decently looking Trmnl dashboard, I was immediatelly drawn to it. It’s a nice looking device with actually great dashboard software. It’s not perfect (e.g. darn display updates take ages), but there is nothing major I mind. It even has option to host your own server and half decent instructions on how to get it running.
However, even with all this goodness, I decided to roll my own software regardless. Reason? Well, my main beef was that I just wanted a simple list of events for today and tomorrow. On left I would have general family events while on right each of my kids would get their own column. I did try to use calendar for this but main issue was that it was setup as calendar and not really as event list I wanted. Also, it was not really possible to filter just based on date and not on time. For example, I didn’t want past events to dissapear until day is over. And I really wanted a separate box for tomorrow. Essentially, I wanted exactly what is depicted above.
To make things more complicated, I also didn’t want to use calendars for this. Main reason was because it was rather annoying to have all events displayed. For example, my kids’ school schedule is not really something they will enter in calendar. That would make calendar overcrowded for them. As for me, my problem was oposite one as I quite often have stuff in calendar that nobody else cares about and that would just make visual mess (e.g. dates for passport renewal are entries in my calendar). And yes, most of these issues could be sorted by a separate calendar for dashboard. But I didn’t really like that workflow and, most importantly, it wouldn’t show what happens the next day. And that is something my wife really wanted.
With all this I figured I would spend less time rolling my own solution than creating plugins.
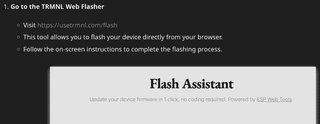
Thankfully, Trmnl was kind enough to anticipate the need for custom server in their device setup. Just select your custom destination and you’re good. Mind you, as an opensource project, it would be simple enough to change servers on your own but actually having it available in their code does simplify future upgrades.
On server side, you just need three URLs to server.
The initial one is /api/setup. This one gets called only when device is first time pointed toward the new server and its purpose is to setup authentication keys. Because this was limited to my home network and I really didn’t care, I simply just respond 200 with a basic json.
{
  "status": 200,
  "api_key": "12:34:56:78:90:AB",
  "friendly_id": "1234567890AB",
  "image_url": "http://10.20.30.40:8084/hello.bmp",
  "filename": "empty_state"
}
Once device is setup, the next API call it makes will probably be /api/log. This one I ignore because I could. :) While device is sending the request, it doesn’t care about the answer. At the time I wrote this, even Trmnl own API documentation didn’t cover what it does. While they later did update documentation, I didn’t bother updating the code since 404 works here just fine and data provided in this call is actually also available in the next one.
In /api/display device actually asks you at predefined intervals what to do. Response gives two important pieces of information to the device: where is image to draw and when should I ask for the next image. The next image is easy - I decided upon 5 minutes. You really cannot do it more often as every refresh flashes the screen. Probably the only thing I really hate and actualy the one that will be solved eventually since there is no reason to do a full epaper reset on every draw. But, even once that is solved, you don’t want to do it more often because you will drain your battery. With 5 minute interval it will last you a month. I could have used longer intervals but then any update I make wouldn’t be visible for a while. Month is good enoough for me. To keep things simple, for the file name I just gave specially formatted URL that my software will process later.
{
  "status": 0,
  "image_url": "http://10.20.30.40:8084/A085E37A1984_2025-06-01T04-55-00.bmp",
  "filename": "A085E37A1984_2025-06-01T04-55-00.bmp",
  "refresh_rate": 300,
  "reset_firmware": false,
  "update_firmware": false,
  "firmware_url": null,
  "special_function": "identify"
}
And finally, the last part of API was actually providing the bitmap. Based on the file name and time requested, I would simply generate one on the fly. But you cannot just give it any old bitmap - it has to be 1-bit bitmap (aka 1bpp). And none of the C# libraries supports it out of box. Even SkiaSharp that is capable of doing any manipulation you can imagine simply refuses to deal with something that simple. After trying all reasonably popular graphic libraries only to end up with the same issue, I decided to simply go over the bits in for loop and output my own raw bitmap bytes. Ironically, I spent less time on that then what I spent on testing different libraries. In essence, bitmap Trmnl device wanted has 62 byte header that is followed by simple bit-by-bit dump of image data. You can check Get1BPPImageBytes function if you are curious.
And that is all there is to API. Is it perfect? No. But it is easy to implement. The only pet peeve I have with it is not really the API but device behavior in case of missing server. Instead of just keeping the old data, it goes to an error screen. While I can see the logic, in my case where 95% of time nothing changes on display, it seems counter-productive. But again, I can see why some people would prefer fresh error screen to the old data. To each their own, I guess. Second issue I have is that there is no way to order device NOT to update. For example, if my image is exactly the same as the previous one, why flash the screen? But, again, those are minor things.
After all this talk, one might ask - what about data? Well, all my data comes in the form of pseudo-ini files. The main one being the configuration that setups what goes where. The full example, is on GitHub, I will just show interesting parts here.
[Events.All]
Directory=All
Top=0
Bottom=214
Left=0
Right=265

[Events.Thing1]
Directory=Thing1
Top=0
Bottom=214
Left=267
Right=532

[Events.Thing2]
Directory=Thing2
Top=0
Bottom=214
Left=534
Right=799

[Events.All+1d]
Directory=All
Offset=24
Top=265
Bottom=479
Left=0
Right=265

[Events.Thing1+1d]
Directory=Thing1
Offset=24
Top=265
Bottom=479
Left=267
Right=532

[Events.Thing2+1d]
Directory=Thing2
Offset=24
Top=265
Bottom=479
Left=534
Right=799
Then in each of those directories, you would find something like this.
[2025-05-26]
Lunch=Šnicle
Lunch=Krumpir salata
Lunch=Riža

[2025-05-27]
Lunch=Piletina na lovački
Lunch=Pire krumpir
Lunch=Zelena salata
Each date gets its own section and all entries underneath it are displayed in order. Even better, if they have the same key, that is used as a common header. So, the “Lunch” entries above are all combined together.
Since files are only read when updating, I exposed them on a file share so everybody can put anything on “the wall” by simply editing a text file. Setup is definitelly something that is not going to fit many people. I would almost bet that it will fit only me. However, that is a beauty of being a developer. Often you get to scratch the itch only you have.
You can find my code on GitHub. If you want to test it yourself, docker image is probably the easiest way to do so.


