One of main points of entrance to my web page is page where I talk about ćevapi (or ćevapčići, chevapi, chevapi’s, chevaps and half a dozen other names). As there are many names for them, there are also many recipes. Not only that recipes differ in size, shape and spices but also in types of meat used to produce them. Which kind is best will differ from region to region of ex-Yugoslavia. In restaurants where ćevapi are main selling point you will rarely be able to get recipe. They do keep it as family treasure.
Origin
Although wikipedia states that ćevapi are Turkish dish I cannot see who exactly concluded that. Although name does seems similar to kebab they are made quite differently (e.g., kebab is not made from minced meat). I am closer to those guys who call it a Bosnian dish with some inspiration drawn from Turkish treats (they did lived together for a while).
Croatia is not their country of origin but we do enjoy making and eating them and I (as Croat) will give you my favorite recipe for times when I want to cook something outdoors (you should make ćevapi on charcoal grill).
Notice

I will use proper measurement system (a.k.a. metric) for everything in this article. If you really need imperial units just use online converter.
All measurements here will be given for total of 1 kg of ćevapi. If you wish to make larger amount just multiply it by factor. It scales perfectly. In case you are wondering how much mouths can 1 kg of ćevapi feed, I cannot help you. It may be anywhere from 2 to 10. It all depends on side dishes you provide and/or additional meat on table (I always combine it with sausages and/or bacon). For my family and close friends I tend to anticipate meat usage to be in range of 0.5 kg per person but take a notice that we do like to eat and we do have some (minor) leftovers.
Recipe
I start with equal amount of pork and beef (0.5 kg of each). You should grind them together in meat grinder. If you do not have meat grinder don’t use food processor. It tends to either leave large chunks of meat as a whole or destroy texture of meat altogether. Just buy pork and beef as minced meat at your favorite butcher. It should be fresh and not frozen like in big stores.
Add 12 g of salt and 8 g of pepper (if you find it too spicy, keep salt as it is, just remove some pepper). From time to time I like to add little bit of hot paprika in a mix (you may use chili powder but it is not the same).
I like to add one chopped onion (very small pieces, please) and two cloves of garlic (smashed into a very smooth paste). This gives totally different taste to them but I know a lot of people that do not like onions so you may want to check.
If meat has lot of fat you may add little bit of old bread in the mix (2-3 slices per kg). It will blend nicely with meat and kill a little bit of fatty taste. If you are using 80/20% meat, ignore this step.
Mix everything you added by hand for few minutes until it blends together.
Now you should form ćevapi using 2-3 cm sausage funnel but you can also use top of bottle (cut the bottom off) and force mix through it. Cut longer sausage-like strips in 5-10 cm (if you cut it shorter then each will be easier to handle on grill but there will be more of them to handle and they tend to dry out). My preferred size is 2.5x10 cm (or 1x4 inches, for SI challenged).
Grilling
Do not put them on open flames - that is not point of grilling. You should always strive to cook them longer on lower heat. Total time should be 5-15 minutes (depends mostly on their thickness) with a few turns when each side is done. Meat should be well done on outside and done on the inside. If you have something rare - you did it wrong.
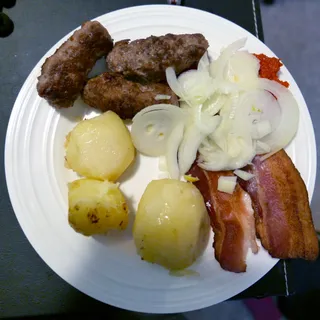
You should serve it in lightly grilled flat bread.
There are lot of side dishes you can serve but I do tend to like ajvar the best. Freshly chopped onions (thick rings) does work but don’t kiss anybody after. Some people like sour cream but I’ll skip that.
Enjoy.
Ingredients:
500 g beef500 g pork12 g salt (about 2 teaspoon)8 g pepper (about 1½ teaspoon)1 onion (or 25 g (about 3 tablespoon) dried onion flakes)2 garlic cloves (or 1.2 g (about ¼ teaspoon) garlic powder)