SDR on Raspberry Pi 3 (Software)
[This is a post 2 in series, for hardware setup go here]
The first piece of software we need to get Raspberry Pi running is of course its operating system. If you have a monitor and keyboard attached, you can proceed with NOOBS install without any trouble. If you don’t want to deal with imaging SD card, this is the best as you can even buy it pre-programmed.
However, I like to complicate and thus decided to go with the headless install of Raspbian Jessie Lite. The most noticeable difference between normal Raspbian and Raspbian Lite is that you get a graphical interface only in one of them. Guess which is which.
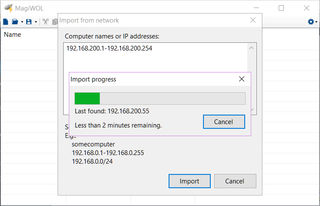
After creating image and booting machine up with the prepared SD card, one challenge is how to find it. I personally use Import function of MagiWOL to find a new IP around, but you can also log into your router and figure IP from there. Chickens can even attach monitor, I won’t judge. With IP in hand just connect to machine via SSH client (e.g. PuTTY). User name and password are usual pi/raspberry.
First action after fresh install would be to update to the latest packages:
sudo apt-get updateNext you proceed with installing all the goodies (steps taken from Ham Radio Science):
sudo apt-get install -y git cmake libusb-1.0-0.dev build-essential
git clone git://git.osmocom.org/rtl-sdr.git
cd rtl-sdr/
mkdir build
cd build
cmake ../ -DINSTALL_UDEV_RULES=ON -DDETACH_KERNEL_DRIVER=ON
make
sudo make install
sudo ldconfig
Now we want to create two scripts. Yes, you can run stuff manually but these scripts are going to make it easier if you want to do it automatically on startup. Notice each is just a single cat command with a lot of data:
cat > /home/pi/rtl-sdr/build/rtl_tcp.sh <<- EOF
#!/bin/bash
INTERFACE=eth0
IP=`ip addr show $INTERFACE | grep inet | grep -v inet6 | awk '{print $2}' | cut -d'/' -f1`
if [[ $IP != '' ]] ; then
    /usr/local/bin/rtl_tcp -a $IP
else
    echo "Cannot find IPv4 address on $INTERFACE interface." >&2
    exit 1
fi
EOF

# cat > /home/pi/rtl-sdr/build/rtl_tcp.service <<- EOF
[Unit]
After=network-online.target

[Service]
Type=simple
ExecStart=/home/pi/rtl-sdr/build/rtl_tcp.sh
ExecStop=killall rtl_tcp
Restart=on-failure
RestartSec=10
User=pi

[Install]
WantedBy=multi-user.target
EOF
Finally we have a chutzpah of steps for the remaining details (including disabling TV driver for the SDR device):
chmod +x /home/pi/rtl-sdr/build/rtl_tcp.sh
sudo cp /home/pi/rtl-sdr/rtl-sdr.rules /etc/udev/rules.d
sudo bash -c 'echo "blacklist dvb_usb_rtl28xxu" > /etc/modprobe.d/dvb_usb_rtl28xxu.conf'
If all steps are completed, we can now run our newly created script:
# /home/pi/rtl-sdr/build/rtl_tcp.sh
 Found 1 device(s):
   0:  Realtek, RTL2838UHIDIR, SN: 00000001
 Using device 0: Generic RTL2832U OEM``
 Found Rafael Micro R820T tuner``
 [R82XX] PLL not locked!
 Tuned to 100000000 Hz.
 listening...
 Use the device argument 'rtl_tcp=192.168.200.47:1234' in OsmoSDR (gr-osmosdr) source
 to receive samples in GRC and control rtl_tcp parameters (frequency, gain, ...).
If you wish program to start automatically, you can also make use of the newly created service file:
sudo systemctl enable /home/pi/rtl-sdr/build/rtl_tcp.service
sudo init 6
After machine is booted back up (it should take less than a minute), you can use your favorite SDR program with a support for RTL-SDR over TCP to connect on port 1234. I personally find SDR# well behaved and problem-free but any other will do too.
PS: All this was done on a default partition that has under 200 MB free. To increase partition size run sudo raspi-config and choose Expand Filesystem.
[2017-01-16: Adjusted file creation commands to work better with shell copy/paste] [2020-11-11: Added extra cmake parameters.]
