Dual Boot With Bitlocker for a Nitpicker
As I use my laptop for both work and personal stuff, from the get-go I decided to go with the dual boot setup. For security I also decided to have full-disk encryption with the additional benefit of further separating those two installations.
When I first installed my laptop I did it as any sane person would - just install two Windows copies and everything works. However, during these holidays I decided to clean out my machine and redo the installs in a slightly different way.
Basic premise was the same: two BitLocker Windows installations. First one would occupy 400 GB, while the other would get leftovers out of 476 GB drive. What was tricky was my desire to have 400 GB accessible to user after Windows take their share. And I definitely wanted my personal partition to be first so that I can easily kill work partition(s) if I ever want to convert it to personal-only rig.
So I downloaded the latest Windows installation onto my USB and got it started. At the first screen I pressed <Shift>+<F10> and wrote DISKPART on the command prompt. Here I wanted to clean my existing disk content, setup GPT partitioning scheme, and have first 400 GB available for my private install with rest of the disk reserved for the work partition:
SELECT DISK 0
CLEAN
CONVERT GPT
CREATE PARTITION PRIMARY SIZE=410176
CREATE PARTITION PRIMARY
SELECT PARTITION 1
DELETE PARTITION
EXIT
As you can see from commands above, I’ve done this by creating two partitions and then deleting the first one so that Windows can have fun in that area only. Yes, I could’ve create recovery and system partitions myself but I actually prefer not to deal with such a low level details. If you wonder how I came upon 410,176 MB as a figure that will give me 400 GB partition, it is simply 409,600 MB (400 GB, the final desired size) + 450 MB (recovery parition) + 100 MB (system partition) + 16 MB (reserved partition) + 10 MB (to get into next cylinder). After that I’ve continued with Windows installation on unassigned space and my disk C after installation was 400.01 GB - the closest I could get to 400 GB.
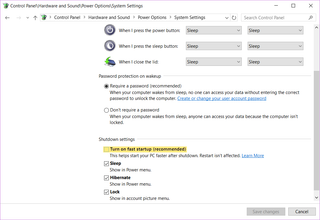
As I wanted to have dual boot, I also went into Power Options, Choose what the power buttons do and turned OFF fast startup setting. In the early Windows 10 days omitting this would cause quite a few dual boot issues as each Windows copy left hardware in its own state. With the newer builds Windows seems to handle that better but I see no reason to tempt the fate. Only step left was to start Bitlocker encryption and get onto the next installation once it is done.
After next installation booted (actually of the same USB media), I used <Shift>+<F10> again to delete partition I’ve “reserved” previously. Since Windows added quite a few of its own partitions, it has moved to 5th spot:
SELECT DISK 0
SELECT PARTITION 5
DELETE PARTITION
EXIT
Installation continues as usual with the same adjustments applied (fast startup off + bitlocker on). Note that this leaves second installation as a default startup option. This can be changed in Advanced System Settings under startup and recovery.
